EQUIPMENT FOR IMAGE ACQUISITION
Arrangement of the Examination Room
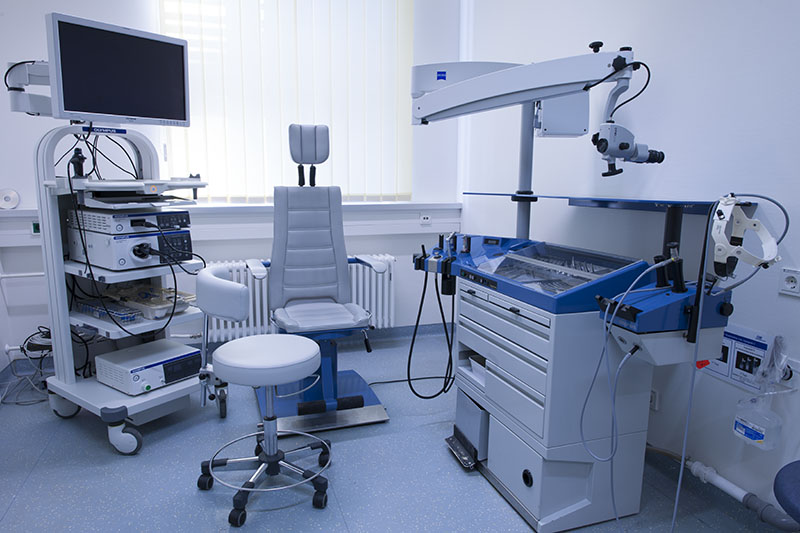
When arranging an office for laryngeal endoscopy there are some important aspects to consider.
The room has to be large enough to place the necessary equipment while leaving enough space for the patient and the examiner(s) as well as for any assistants who may need to move around the examiner and patient.
When examinations or office-based operations are performed with the patient lying supine even more space will be required.
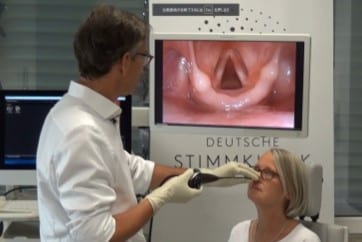
The chair for the patient should be placed so as to allow placing the equipment and instrumentation within easy reach and without cables to stumble across.
Place the video monitor next to the patient, so that the examiner can view both patient and monitor in a relaxed manner, either when sitting or standing.
Choose height-adjustable chairs for both the patient and the examiner.
The examiner should not be blinded by a light source or with a daylight window during the examination.
Criteria for the Examination Room:
Enough space for a patient, examiner and assistant.
Enough space for a patient lying on a stretcher.
Endoscope equipment and ENT instruments within easy reach of the examiner.
Choose a monitor position that permits the clinician to view both the screen and the patient in reasonable comfort.
Avoid loose cabling on the floor to avoid tripping accidents.
Window light and room light should be dimmed.
Image Acquisition and Processing
General Remarks
In this section we want to stress the fact that video endoscopy relies on a series of well-attuned components.
Although we cannot deal with cameras and image processing in this endoscopy manual, it needs to be said that the weakest component determines the image outcome. However, we address some aspects in the following sections.
Keep in Mind Which Parameters Determine the Quality of Your Images:
- Optimum illumination
- High resolution for the smallest structures
- Image centered on region of interest (ROI)
- Focus on ROI
- No image rotation (see alignment)
- Lens of endoscope should be clean; check with microscope
- Optimal distance to ROI (optimal size)
- Balanced colors (white balance)
- Adequate color and contrast balance
In most ENT offices providing laryngoscopy, video or computer recording is usually available.
Video recording of the whole examination is recommended for comprehensive assessment and reevaluation as well as for documentation, demonstration to the patient, teaching and monitoring pre- and postoperative outcome.
Video editing saves data space, but requires extra time. In busy offices, there might not be enough time to edit videos.
All components for video laryngoscopy and archiving be adjusted and balanced in order to optimize image quality: Endoscope, light source, camera, recorder, monitor, stroboscope, light filters (e.g. NBI), printer, computer, server.
When video recording of huge data sets is mandatory, choose the best trade-off between image quality and compression ratio for digitized video.
We believe that in the near future one can expect easy image acquisition with mobile devices, e.g. with an adapter connected to a smart phone.
Preparing the Equipment
Before starting the examination, the equipment (which includes light source, camera, endoscope and recorder) has to be prepared and connected.
Adjust the focus of the endoscope and the camera.
There are various parameters determining image quality that need special attention.
Be sure you have chosen the right settings. Check before the examination starts.
There are various different systems, so we can only describe the most important and most common parameters.
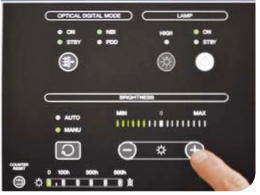
Depending on your system, some parameters can be selected either on the camera or on the processor.
Checklist: Preparing the Equipment
Processor
□ Switch on devices
□ Archive patient’s data
□ Connect the endoscope, camera, recorder and light source
□ Select light control (automatic/manual)
□ Connect fiber-optic light cable either to a continuous light source or stroboscope
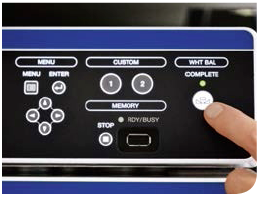
Endoscope
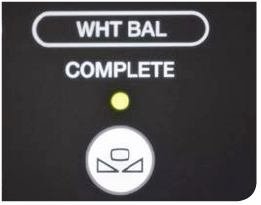
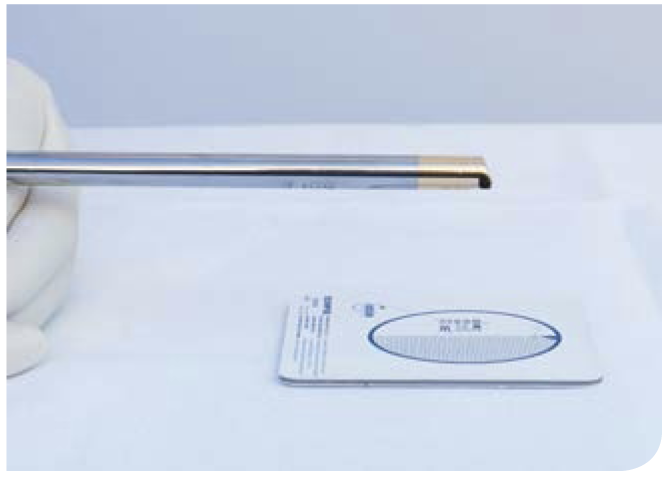
□ Adjust white balance in the image
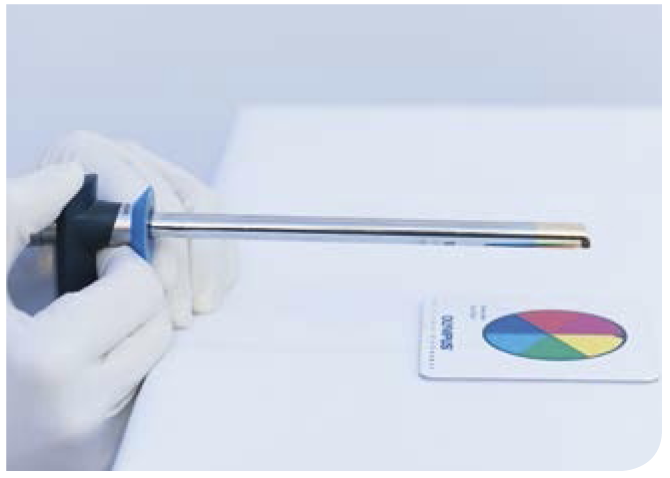
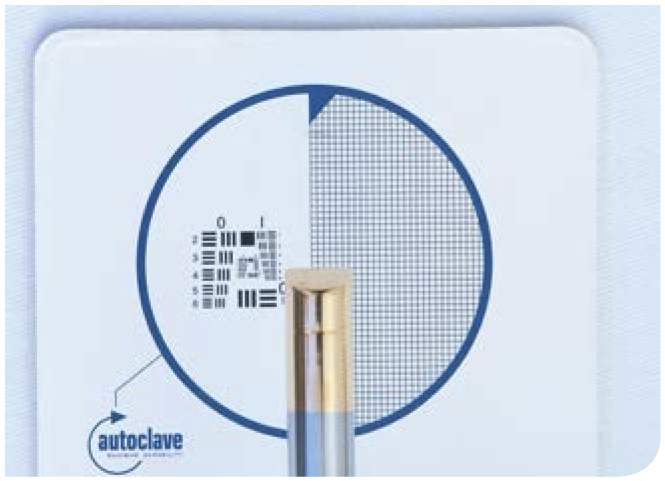
□ Calibrate image with a test chart
□ Focus for distance (4–6 cm works well in most cases)
□ Defocus to avoid moiré pattern (fiberscope)
□ Align camera
□ Apply antifog agent on tip of endoscope
□ Check the image orientation on the monitor
Examiner
□ Ensure you are in a comfortable sitting position including comfortable height of chairs
□ Choose suitable position for the foot pedals
□ Use gloves
□ Dim room light and sunlight
□ Ensure that your head is in a comfortable position that permits a view of the patient and the monitor

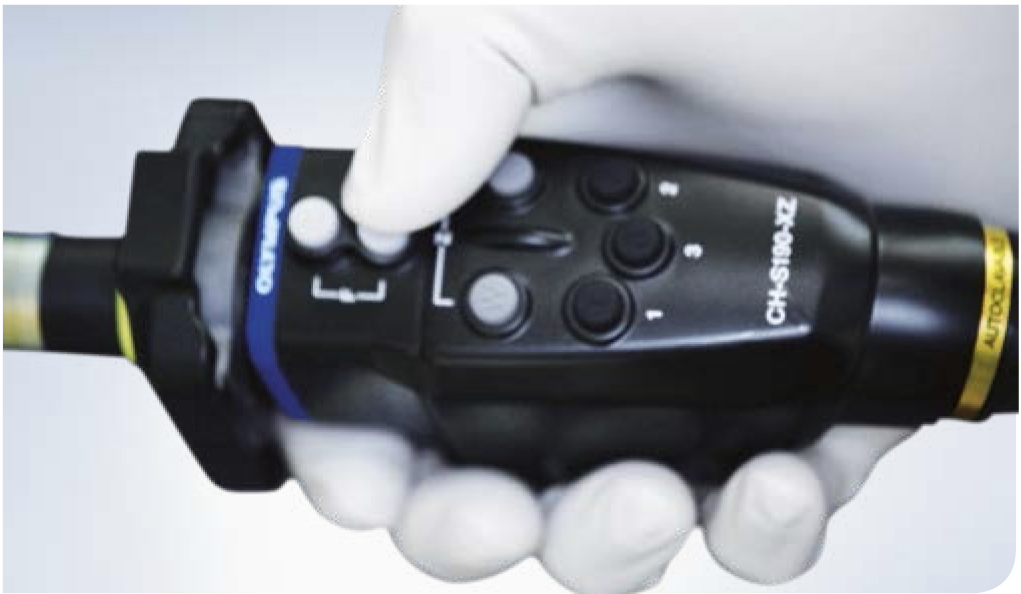
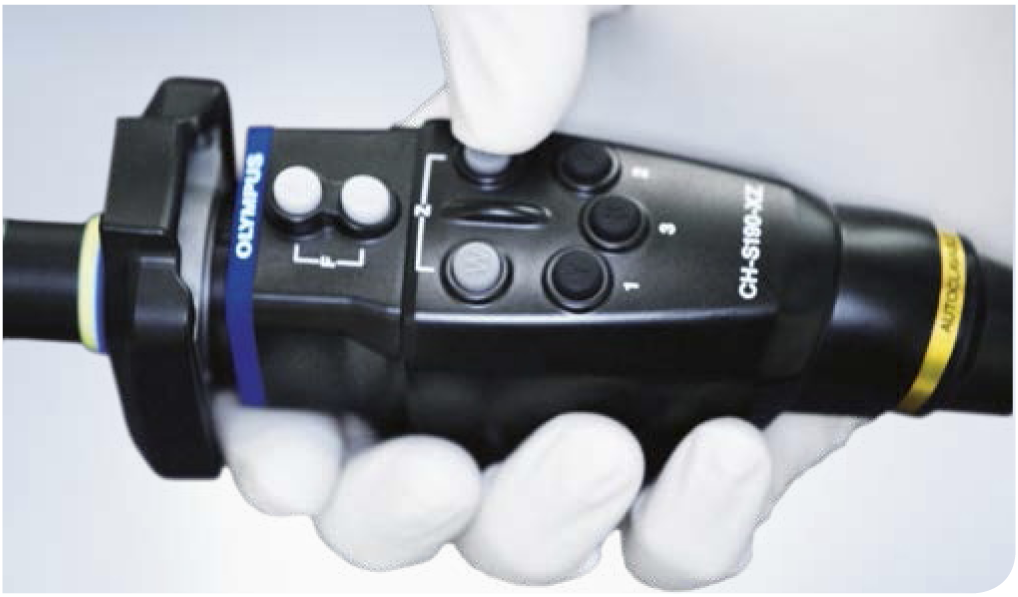
In some systems, focus and zoom can be adjusted with buttons, i.e. electronically, or with adjustment rings (mechanically)
- Content Type