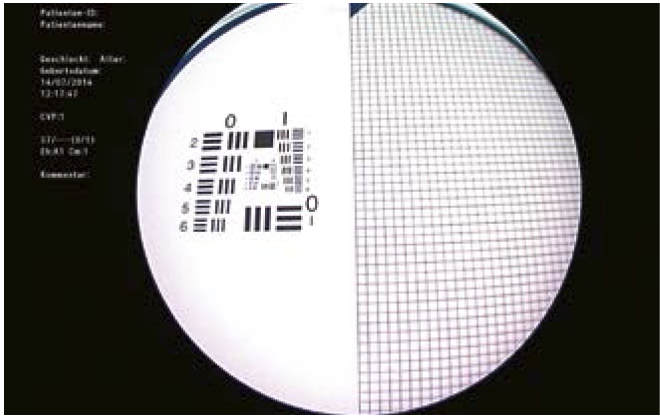
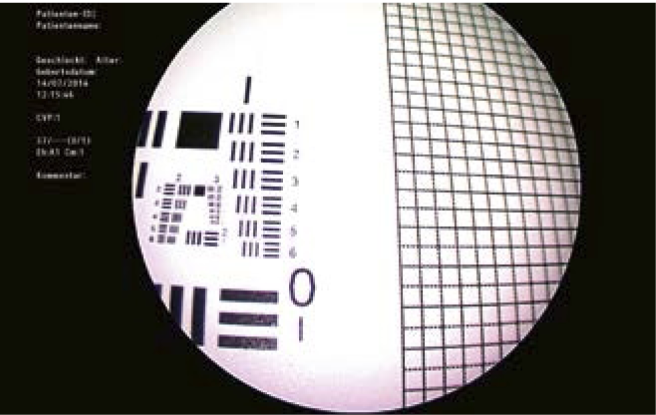
Examples of Poor Image Quality

Here, reasons for poor image quality are shown.
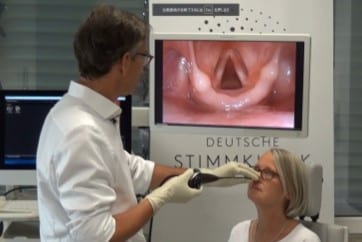
Endoscopes for Laryngoscopy
General Remarks
It is important that the examiner is entirely familiar with all instruments and devices so he can concentrate fully on the examination itself and doesn’t have to struggle with problems with instrument handling.
In this chapter you can find some basic information about endoscopes, camera systems and video images.
Additionally, we describe some helpful tips and techniques for endoscopy. You can easily try these tricks before examining a patient.
With the perfect knowledge of your instrumentation it is easier to take advantage of all possibilities during endoscopy.
Traditionally, examination of the larynx with a mirror was standard. Here, the examiner has to pay attention to the direction of the light beam – it should be in the same axis as his viewing axis. In some situations this technique can still be helpful, e.g. for assessment of level differences, for true 3D imaging or when you want to see the true colors of the larynx.
Relation of Image to Larynx
When performing indirect laryngoscopy it is important to remember that the final image that is projected is dependent on the equipment being used. In practice, with modern camera systems, every orientation of anterior to posterior and right to left is possible. Get to know your instrumentation.
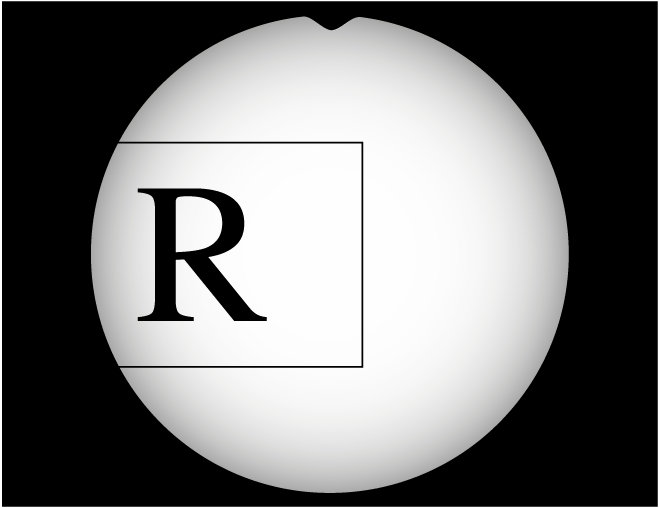
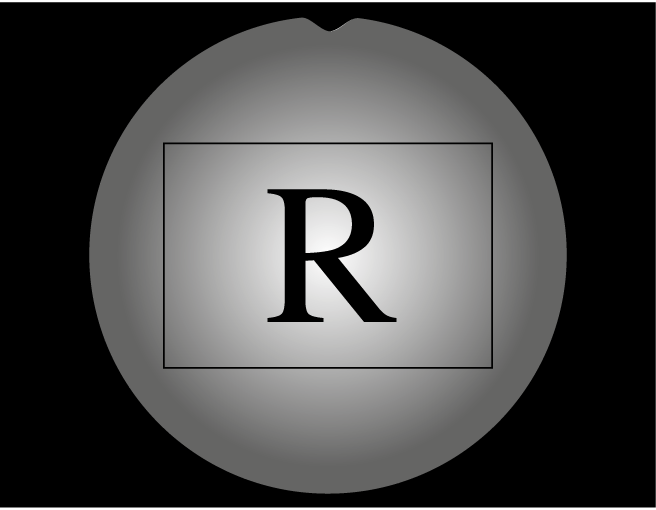
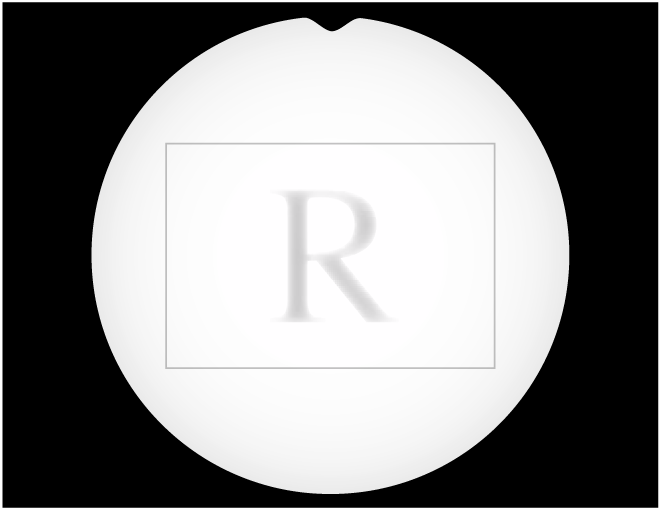
In the traditional view with (A) a mirror compared with (B) rigid endoscopy, the anterior and the posterior aspects of the larynx are reversed (vertical inversion).
For flexible endoscopy (B, C, D), depending on how the camera is connected and adjusted and how the examiner holds the endoscope, the image may be rotated by 180° or it may be mirrored vertically or horizontally.
Caveat: the left and right sides in (B) and (D) are switched.
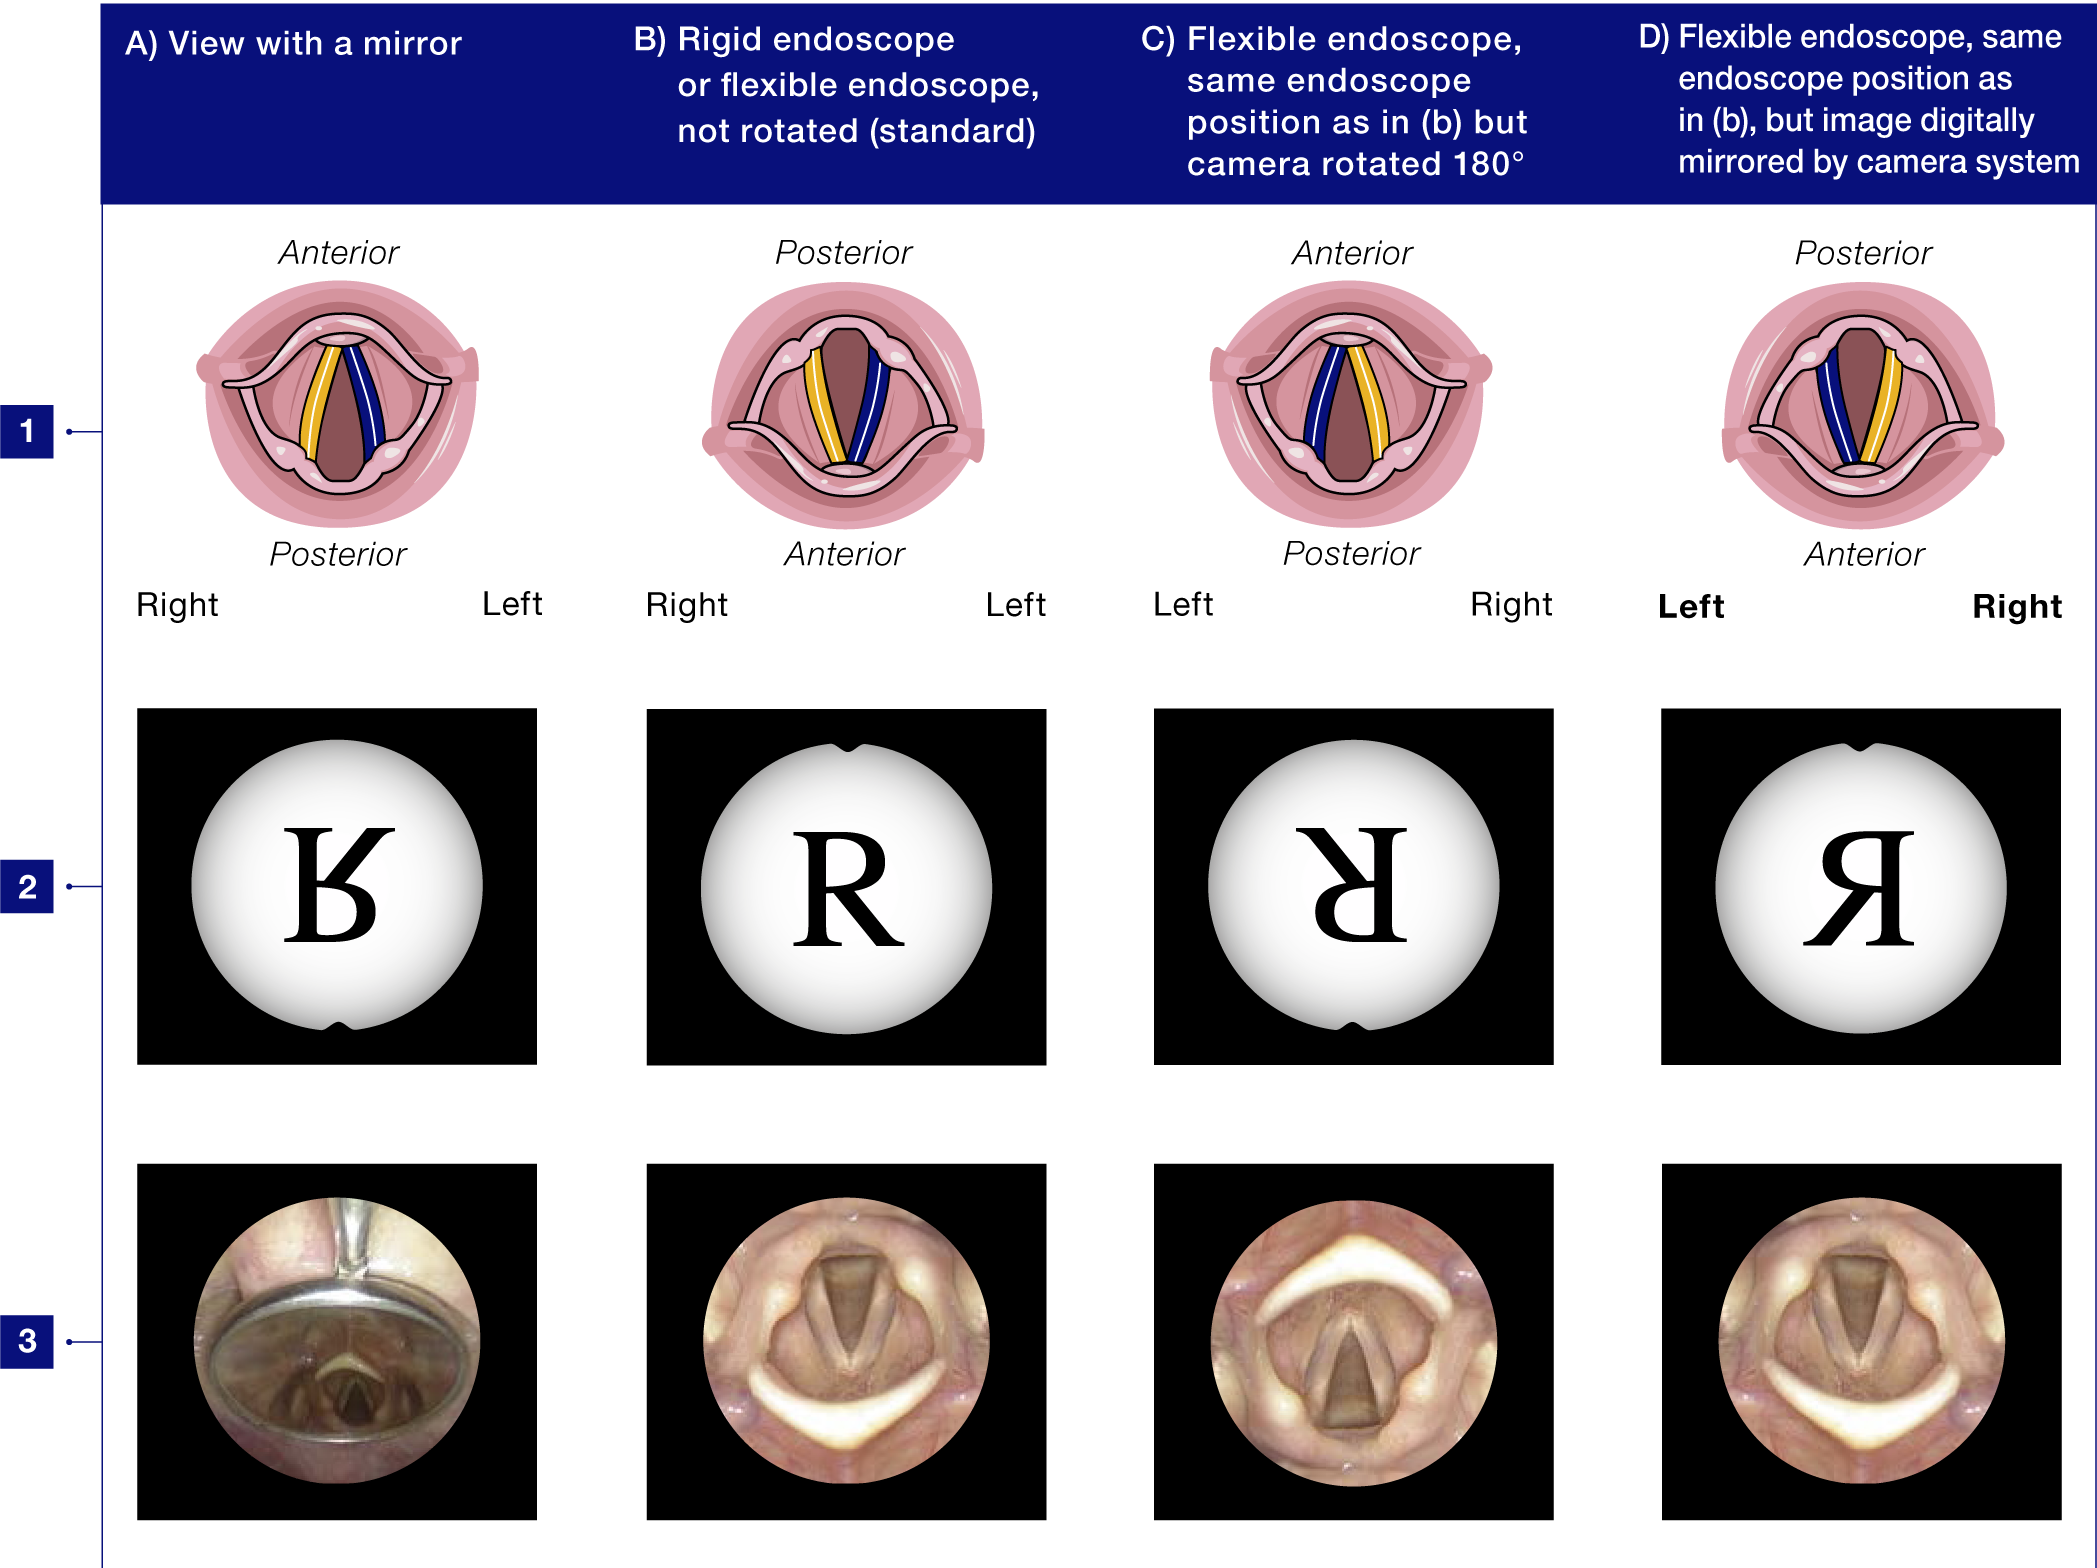
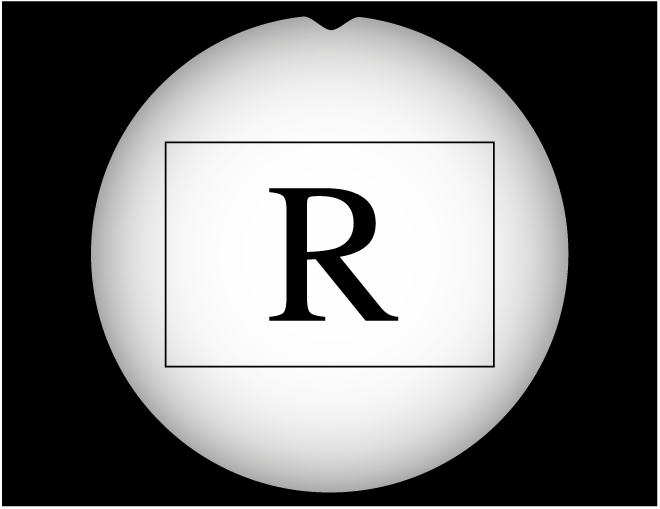
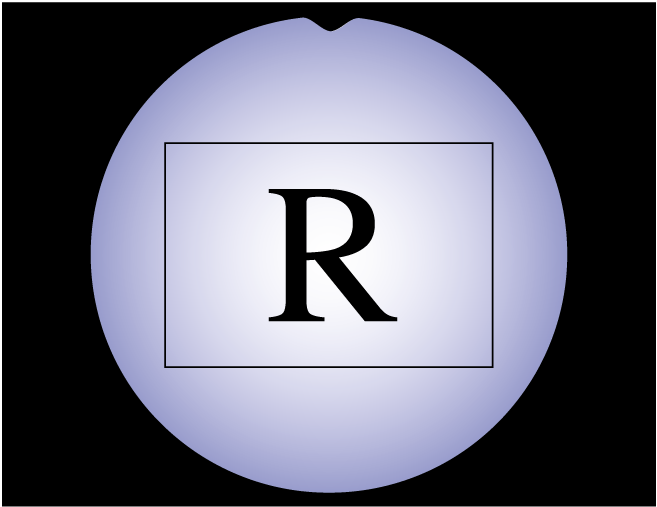
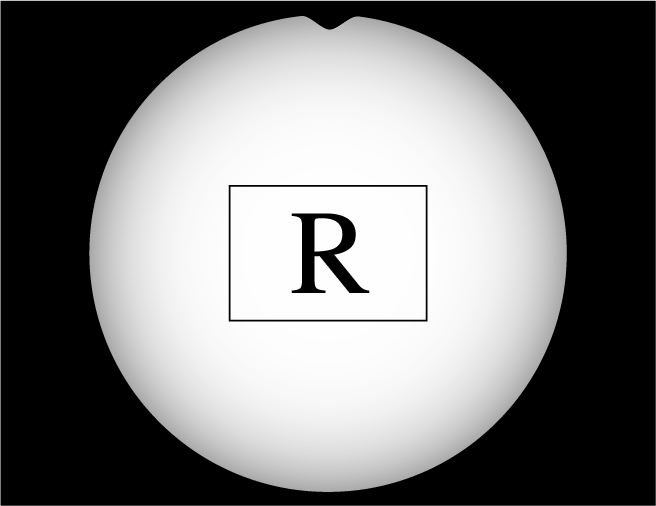
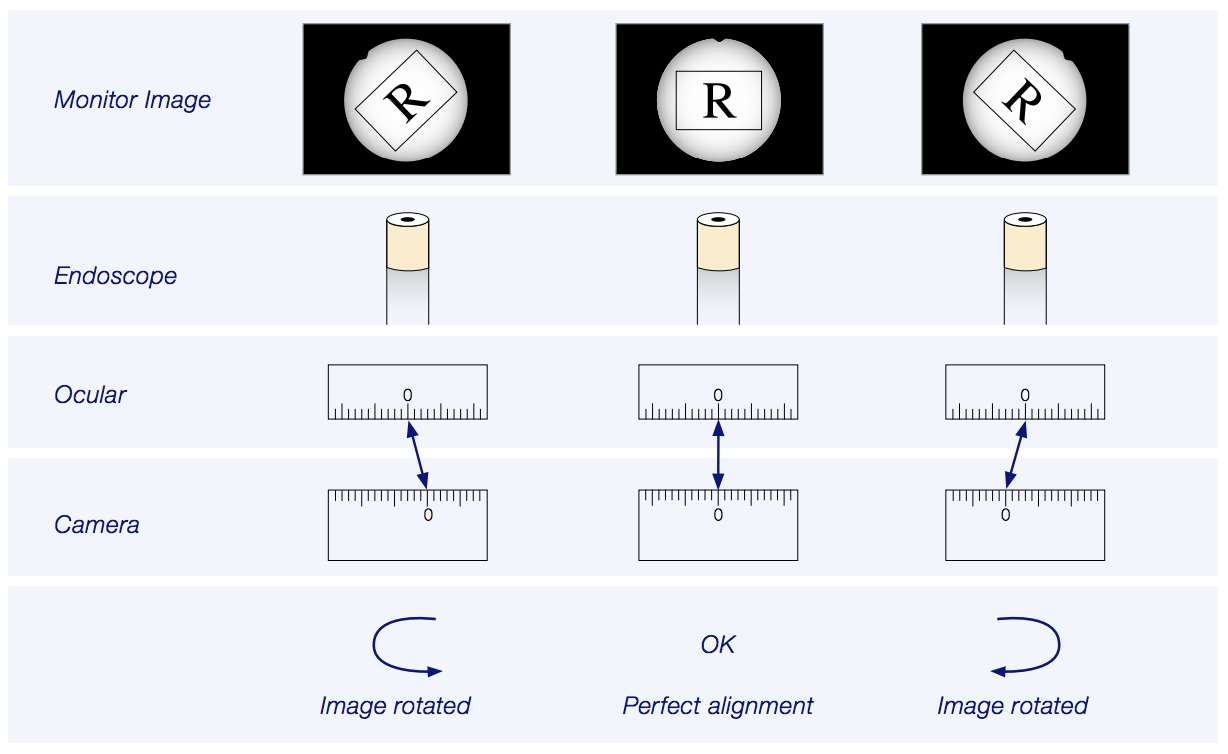
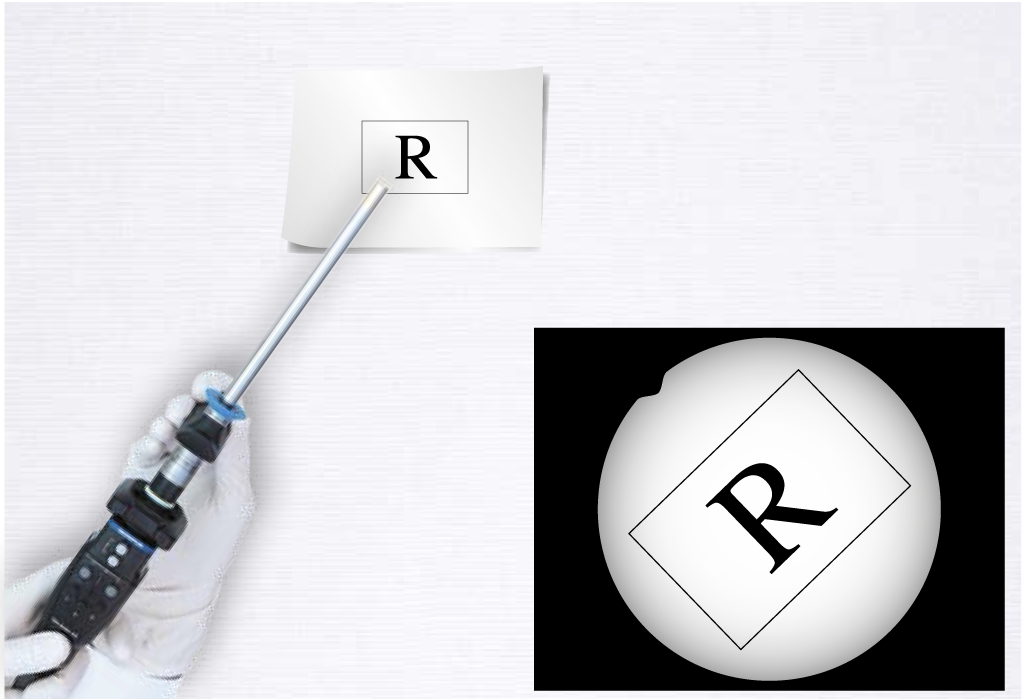
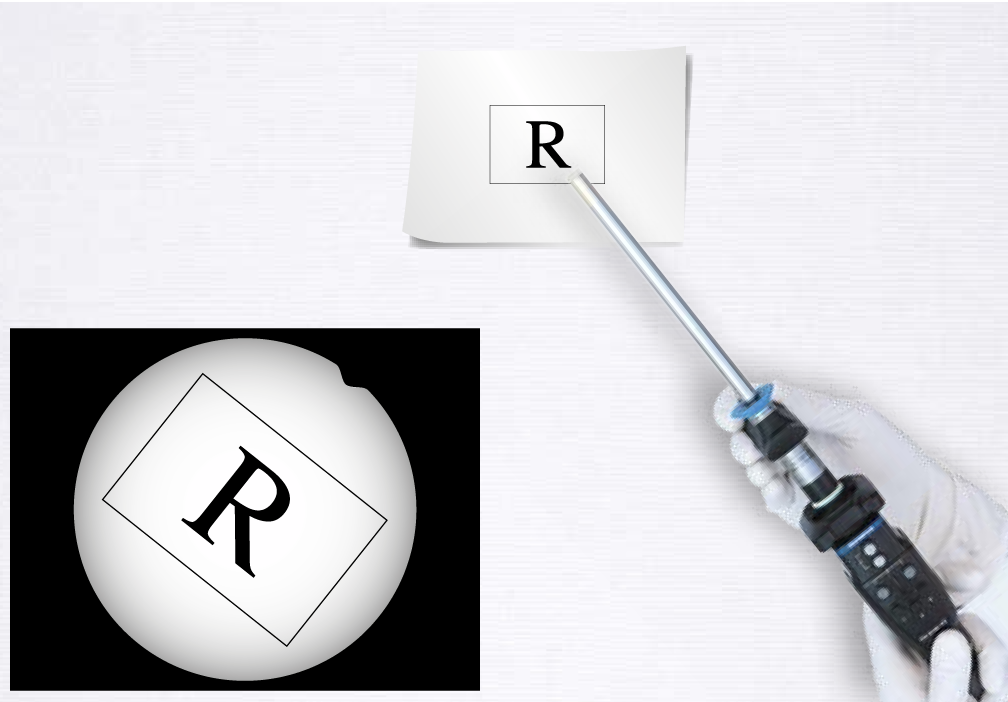
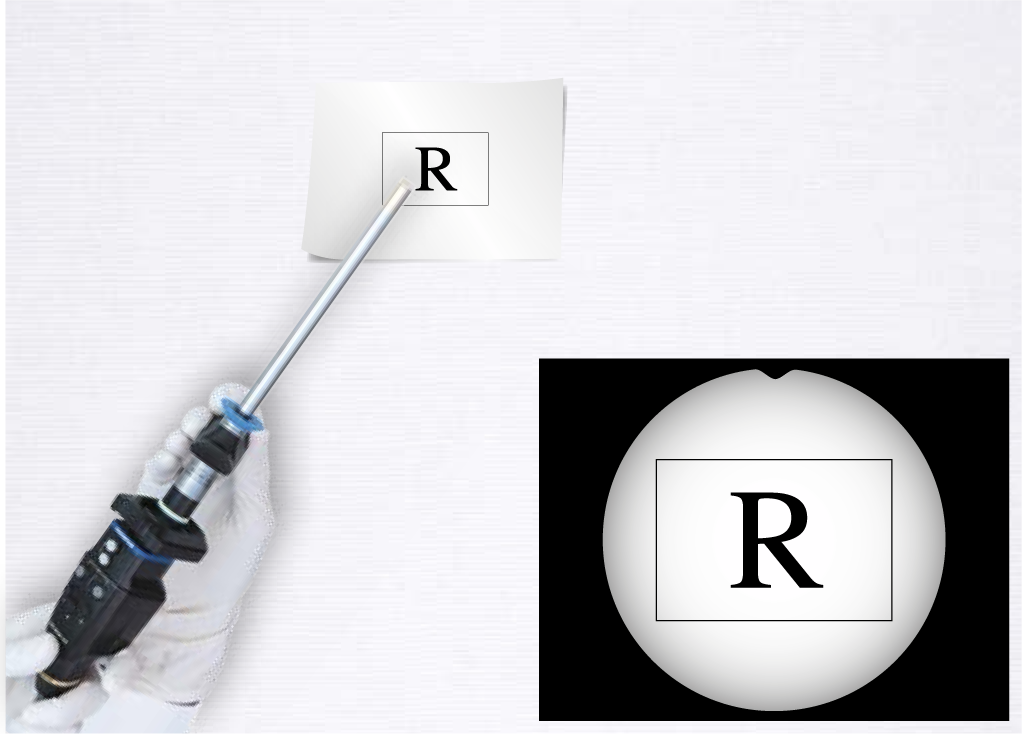
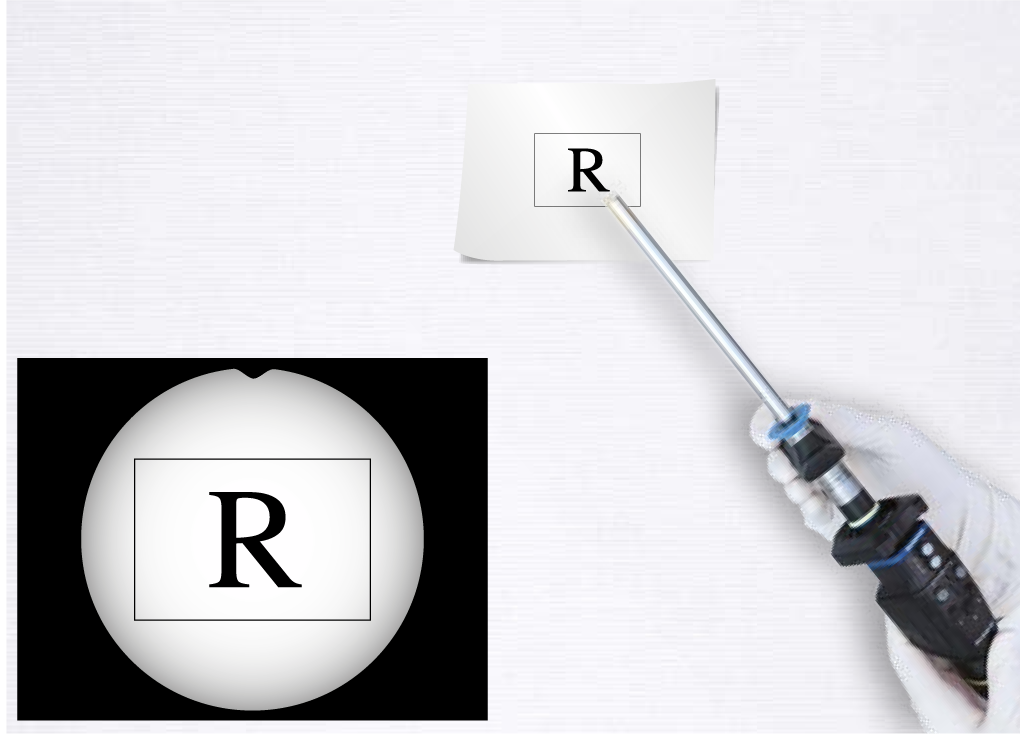
The Possibilities of Image Projection Are Illustrated Here:
Line 1 shows a scheme of the vocal folds with the specification of anterior to posterior and right to left.
Line 2 illustrates with the letter R what happens to a picture.
In Line 3 laryngoscopy was performed in that specific way and the picture of the larynx is shown.
Indication for Rigid and Flexible Laryngoscopy
There are numerous endoscopes available on the market for indirect laryngoscopy.
When choosing between rigid and flexible laryngoscopy, it is important to know the specific advantages of both techniques.
To obtain maximum information from the examination it is often best to use both techniques (see Table 2.1).
With the development of the distal-chip cameras the image quality of flexible endoscopy has improved dramatically.
Advantages of rigid endoscopy are less significant now than in former times when compared with glass-fiber flexible endoscopes. But rigid endoscopes can still provide high-quality images.
Controlling the position of the endoscope tip is easier when using a rigid endoscope rather than a flexible one. Symmetry and orientation of the image is easier to maintain during rigid endoscopy.
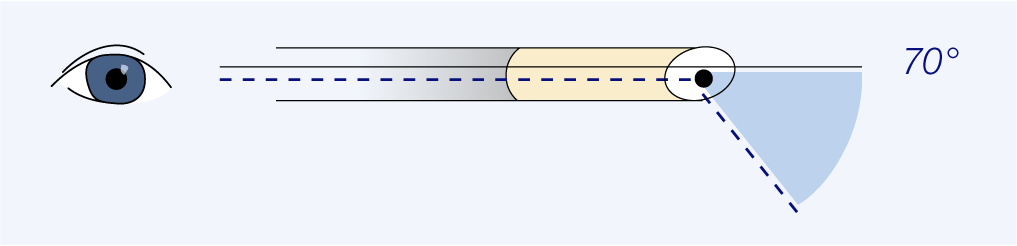
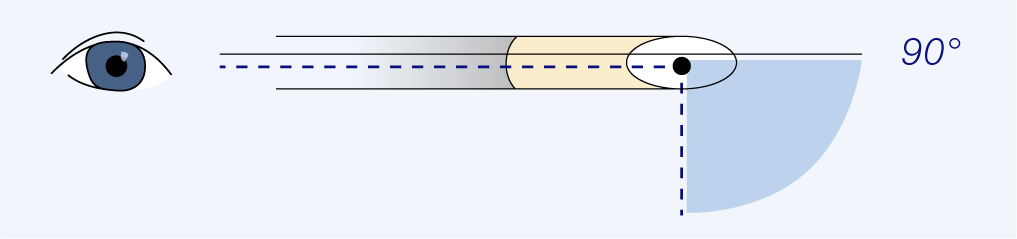
For rigid laryngoscopy, endoscopes with 70° and 90° angles have different advantages. Typically, 70° laryngoscopes are best examining of children and visualizing the anterior commissure.
In some countries flexible endoscopes must be cleaned in a time-consuming way. Rigid endoscopes are mostly cheaper and easier to clean. Thus, some examiners might prefer rigid endoscopes.
In the future, high-definition flexible chip-on-the-tip endoscopes may shift your choice to flexible endoscopy.
Experience shows …
… that where a flexible chip-on-the-tip endoscope is available it will be used more and rigid endoscopy will be performed less frequently.
… that when no flexible chip-on-the-tip endoscope is available and a fiberscope must be used, rigid endoscopy will be performed more frequently as the image quality is significantly better than that of the glass-fiber instruments.
| Endoscope | Advantage | Special Application | |
| Rigid | 70° | Autofocus | Children examination, anterior commissure |
| 90° | Zoom (bifocal) in some endoscopes | Same magnification as with 70° and closeup position |
|
| Flexible | All flexible endoscopes | Patients with severe gag response Examination of subglottis/trachea Examination of arytenoid mobility Vocal tract configuration during running speech and singing Examination of swallowing |
|
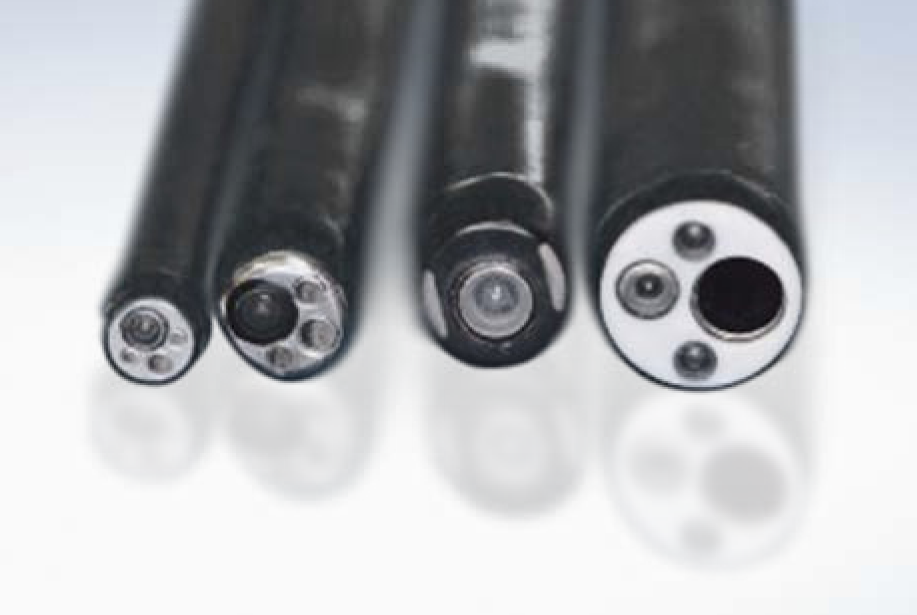
| Smallest size (<2 mm) to largest useable size (nearly 5 mm) | <2 mm glass fiberscope | Very small diameter | Babies and toddlers Transglottal examination in laryngeal stenosis |
| Standard fiberscope | Adaptable to different light sources (CW, strobe) | Bedside examination (because of portable pocket-sized light source) | |
| Chip-on-the-tip videoendoscope (smallest size 2.6 mm) | High-quality images | Looking for fine structures | |
| With instrument channel (≥4.8 mm) | Instrument channel allows operation, suction, etc. | Office-based surgery | |
Table 2.1: Applications for rigid and flexible endoscopes
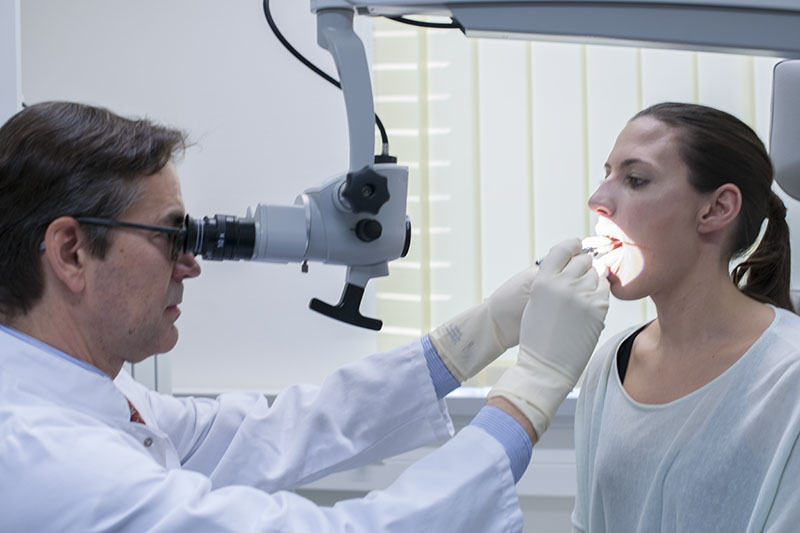
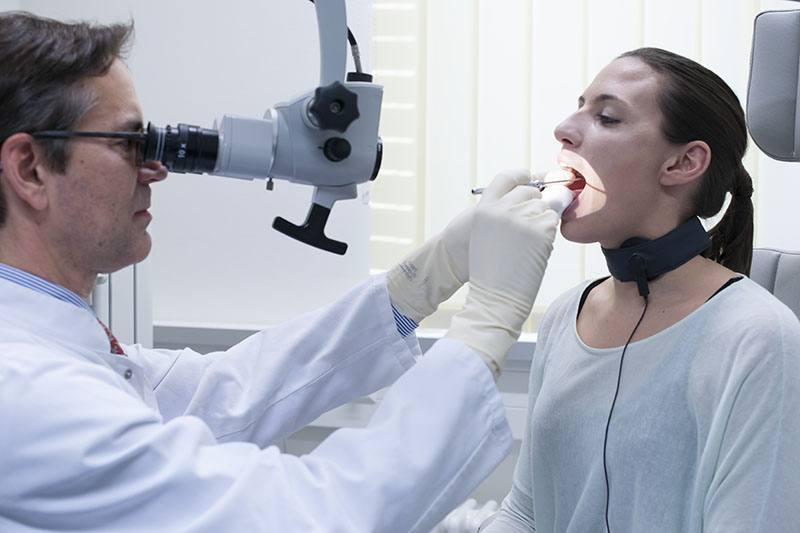
Rigid Endoscopes
Characteristics
Rigid endoscopes angled at either 70° or 90° are suitable for indirect laryngoscopy.
For both there are different versions on the market with different diameters and various handgrips.
In Europe rigid endoscopy was traditionally performed with a 90° endoscope. Now the 70° endoscope seems to increasingly be the instrument of choice.
The 90° rigid endoscopes may provide dual focus for zooming.
The 90° rigid endoscope may also have an antifog ventilation channel.
Optical Axis for Various Rigid Endoscopes:

Magnification Possibilities with Rigid Endoscopes
Magnification can be determined by the distance to the object.
Some rigid endoscopes have the option of a bifocal zoom.
In some camera systems you can additionally zoom with the camera
The zoom can either be optical (within the endoscope or the camera) or digital (using image processing within camera).

Rigid Endoscope and Camera Alignment
Alignment is defined as the process of adjusting parts so that they are in the proper position relative to one another.
For rigid endoscopes correct camera alignment is important.
When the image is rotated, laryngeal cartilage frame asymmetry is difficult to diagnose.
When the image is rotated, assessment of arytenoid movements may be difficult.
The patient’s anterior–posterior (i.e. sagittal) axis should be aligned with the vertical axis of the image.
Most adapters permit rotation of the camera, enabling manual alignment as seen in the following pictures.
Alignment:
In clinical practice when performing laryngoscopy, it is assumed that the larynx is symmetrical and the vocal folds form a V. When a rigid endoscope is in an ideal median laryngoscopic position, it is in a “perfect sagittal” direction as well. In order to achieve a perfect V on the monitor it is mandatory that the camera and adaptor are aligned with the endoscope.
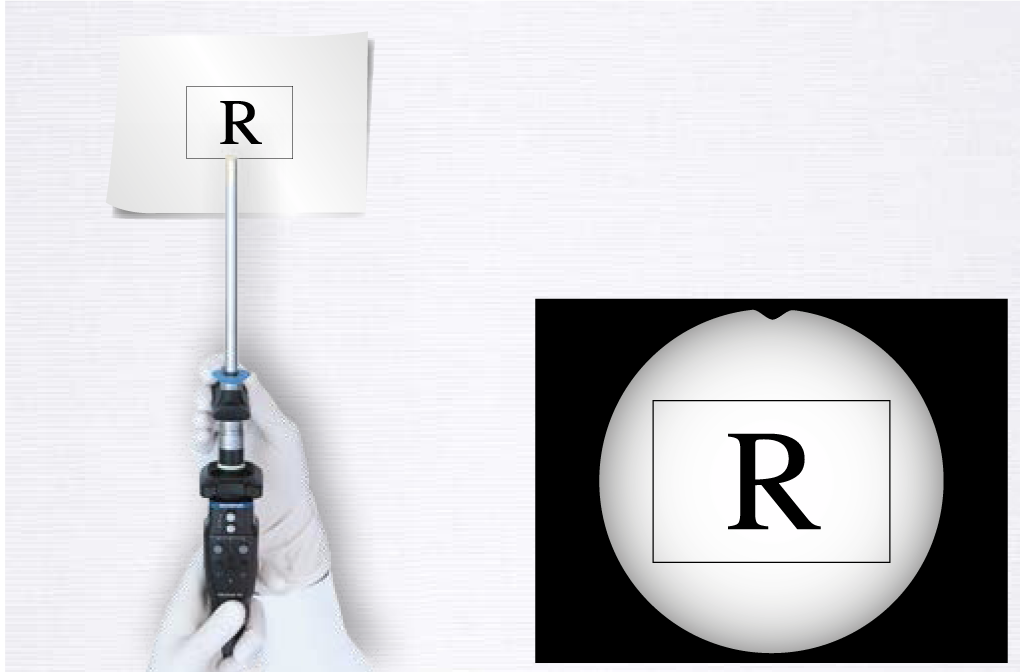
Corrective Alignment:
Intentional correction for (monitor) image alignment: The camera is intentionally rotated to compensate an oblique position of the rigid endoscope. The resulting image on the screen is perfectly adjusted (perfect V).
Corrective alignment can be used to rectify and adjust a monitor image by rotation of the camera attached to the endoscope’s eyepiece.
How Alignment Can Influence Your Imaging
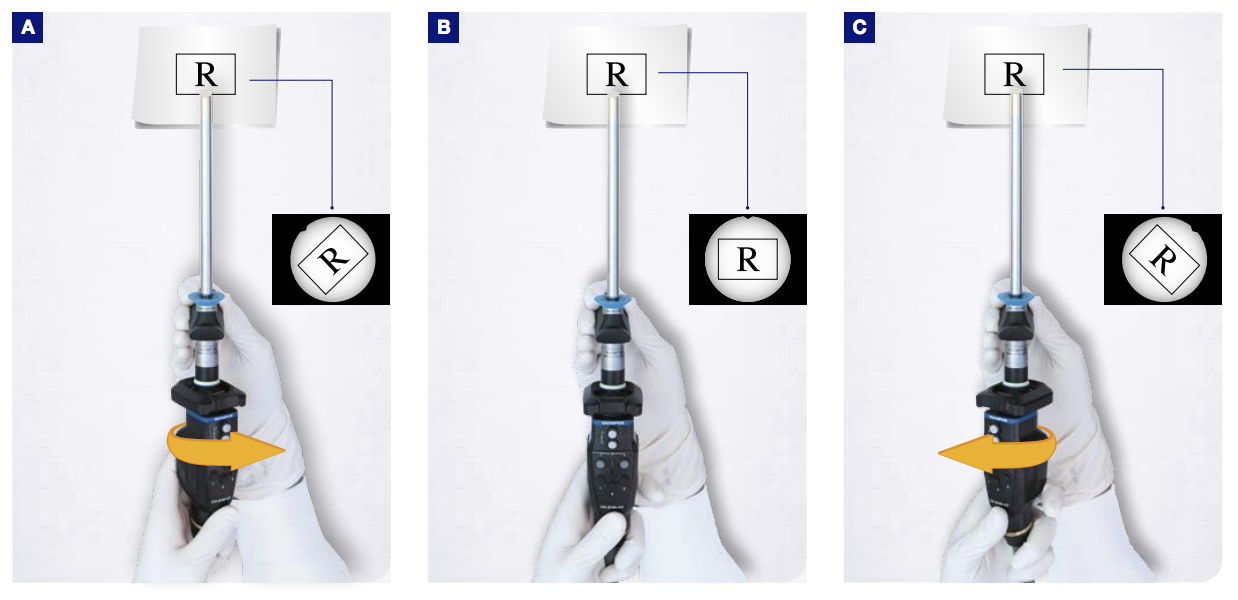
Perfect sagittal projection with the rigid endoscope in an ideal median position and correctly aligned (1).
With normal alignment and an oblique endoscope position, the image seems rotated (2–3).
You can compensate for an oblique endoscope position with intentional corrective alignment (4–5). This effect may be helpful when it is necessary to place the rigid endoscope laterally e.g., during transoral indirect surgery.
Corrective Alignment
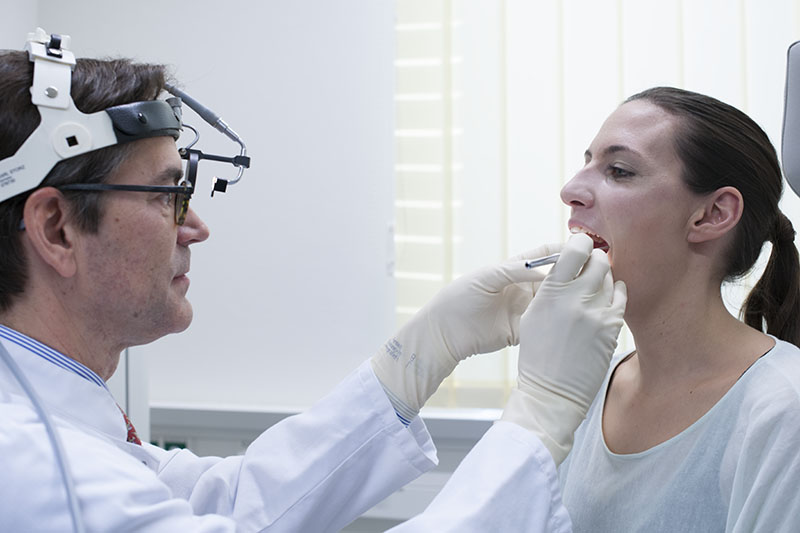
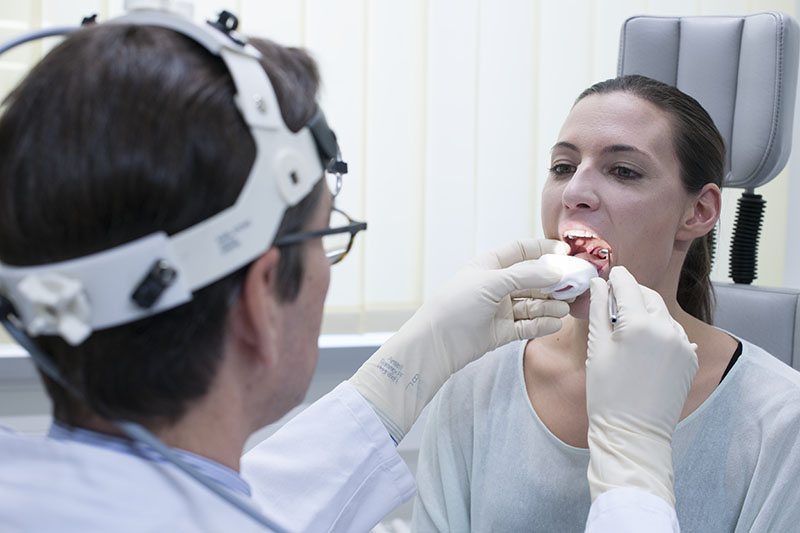
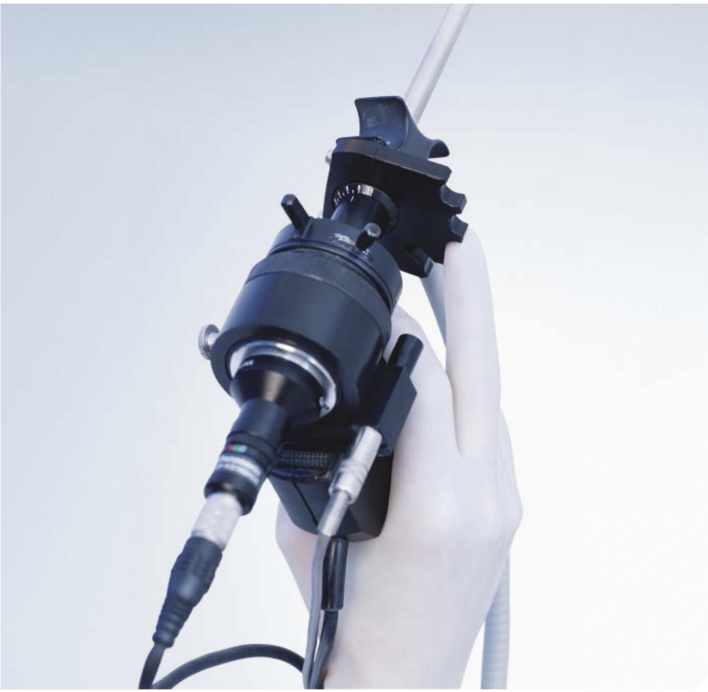
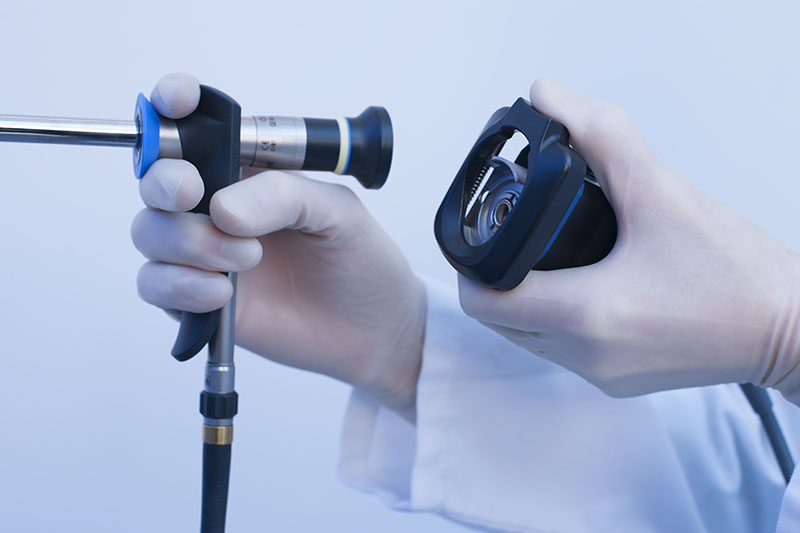
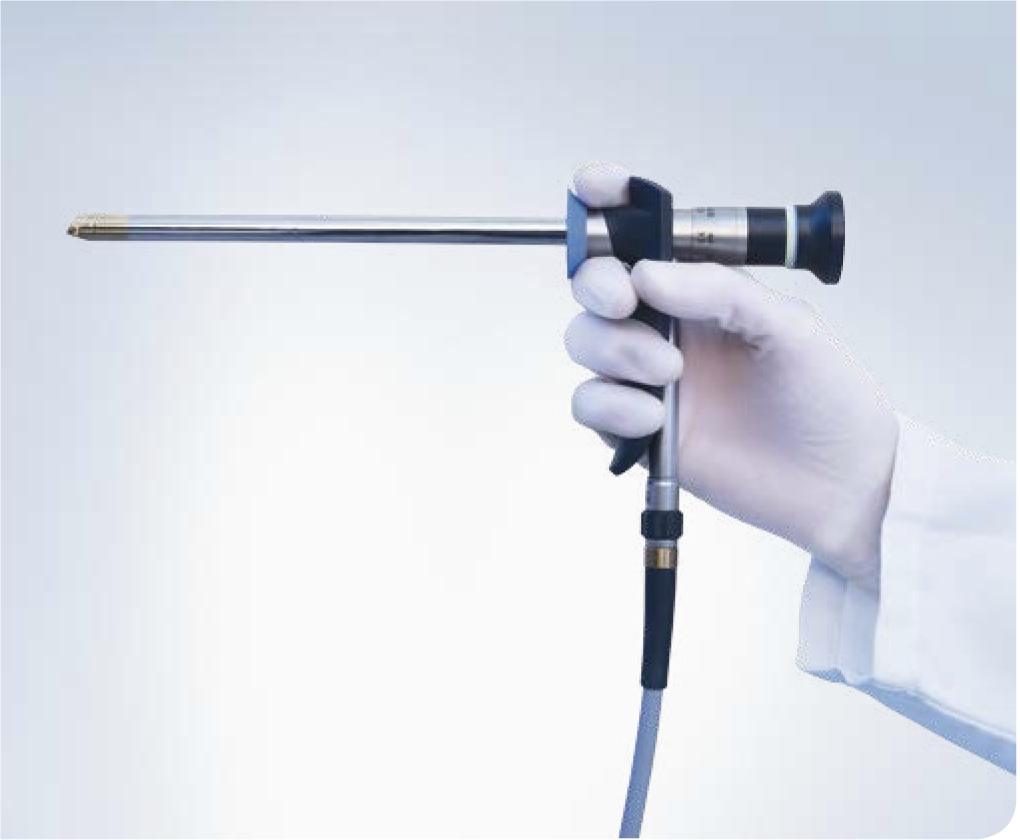
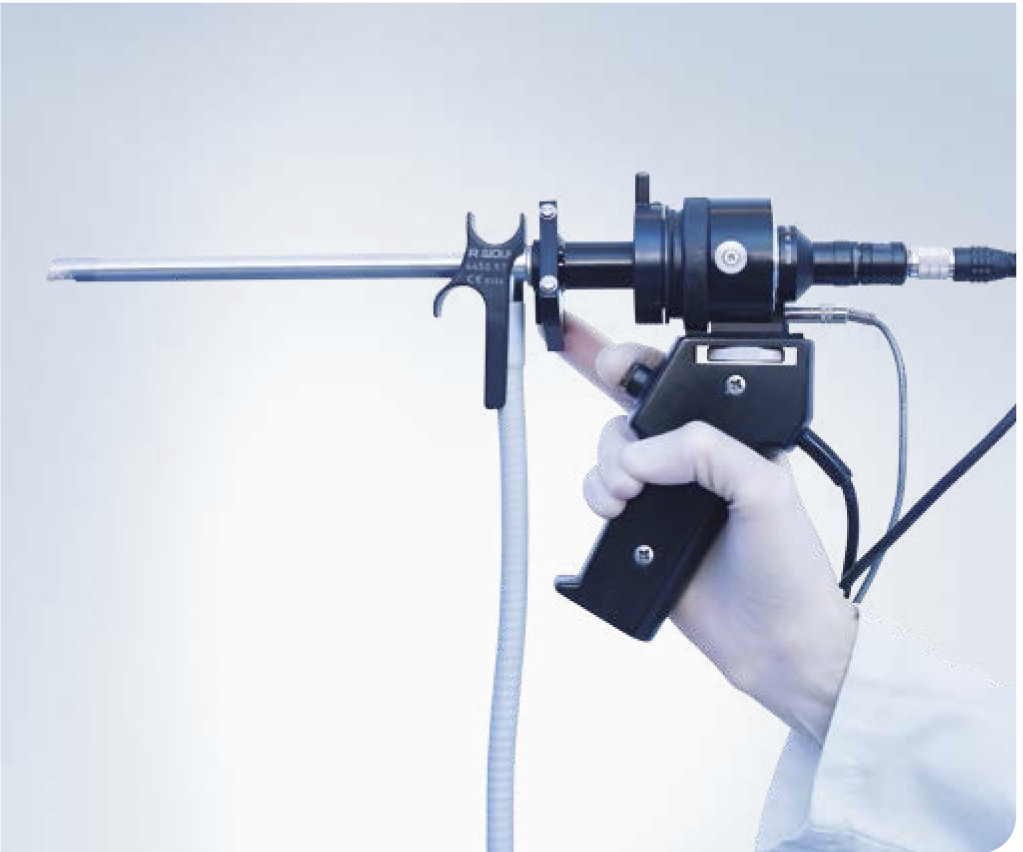
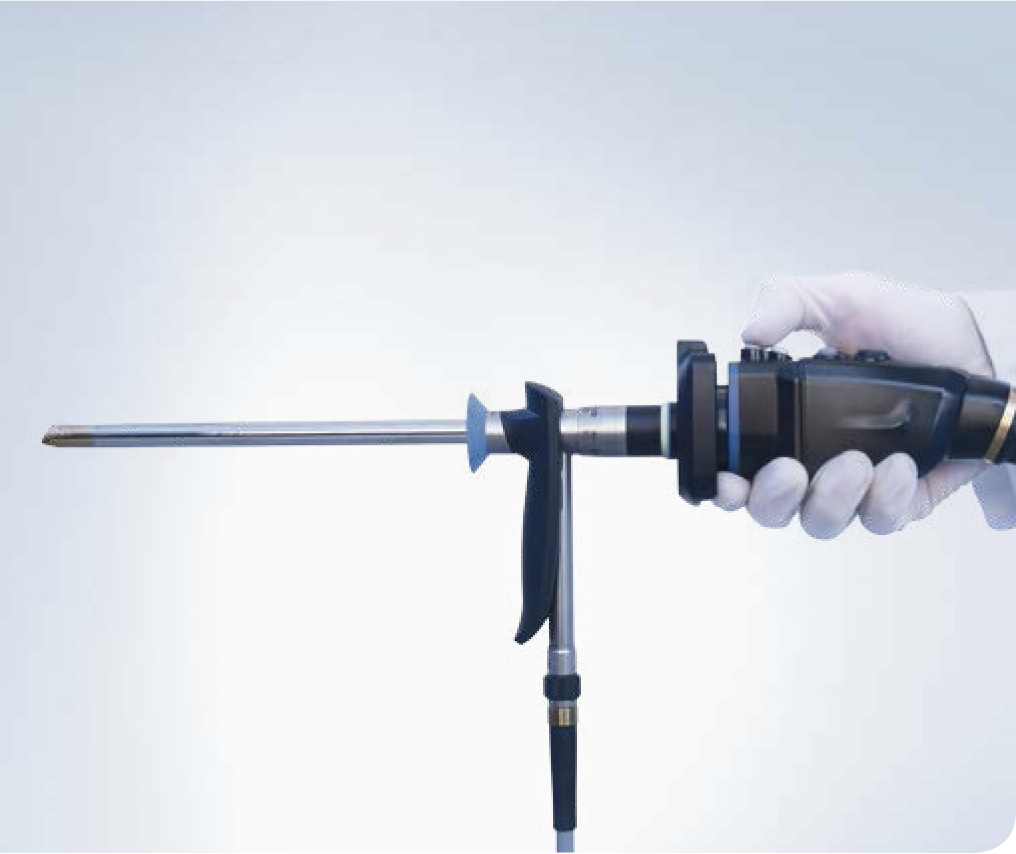
How to Hold Rigid Endoscopes
There are various possibilities for holding the endoscope and camera. In the following pictures, some typical handgrips are shown.
The most appropriate grip must be chosen individually and will depend on additional switches, buttons and zoom-scrollers which have to be handled, the size of the user’s hand, and on the weight of the endoscope and camera.
The standard in endoscopy is to hold the endoscope with the right hand (because most people are right-handed).
In office-based phonosurgery, the standard is to hold the endoscope with the left (nondominant) hand so your right (dominant) hand is free for the operation.
There are no special recommendations for left-handed examiners.

Flexible Endoscopes
Characteristics
All flexible endoscopes for laryngoscopy, even the newest generation, still feed light via glass fibers to the object. However, in the future modern technology will take advantage of illumination by LEDs mounted on the tip of the endoscope.
The standard flexible endoscope also uses glass fibers (this type of endoscope is known as a fiberscope) to transmit the image to the camera.
Endoscopes and cameras do not need to be part of a single manufacturer’s system; mixing and matching is perfectly acceptable.
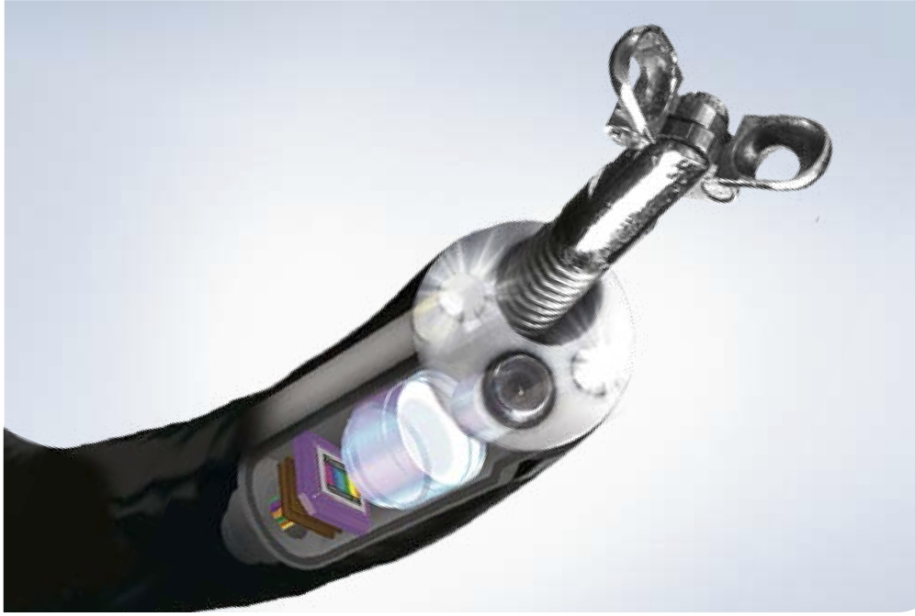
The camera of the chip-on-the-tip flexible endoscope is built into the tip. Glass fibers are only used for light transmission.
Using a chip-on-the-tip flexible endoscope means that the examiner can only observe the larynx on a monitor screen.
Since the implementation of chip-on-the-tip cameras, the image quality of flexible endoscopy has improved significantly, particularly when combined with high-definition TV (HDTV).
The diameter of the chip-on-the-tip endoscope is slightly greater, but in most cases nasal passage is no problem. Diameters of > 5 mm may be too uncomfortable for most adults.
Flexible Endoscope and Camera Adjustment
Chip-on-the-tip cameras do not need adjustment (no alignment, no focussing), because the image is not transmitted through glass fibers.
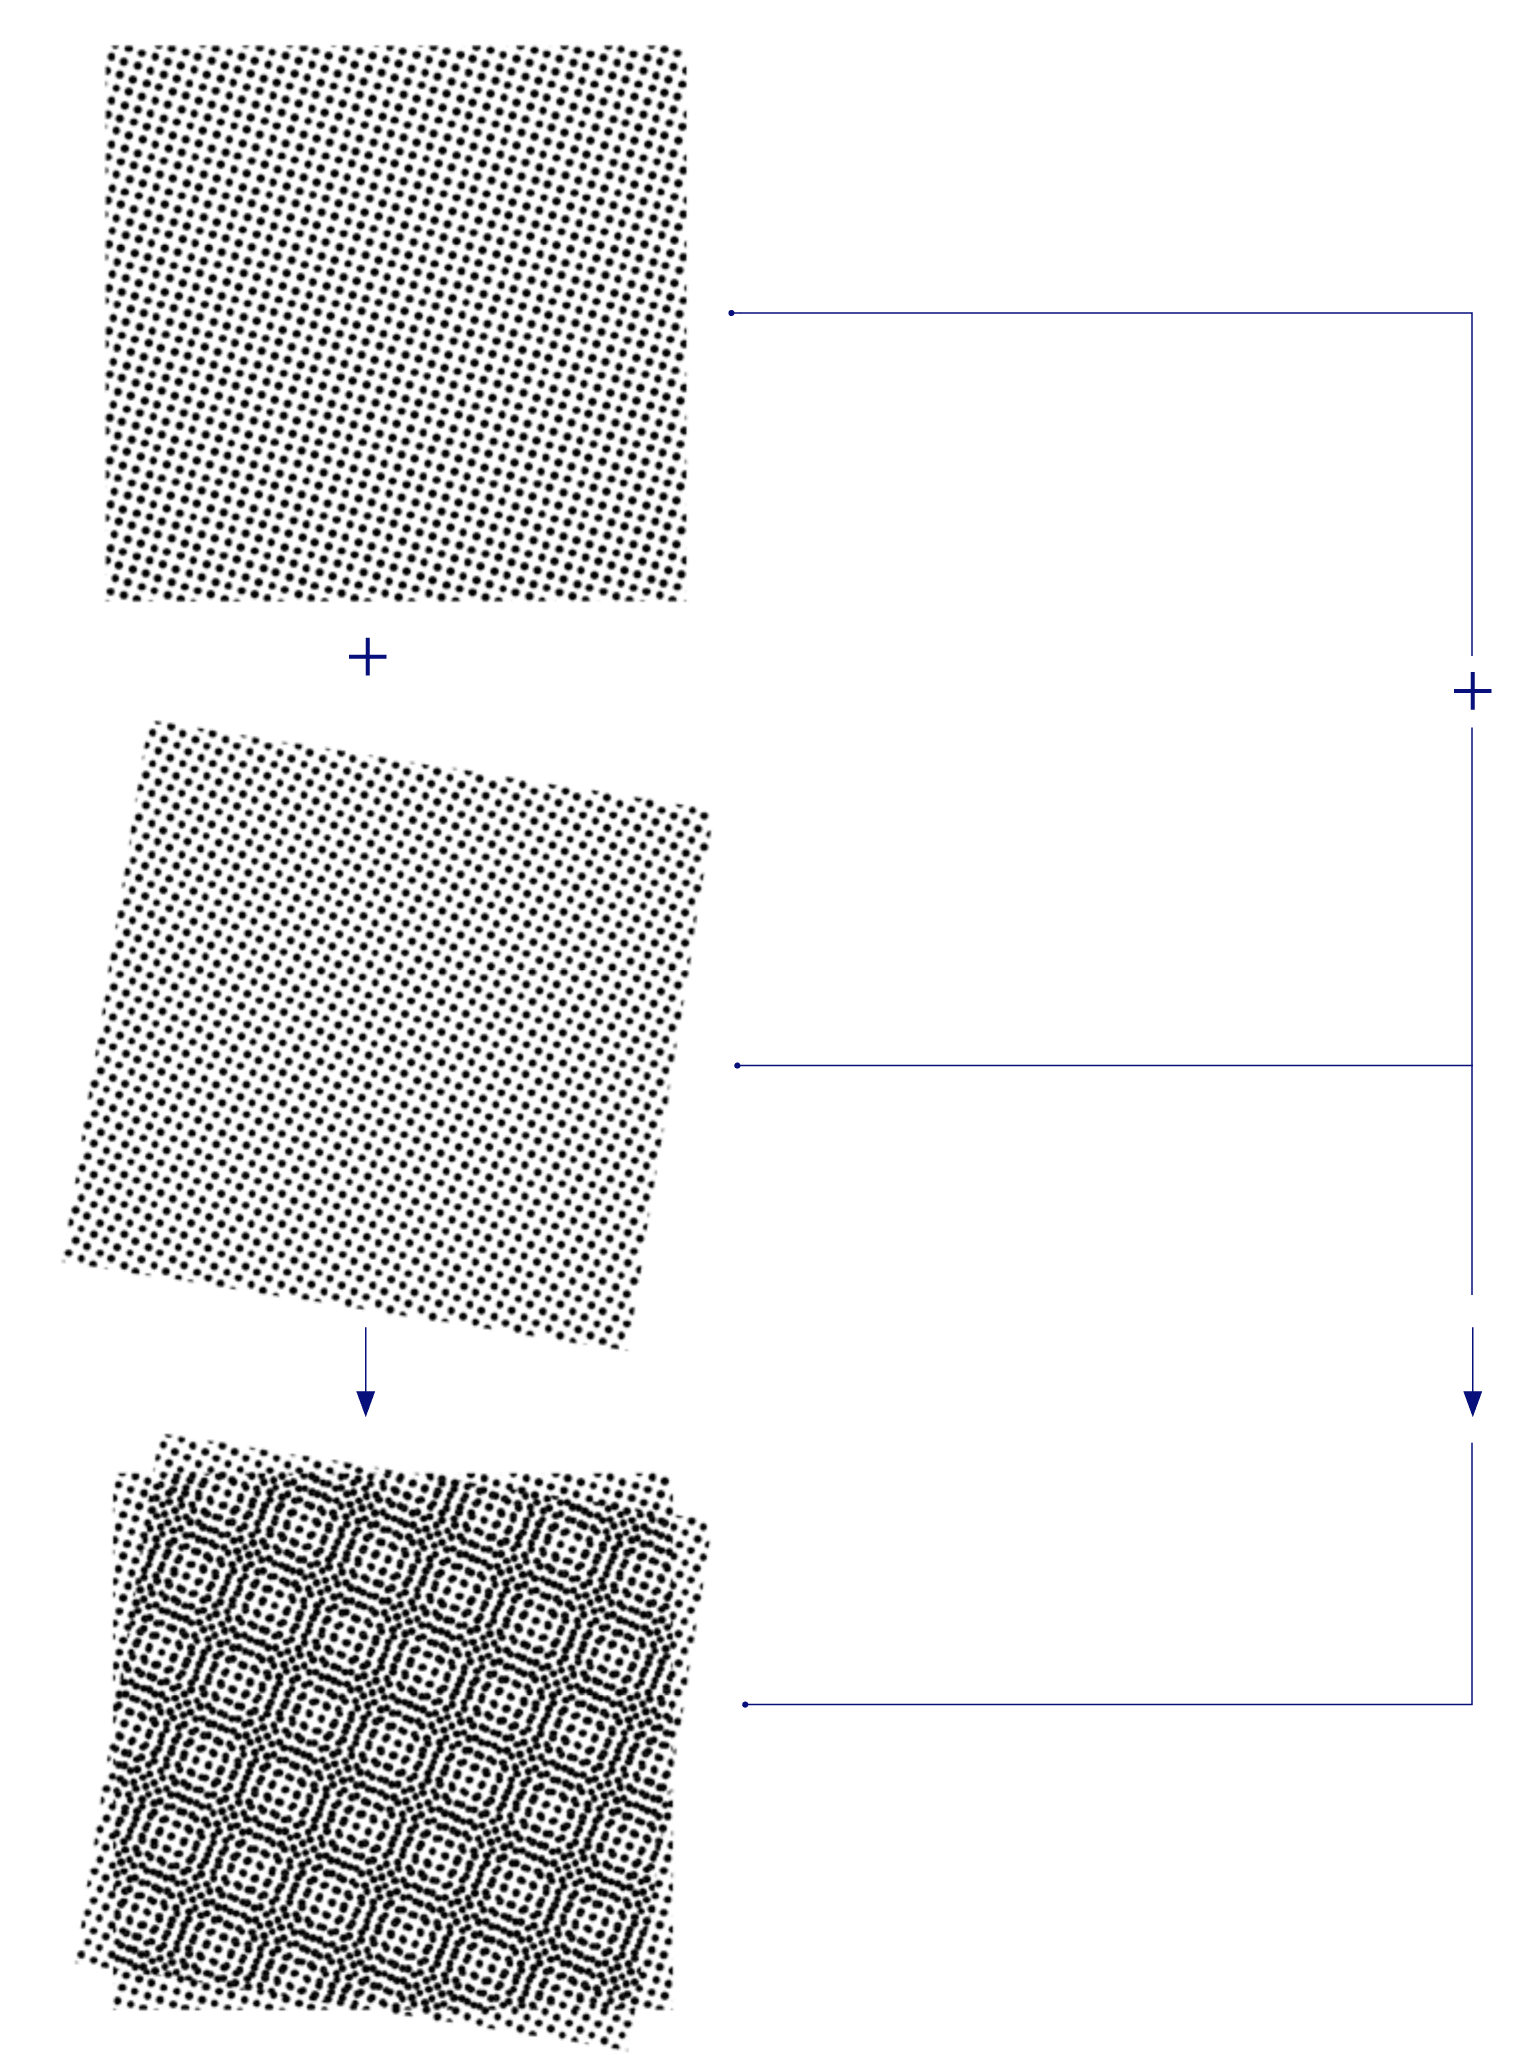
Glass-fiber flexible endoscopes (fiberscopes) not only need adjustment for alignment and focus, but also to minimize the moiré pattern. The superimposition of the glass-fiber pattern and the camera pixel pattern produces a secondary interference pattern known as the moiré pattern.
This effect can be minimized by slightly defocussing the image.
Some cameras have the option of an automatic filter for minimizing the moiré pattern.
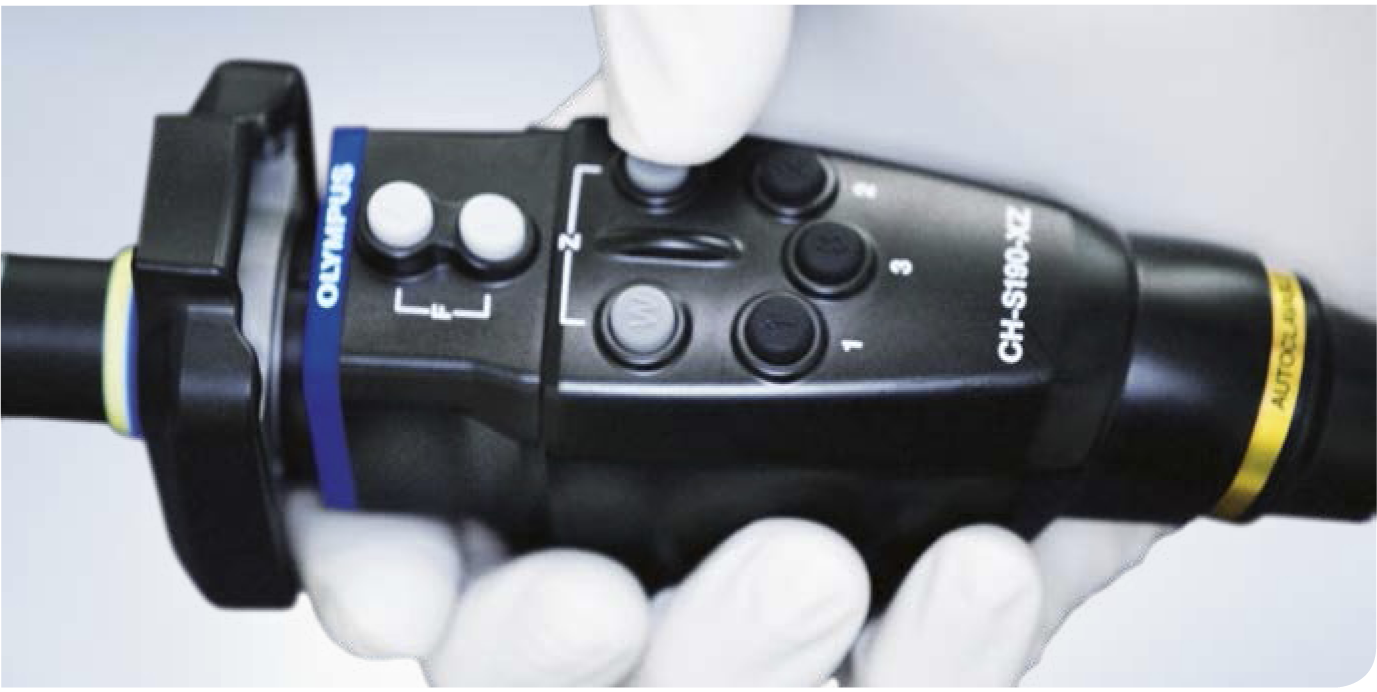
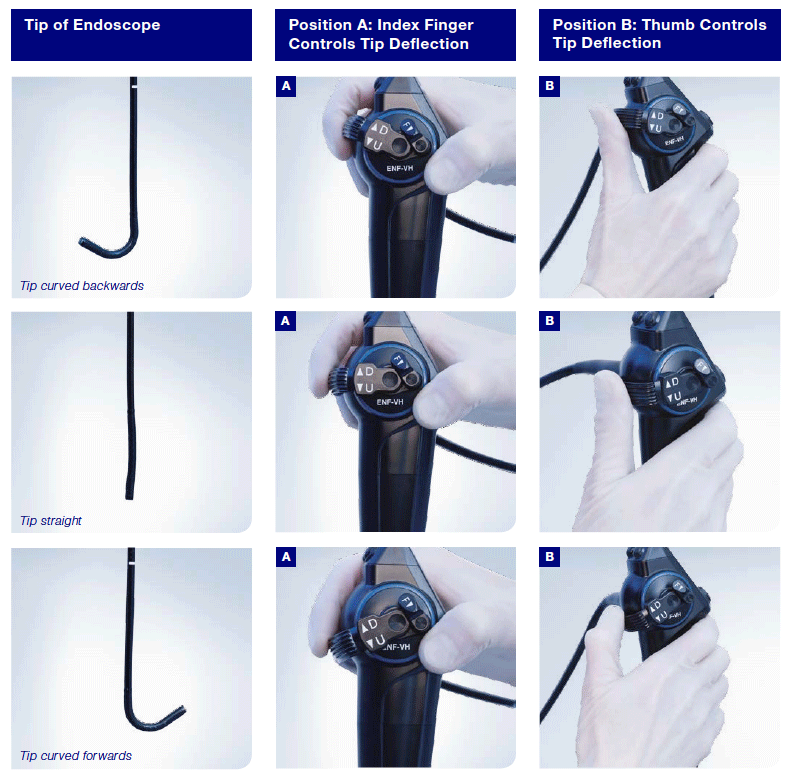
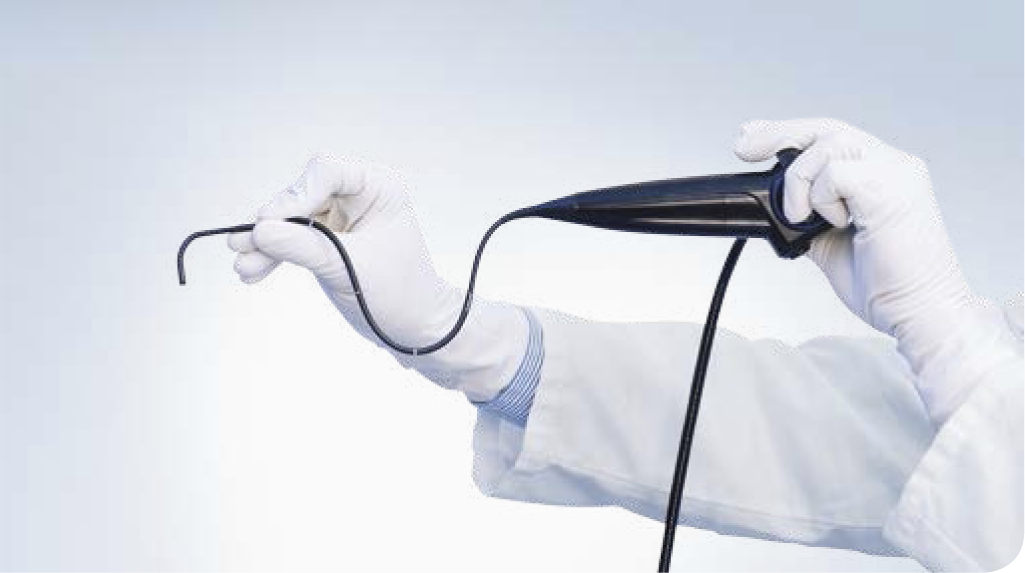
How to Hold a Flexible Endoscope
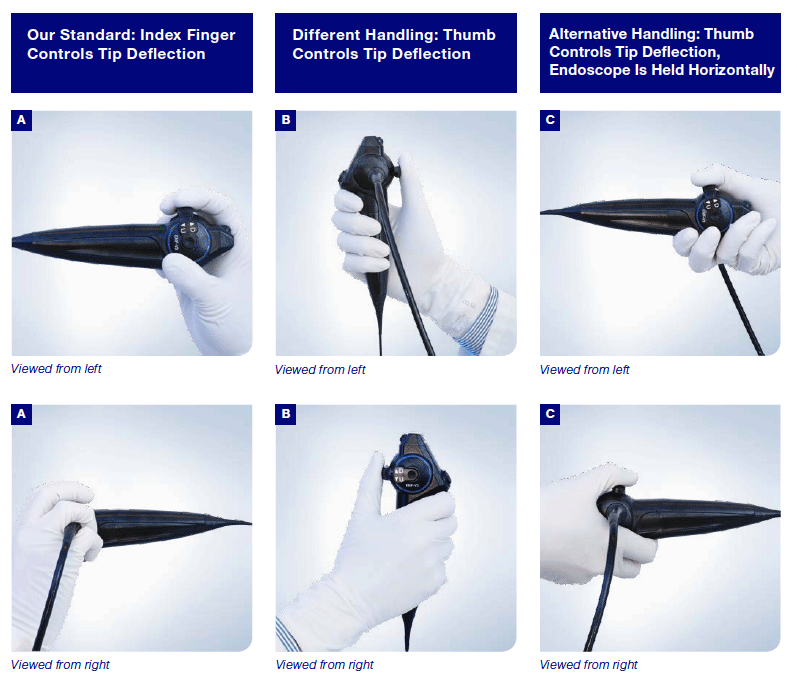
There are various possibilities for holding a flexible endoscope. In the following some typical handgrips for a chip-on-the-tip flexible endoscope are shown.
The most versatile grip must be chosen individually, and will vary depending on any additional switches, buttons and cameras which have to be handled as well as the weight of the apparatus and the size of the endoscopist’s hand.
In Germany, the standard for laryngoscopy is to hold the endoscope with the right hand and move the tip with the index finger (A). When the endoscopist is sitting, grip A might be the most feasible choice.
When thumb control is preferred, you might want to choose grip B or C.
There are no special recommendations for left-handed examiners.
The design of the endoscope and the shape of the camera and adaptor will also determine the most useful grip.
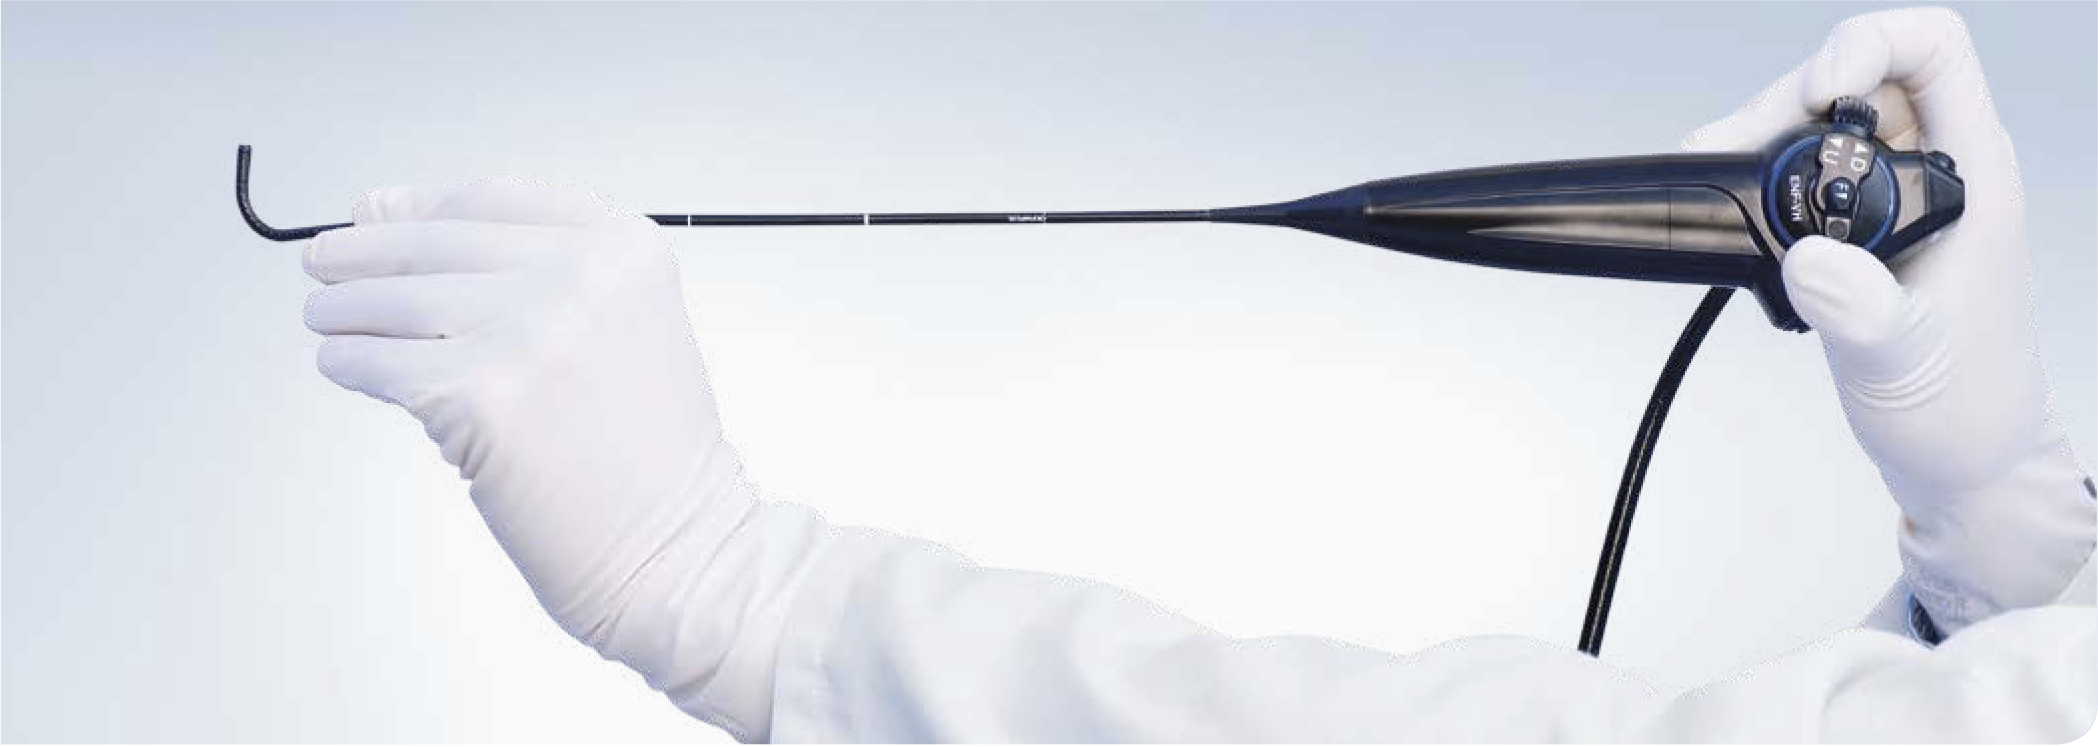
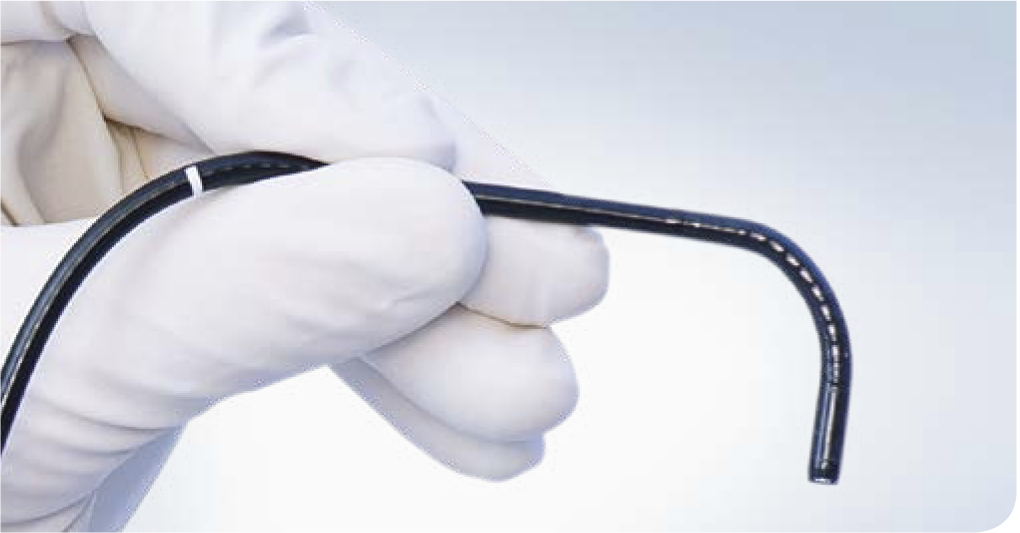
How to Move the Tip of a Flexible Endoscope
In our department the standard grip for laryngoscopy is to hold the endoscope with position A and move the tip with the index finger.
Keep in mind what is happening to the image when you rotate endoscope and camera.
Make sure that you can grip the endoscope firmly and that you can take advantage of the full range of motion of the lever.
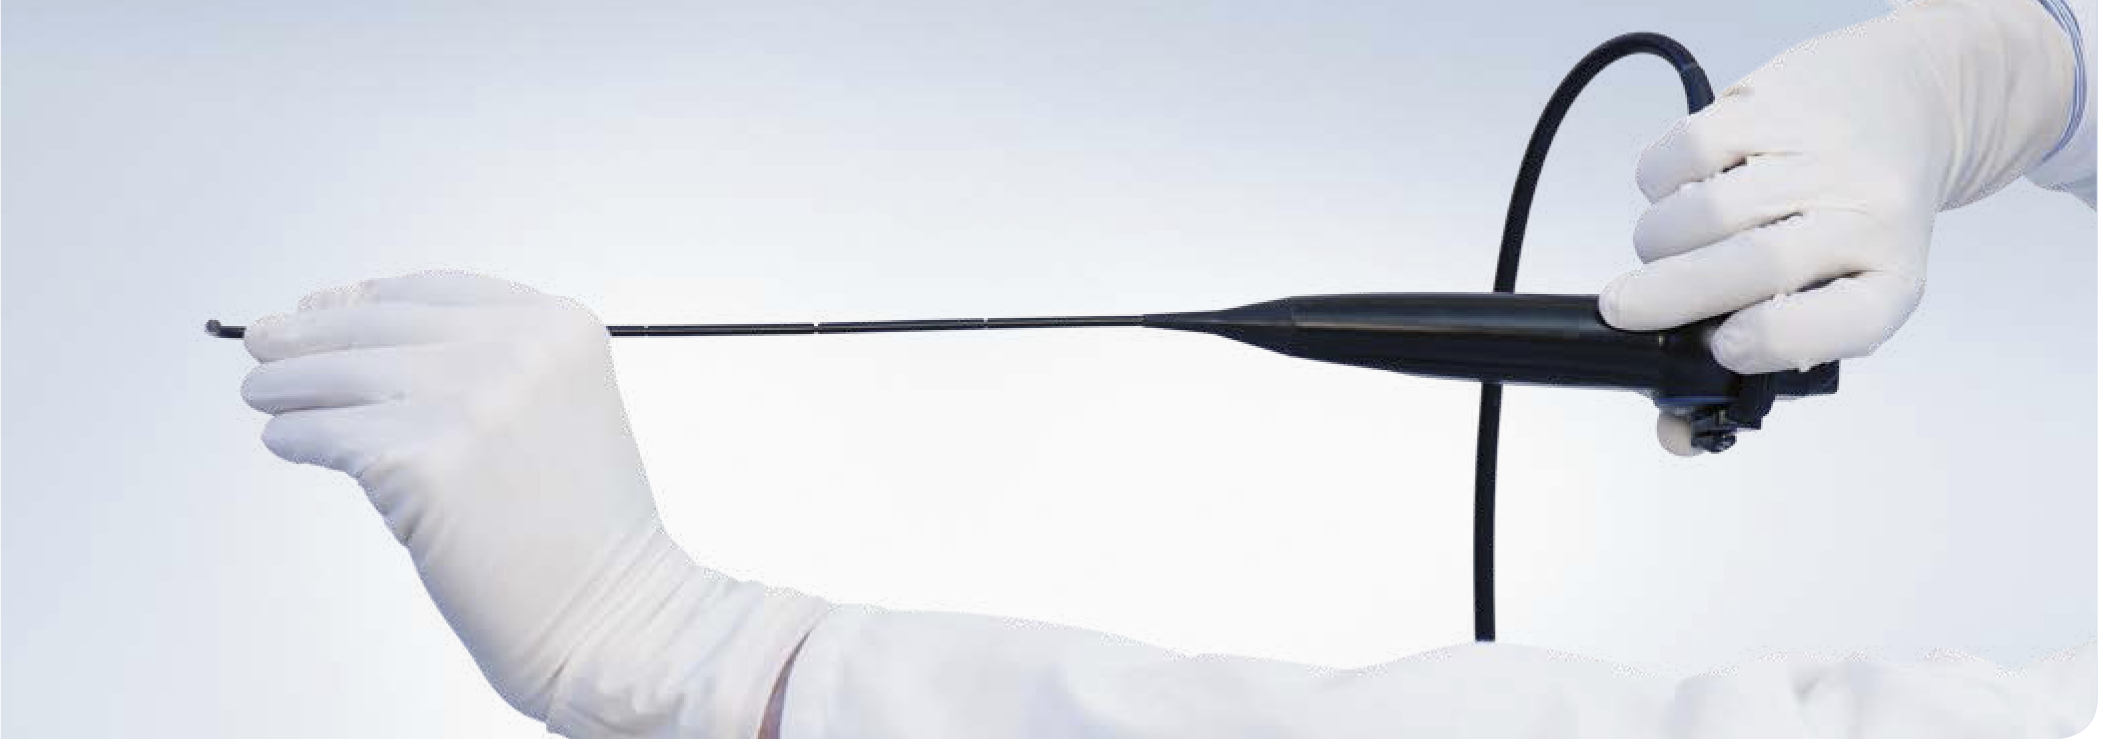
In the following pictures, the alternative grip with the endoscope held horizontally, as demonstrated in the previous set of pictures under C, is not shown.
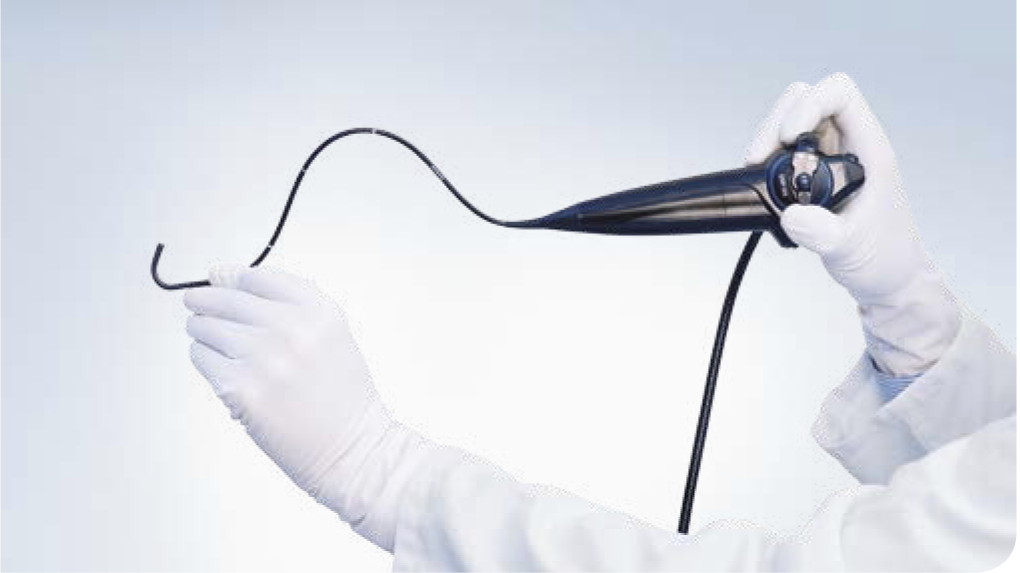
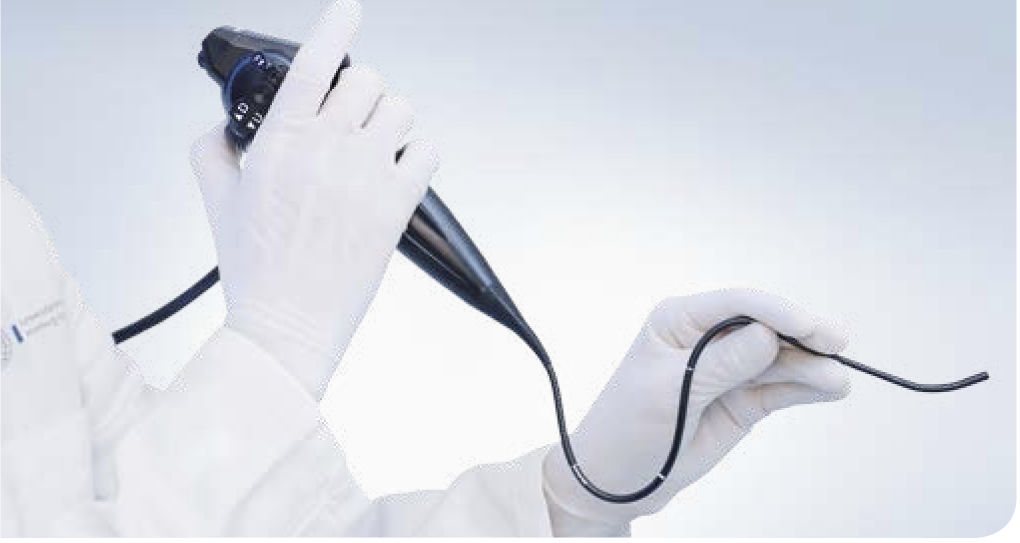
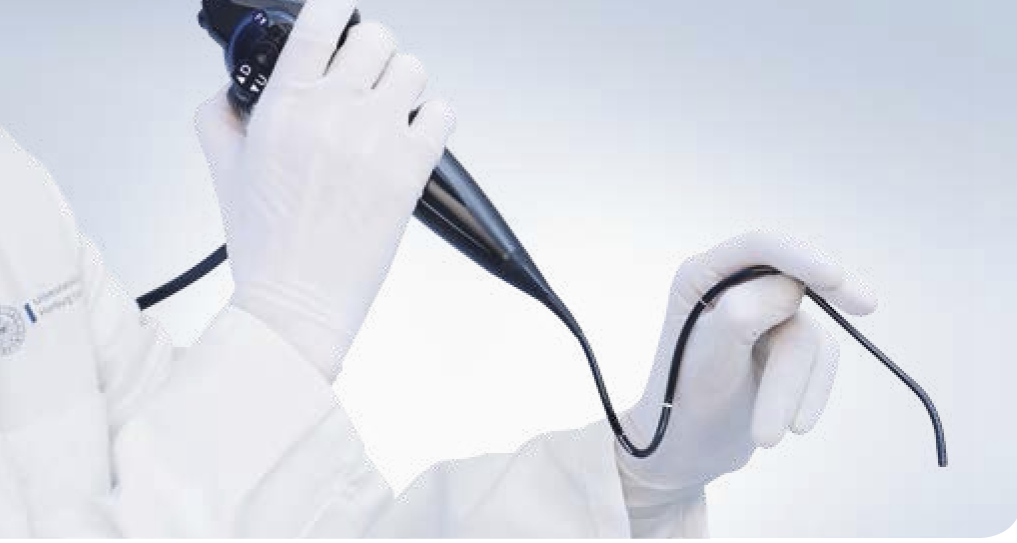
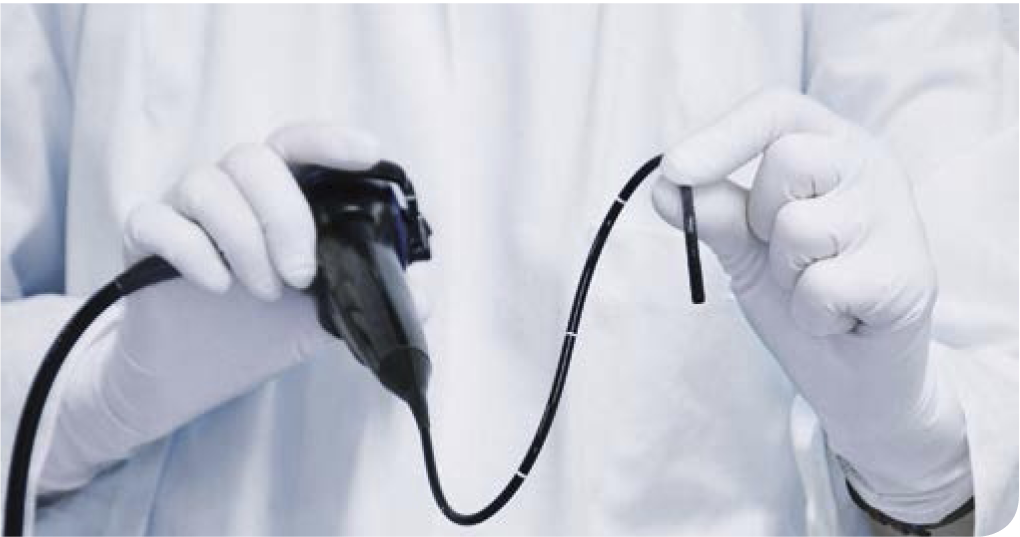
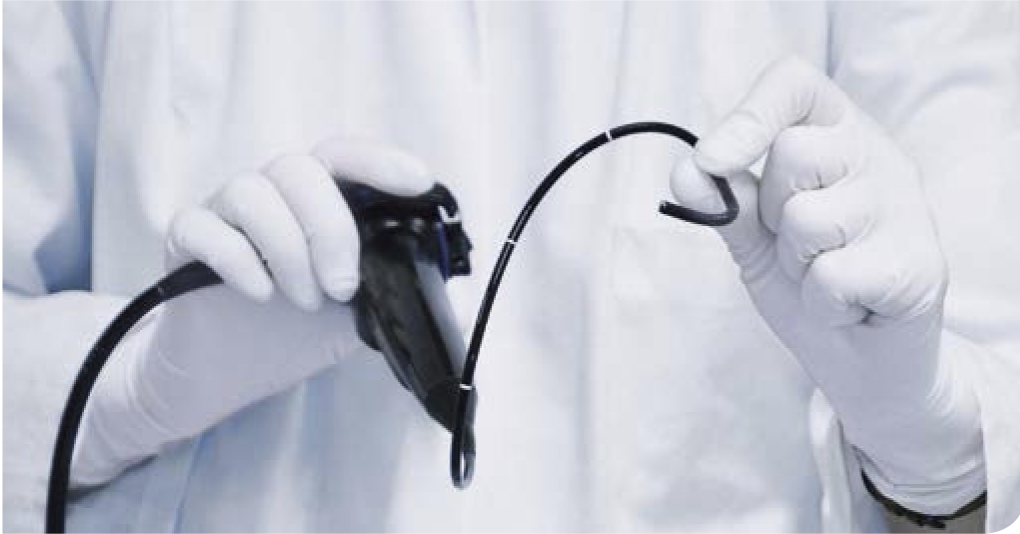
How to rotate the tip of a flexible endoscope
In some situations it is helpful to rotate the tip of the endoscope axially, in order to alter the view of the vocal folds.
There are two ways to achieve this:
A) By rotating the whole endoscope
B) By rotating the tip alone which becomes possible after bending the flexible shaft into a siphon shape
Terminology:
When describing how to hold a flexible endoscope, the hand holding the handpiece is referred to as the “proximal” hand and the other hand holding the flexible part the “distal” hand. Thus, for right-handed endoscopists the right hand is generally the proximal hand whilst the left is the distal hand.
Demonstration of Rotating the Tip with the Whole Endoscope
Demonstration of Tip Rotation Using the Fingers of the Distal Hand by Slackening the Flexible Shaft of the Endoscope to Form a Siphon
Look at the thumb position of the distal hand:
Rotation is possible without twisting the handle of the endoscope.
- Content Type