PROCEDURE
Inserting the bronchoscope
Make sure that the UP indication on the insertion tube rotation ring is aligned with the UP indication on the control section.
The advantages of using the endotracheal tube include ease of insertion/withdrawal, a reduction in the stimulus caused by the movement of the bronchoscope, stabilization of the “floppy” thin bronchoscope, reduction of deflection, and less effort required to advance the bronchoscope to its distal end. Then you may proceed to conduct observation as far as the subsegmental bronchus level.
Raise the left hand high and keep the insertion tube straight when inserting the bronchoscope.
Approaching the lesion
It is important to perform the CT scan and plan the bronchial route for accessing the target region beforehand. While observing the branching of the bronchi directly, advance the ultrathin bronchoscope through the bronchi, following the pre- planned route. When it is required to rotate the bronchoscope by large rotation, it is effective to use the insertion tube rotation function. If the peripheral bronchi collapse and obstruct the view, which can occur as a result of suction, the view can be usually be reacquired by ceasing to perform suction. If fluoroscopy can be used, confirm that the scope is advancing toward the target lesion.
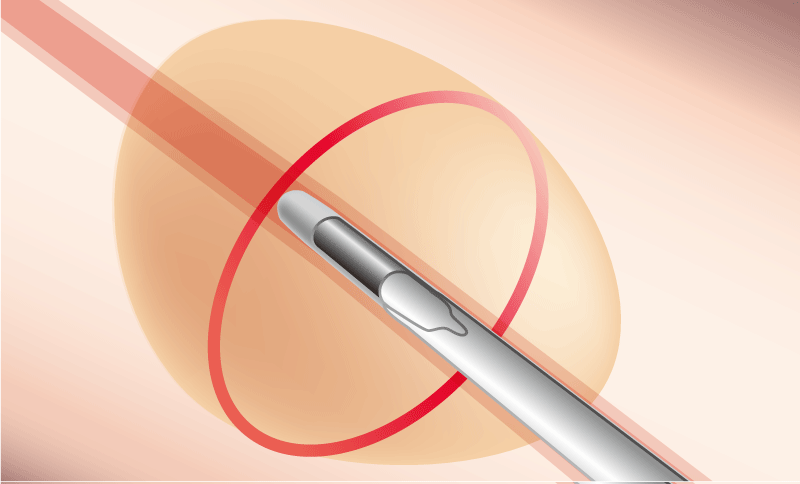
Observation with the ultrasonic probe
After approaching the ultrathin bronchoscope as close to the lesion as possible, insert the probe through the instrument channel and advance it toward the lesion.
■ Since the instrument channel is located beside the lens, even when a bronchus appears to be directly in front of the endoscope at a branching point, advancing the probe straight may cause it to enter the bronchus to the side of the bronchus visible in front. Always check the endoscopic image to confirm which bronchus the probe is entering.
■ When the ultrathin bronchoscope is at the closest point to the lesion, push and pull the probe to check whether the EBUS image is reproducible.
■ The tip of the probe should be carefully adjusted to observe the the maximum diameter of the lesion under the ultrasound image.
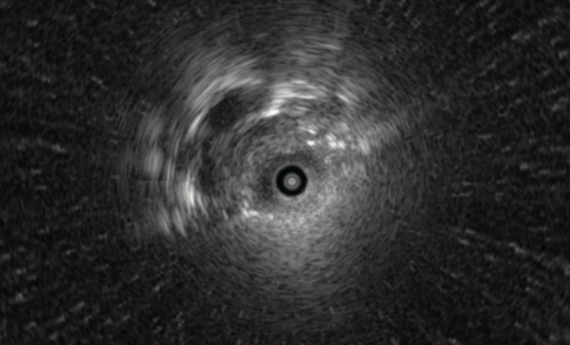
Center of lesion
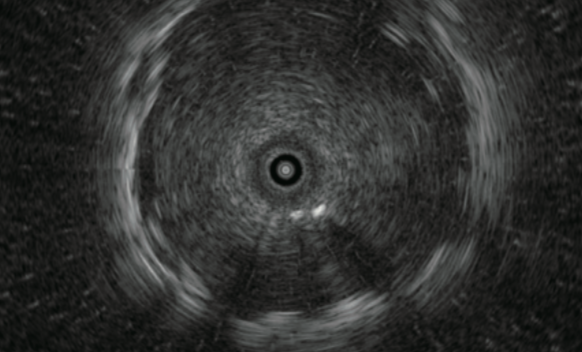
Edge of lesion

Methods for selecting the bronchus so that the probe goes “within” the lesion:
1. While observing the fluoroscopic image, correct the orientation of the ultrathin bronchoscope and probe.
2. While observing the ultrasound image, correct the orientation of the probe. Angle the bronchoscope to re-select the bronchus through which the probe will approach the lesion.
3. Select the bronchus directly under endoscopic observation.
The probe could be damaged if it is subjected to an excessive force or if strong angulation is applied while the probe is being advanced into a bronchial branch.
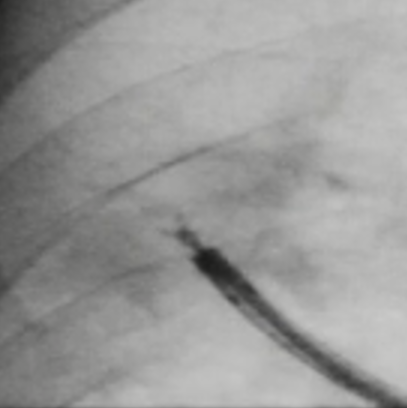
Sampling
The instrument channel of the BF-MP190F has a diameter of 1.7 mm, which is smaller than that of a standard 2.0mm instrument channel. Therefore, biopsy forceps with a diameter of 1.5 mm and a cytology brush with a diameter of 1.4 mm can be used.
Biopsy
The lesion in a peripheral bronchus might be sometimes visible within the endoscopic field of view. However, since the peripheral bronchi are thin, collapse easily and have poor visibility, there is no need to perform a biopsy under direct view if it is not allowed. After confirming the probe is positioned “within” the lesion in the EBUS image, wedge the bronchoscope in the bronchus and continue biopsies.
Since specimens collected with ultrathin forceps are smaller than specimens collected with ordinary forceps, several samples will be required. We usually collect 10 specimens and put each specimen in its own individual formalin-filled bottle to prevent loss. After collecting half the target number of biopsy samples (i.e., 5 specimens), reconfirm the lesion position with the probe. When withdrawing the thin forceps from the bronchoscope, pull slowly so as not to alter the orientation of the distal end of the scope.
If the thin forceps do not open properly, try opening the forceps by moving them back and forth.
After opening the thin forceps, apply the cup to the lesion and perform the biopsy.
If the lesion is located immediately below the pleura, take extra care to avoid pneumothorax.
The thin forceps has a small cup but still presents a risk of bleeding. If the endoscopic image reddens and the view deteriorates while the target lesion is visible in a larger size in fluoroscopy, there may be bleeding. In this case, wait for about 3 minutes while keeping the bronchoscope in the wedged condition until the bleeding stops, and then withdraw the scope slowly.
Brush cytology
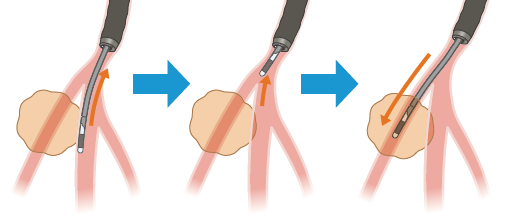
■ Insertion into the bronchoscope
Pull the ring to retract the brush into the tube, and advance the brush until the distal end of the insertion portion appears within the endoscopic field of view.
■ Collect tissue
Push the ring slowly to extend the brush from the tube and contact the target area.
Brush the target area to collect a tissue specimen.
Pull the ring to retract the brush into the tube before taking the brush away from the target area.
Bronchial washing
If the ultrathin bronchoscope has reached inside the lesion, withdraw the bronchoscope from the lesion to reduce the risk of intratumoral infection due to washing and then wash the lesion with a small amount (about 5 ml) of saline.
2 hours after completion, check that there is no pneumothorax with fluoroscopy.
In the peripheral bronchus, the washing solution could not be obtained sufficiently because of the collapse of the bronchi due to the deflation. While suctioning, slowly withdraw the bronchoscope from bronchi and try to collect the washing fluid. Then the bronchoscope can be removed through the tracheal tube and the washing fluid remaining in the operation channel can be collected in the collection container by suctioning the sterilized physiological saline.
- Content Type