Grasping the needle
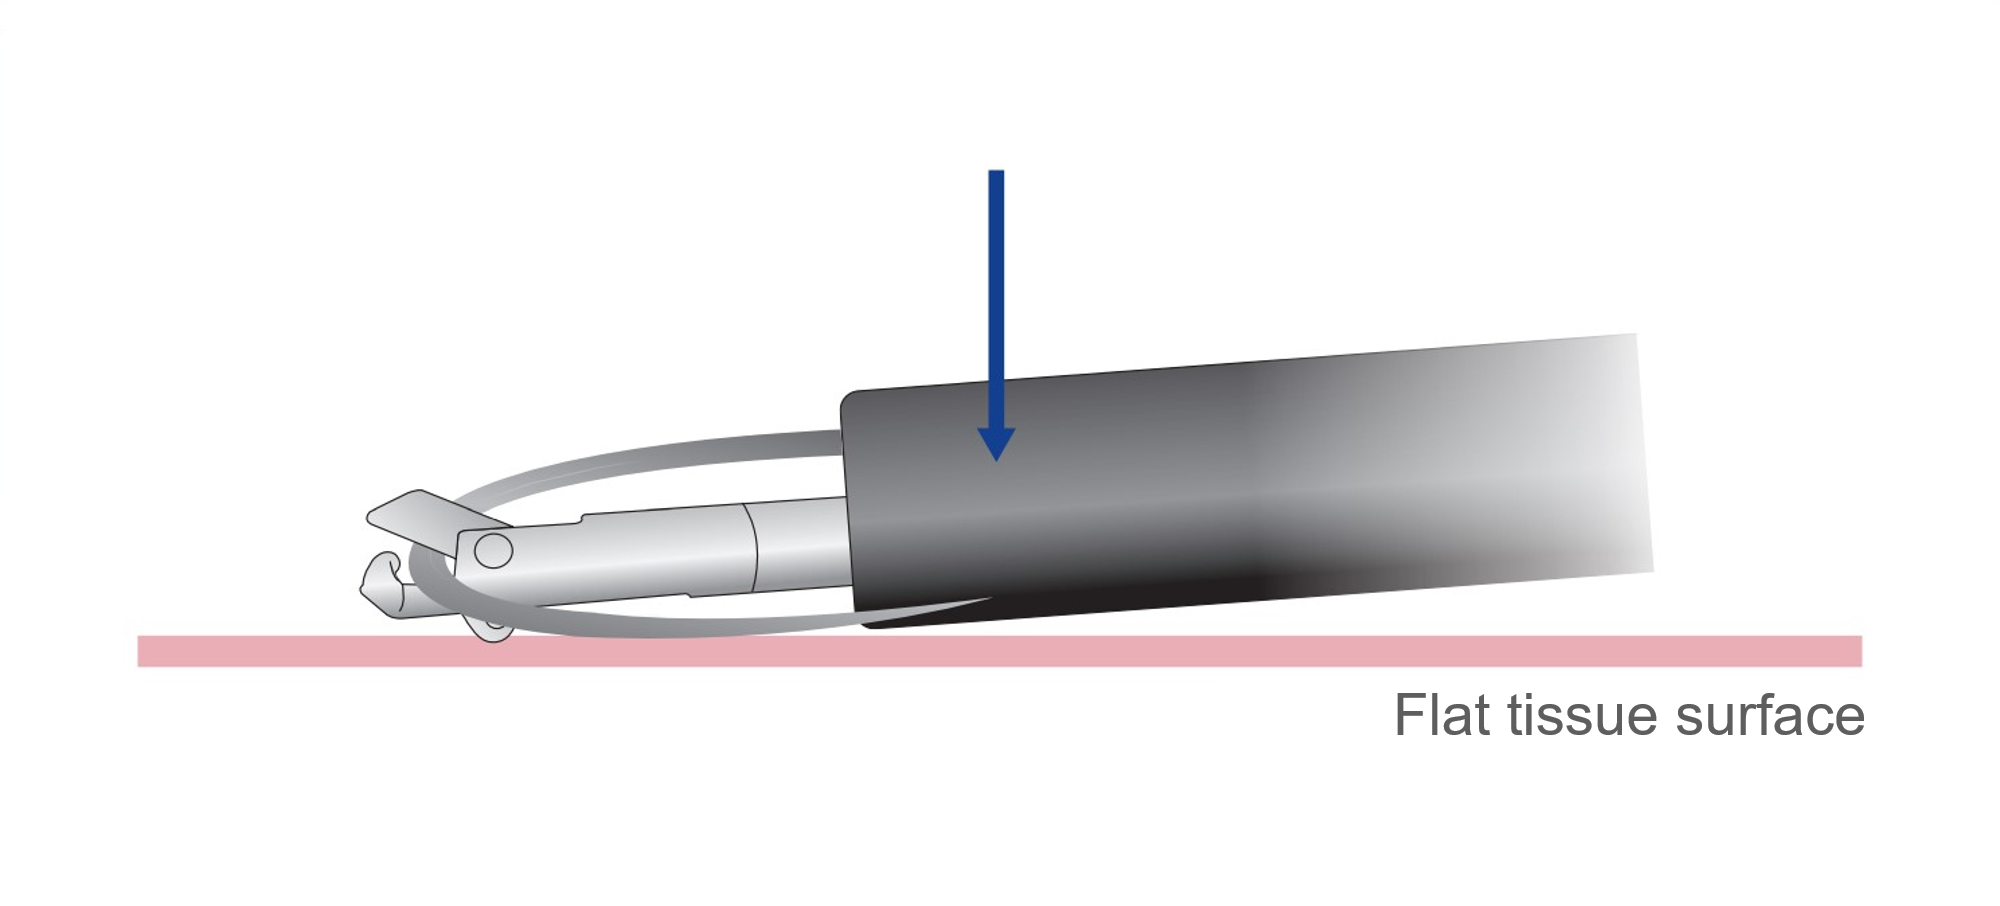
Place the needle on a flat surface in the direction of gravity
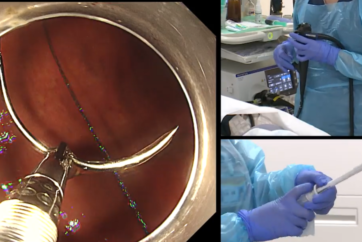
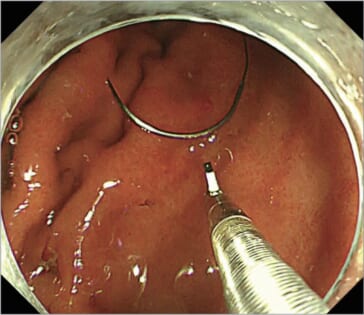
After confirming that the entire needle and suture (including the end of the suture) has completely entered the target site, grasp the needle.
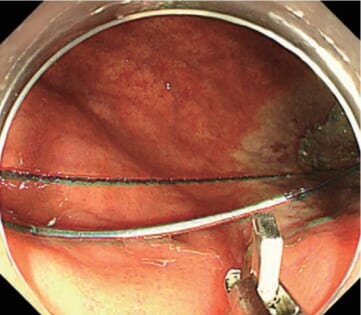
Move the needle to an appropriate position in the lumen using the needle-holder so that the tip of the needle is pointing in the direction in which suturing will be performed. If the channel outlet on the distal end of the scope is positioned in the 5 o’clock direction, move the needle to a flat place in the direction of gravity inside the lumen so that the tip of the needle points to the left. If any water or blood is still in the lumen, the needle may be submerged, making it difficult to see. To prevent this, perform sufficient suction beforehand (Photo 1)
-
(Photo 1)

Grasping the needle and approaching the target
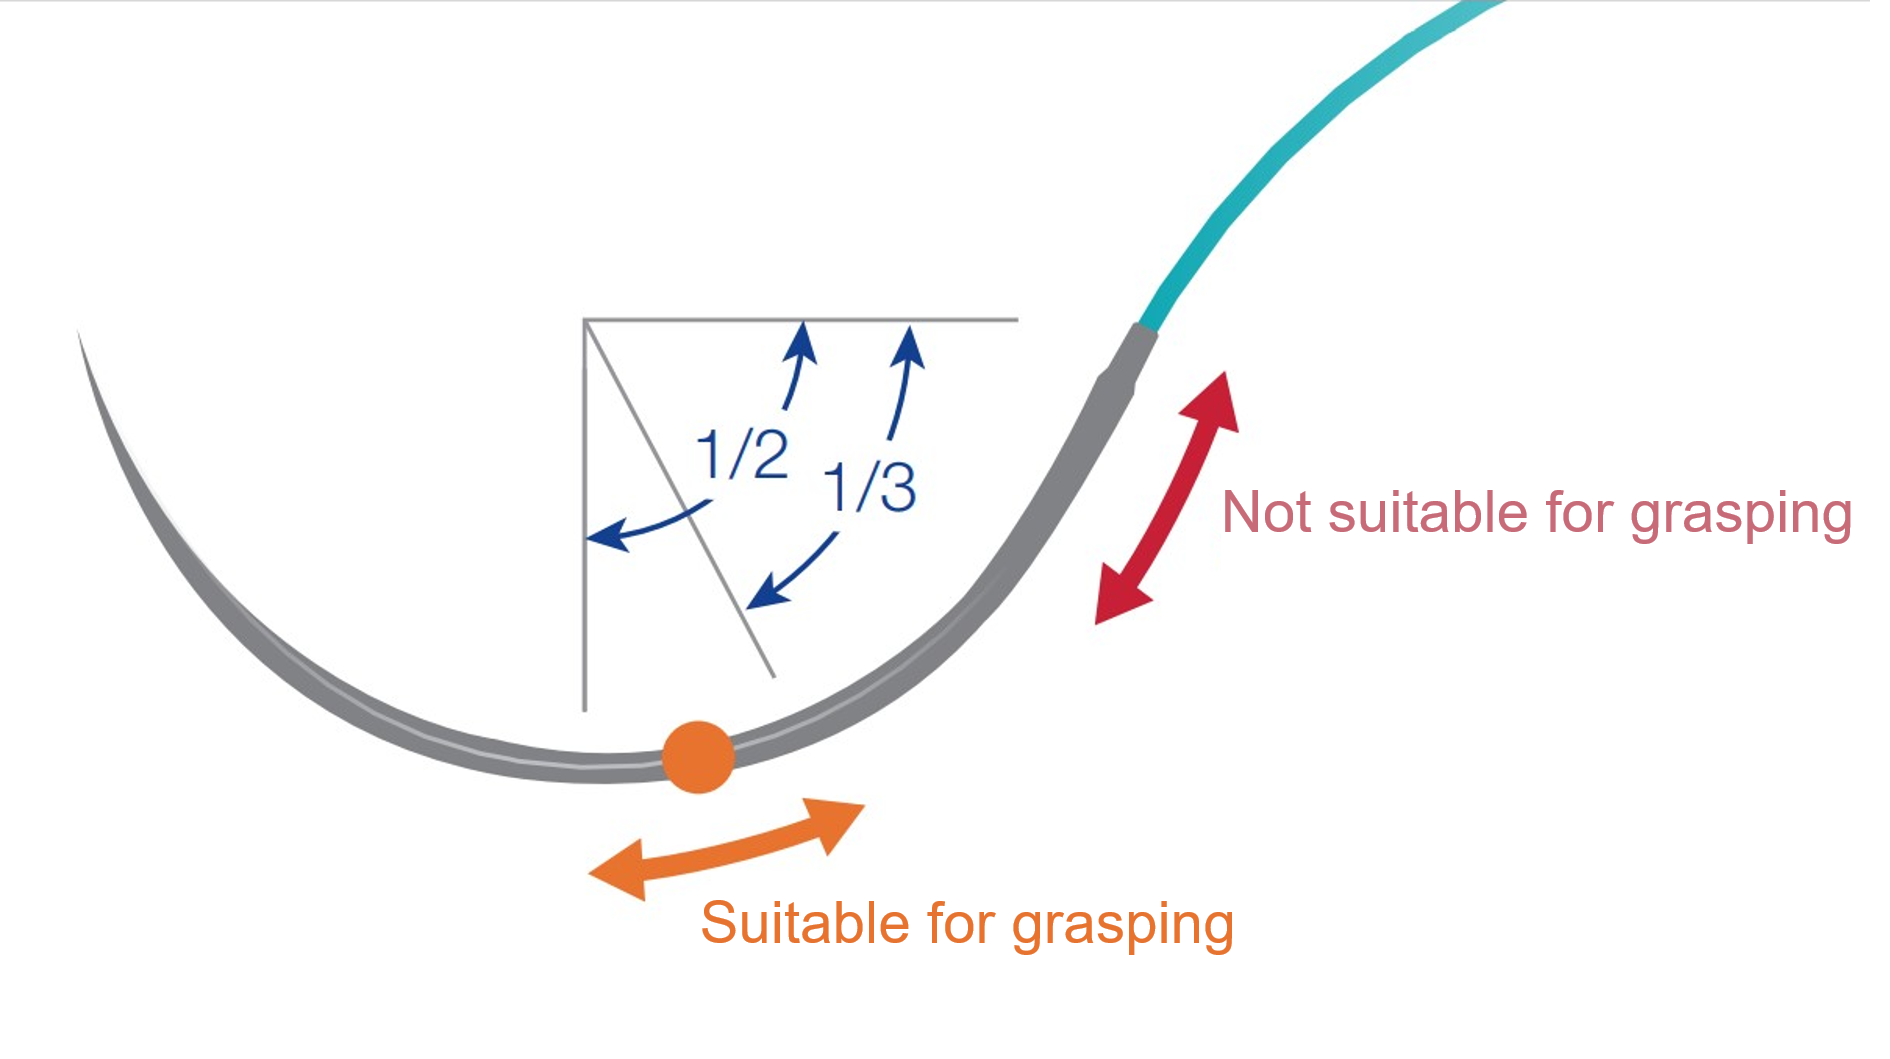
Grasp the needle at a point roughly 1/3–1/2 of its length from the swaged end
To ensure you can maneuver the needle properly, it must be grasped at the right point. If it’s grasped too close to the needle point, the needle won’t be able to puncture the tissue, making it difficult to maintain a firm grasp. If it’s grasped too close to the swaged end, clamping strength will be reduced because the end of the needle is rounder and harder to lock onto securely. For best results, grasp the needle at a point 1/3–1/2 of the needle length away from the end.
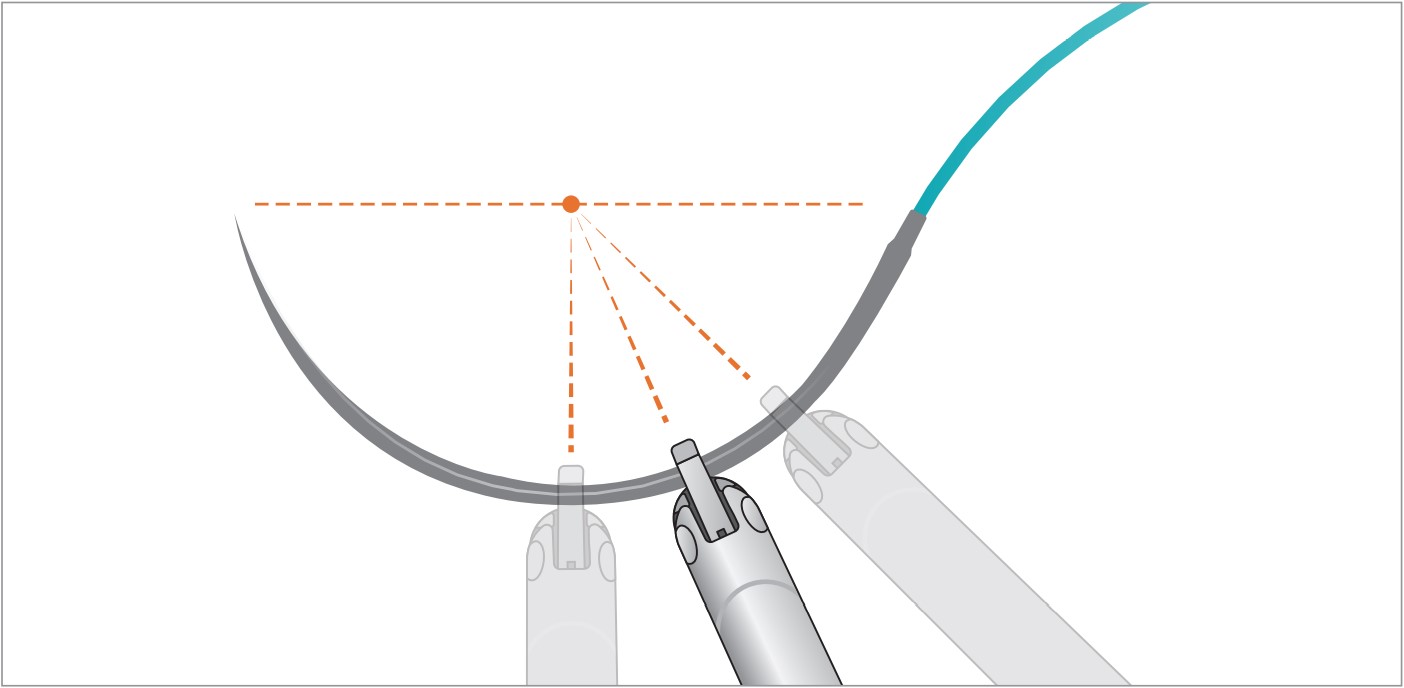
Approach the needle pointing the needle-holder’s tip so that it’s perpendicular to the center of the needle arc
While maneuvering the scope so that the tip of the needle-holder points to the center of the needle arc, bring the needle-holder close to the needle.
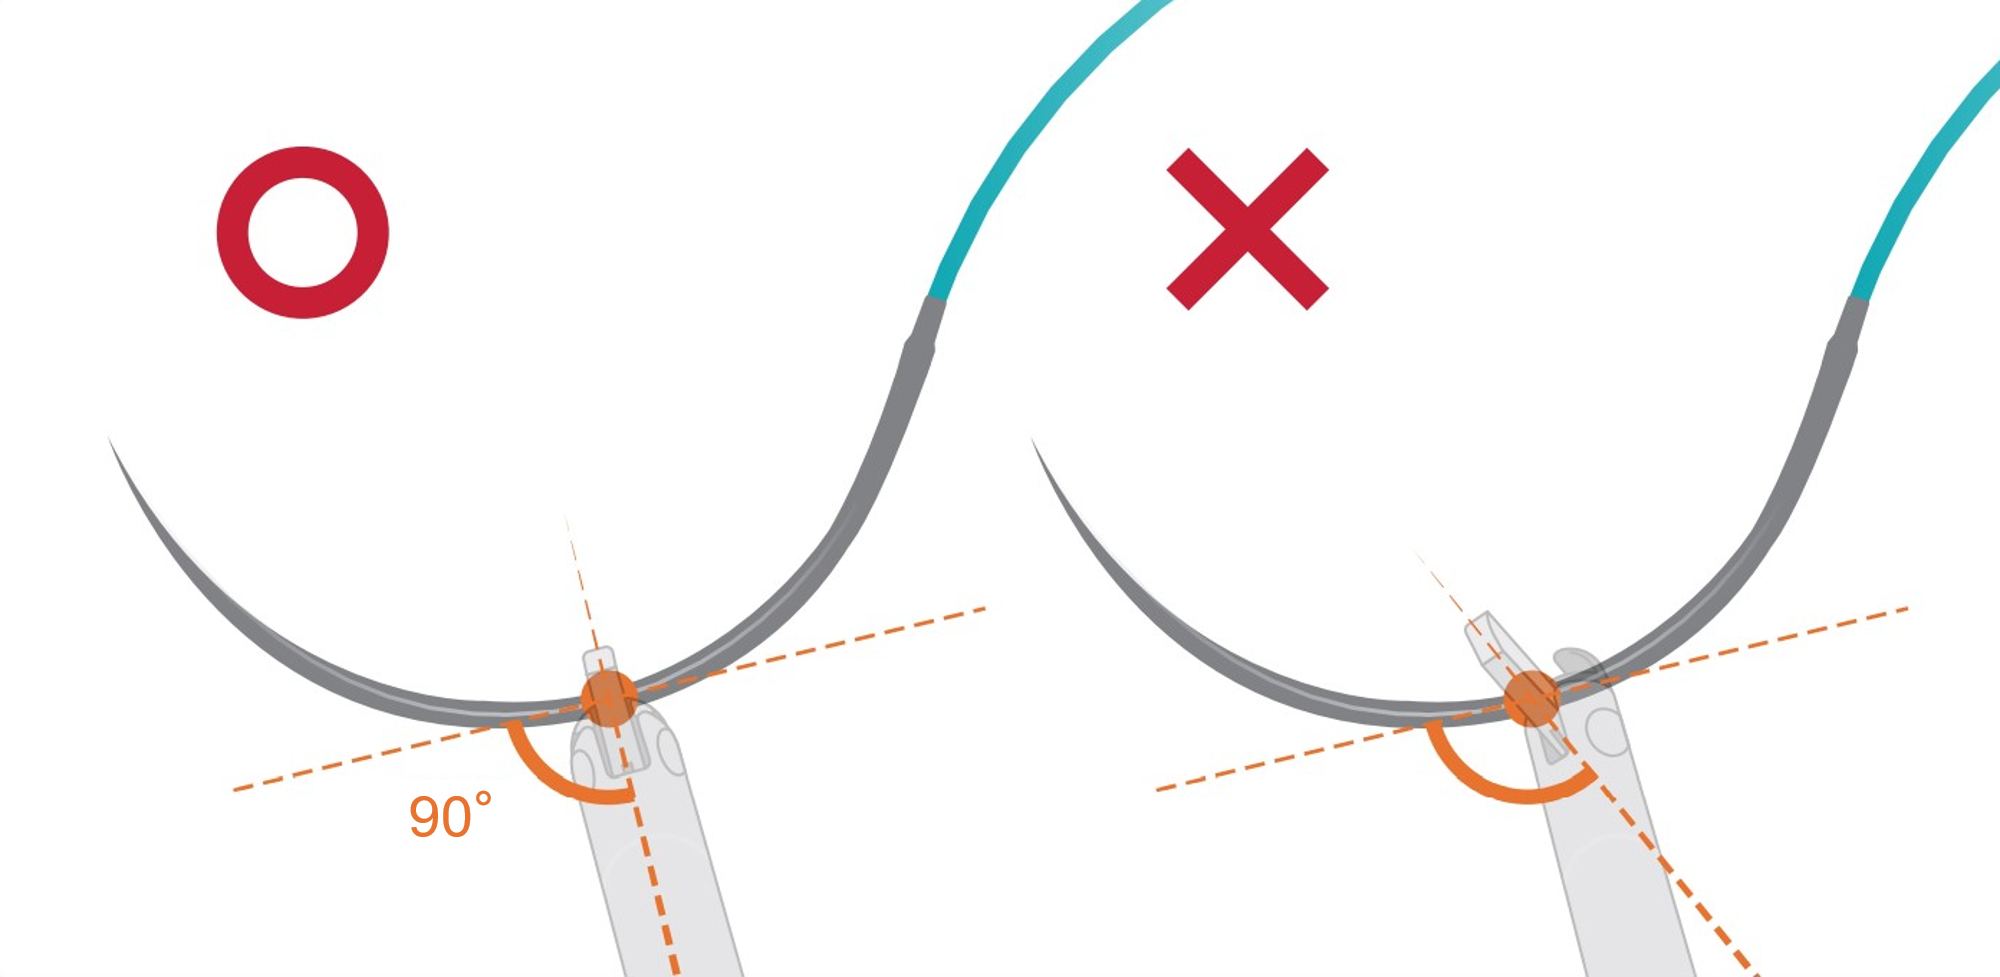
Rotate the needle-holder so that the raised jaw is perpendicular to the needle
Turn the control section of the needle-holder until the open jaw is perpendicular to the needle. If the jaw is oblique to the needle, the needle may slide away and the jaw will close without grasping the needle . Grasping is sometimes possible even in this condition; however, the tip of the needle won’t rotate correctly when the needle-holder is twisted, making it difficult to puncture the tissue. Similarly, when the needle is placed on the distal hook of the needle/suture bracket and the jaw is closed, the needle may slip off if force is applied to the needle.
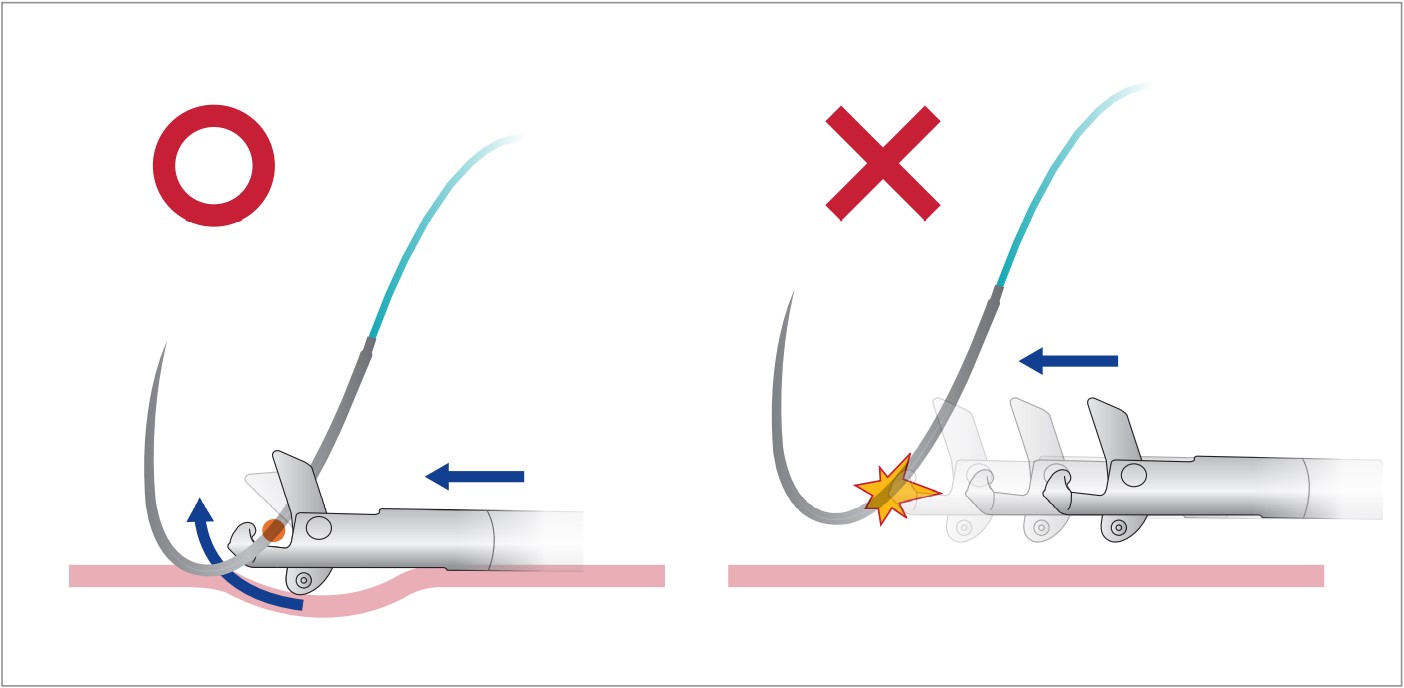
Hook the needle with the tip of the needle-holder to grasp it
Place the needle between the movable jaw and the needle/suture bracket and pull the slider towards the thumb ring to grasp the needle. While doing so, focus on the hook on the distal side of the needle/suture bracket and manipulate the needle-holder as if picking up the needle from below. When the jaw closes and the needle is secured, pull the slider halfway while pressing the needle slider’s tip gently against the wall so that the arc of the needle is perpendicular to the needle-holder. When the needle is grasped at an appropriate angle, pull the slider all the way.
Grasp the needle in close view
When you try to grasp the needle in distant view, you will find it difficult to get a sense of distance in the depth direction regarding the positioning of the needle-holder tip. This increases the likelihood that the tip will close without grasping the needle . Try to grasp the needle while observing the needle-holder tip in close view.
-
(Photo 1)
-
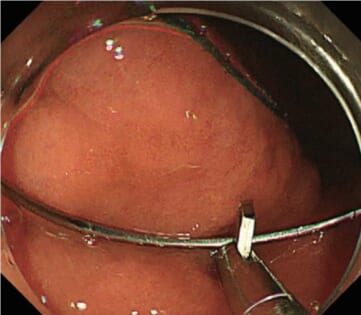
(Photo 2)
-
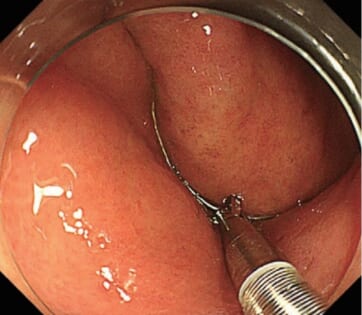
(Photo 3)


Correcting the needle direction
When the arc of the needle is not perpendicular to the needle-holder
Loosen grasping
When the arc of the needle is not perpendicular to the needle-holder (the needle is lying down), press the ratchet release button while the length of the tip is gently pressed down against the wall to loosen the grasping. And keep the needle grasped loosely.
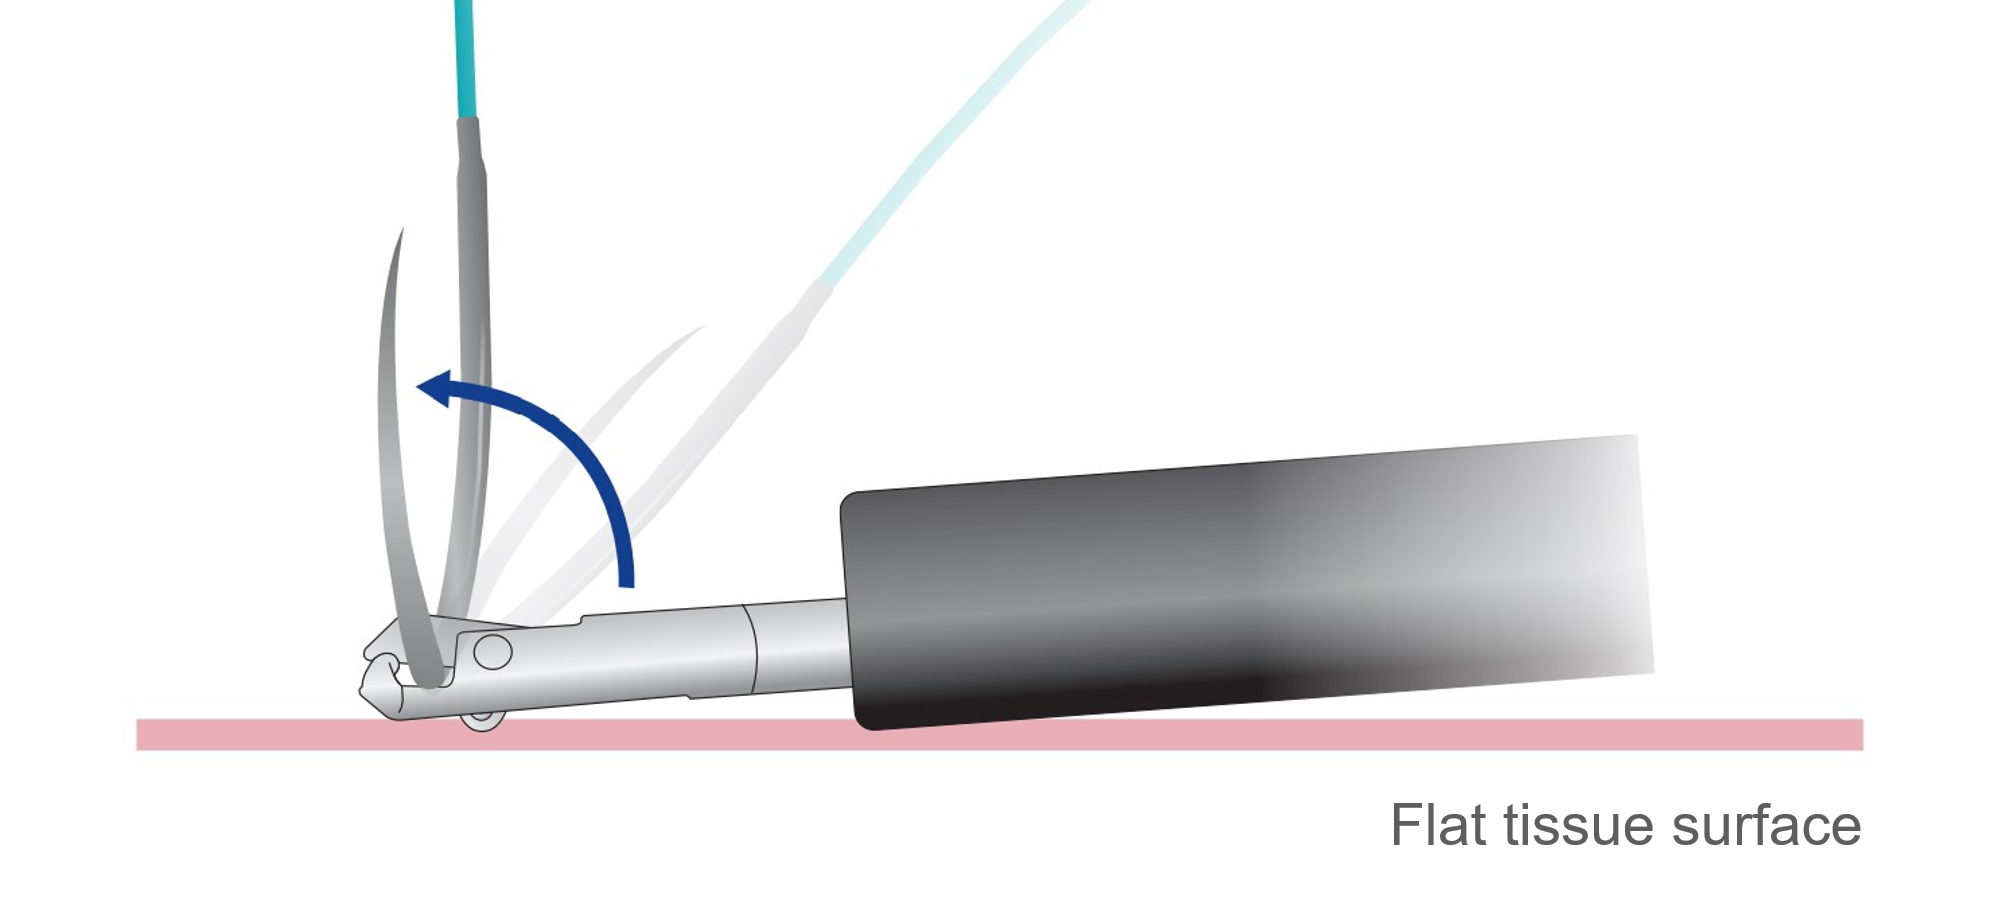
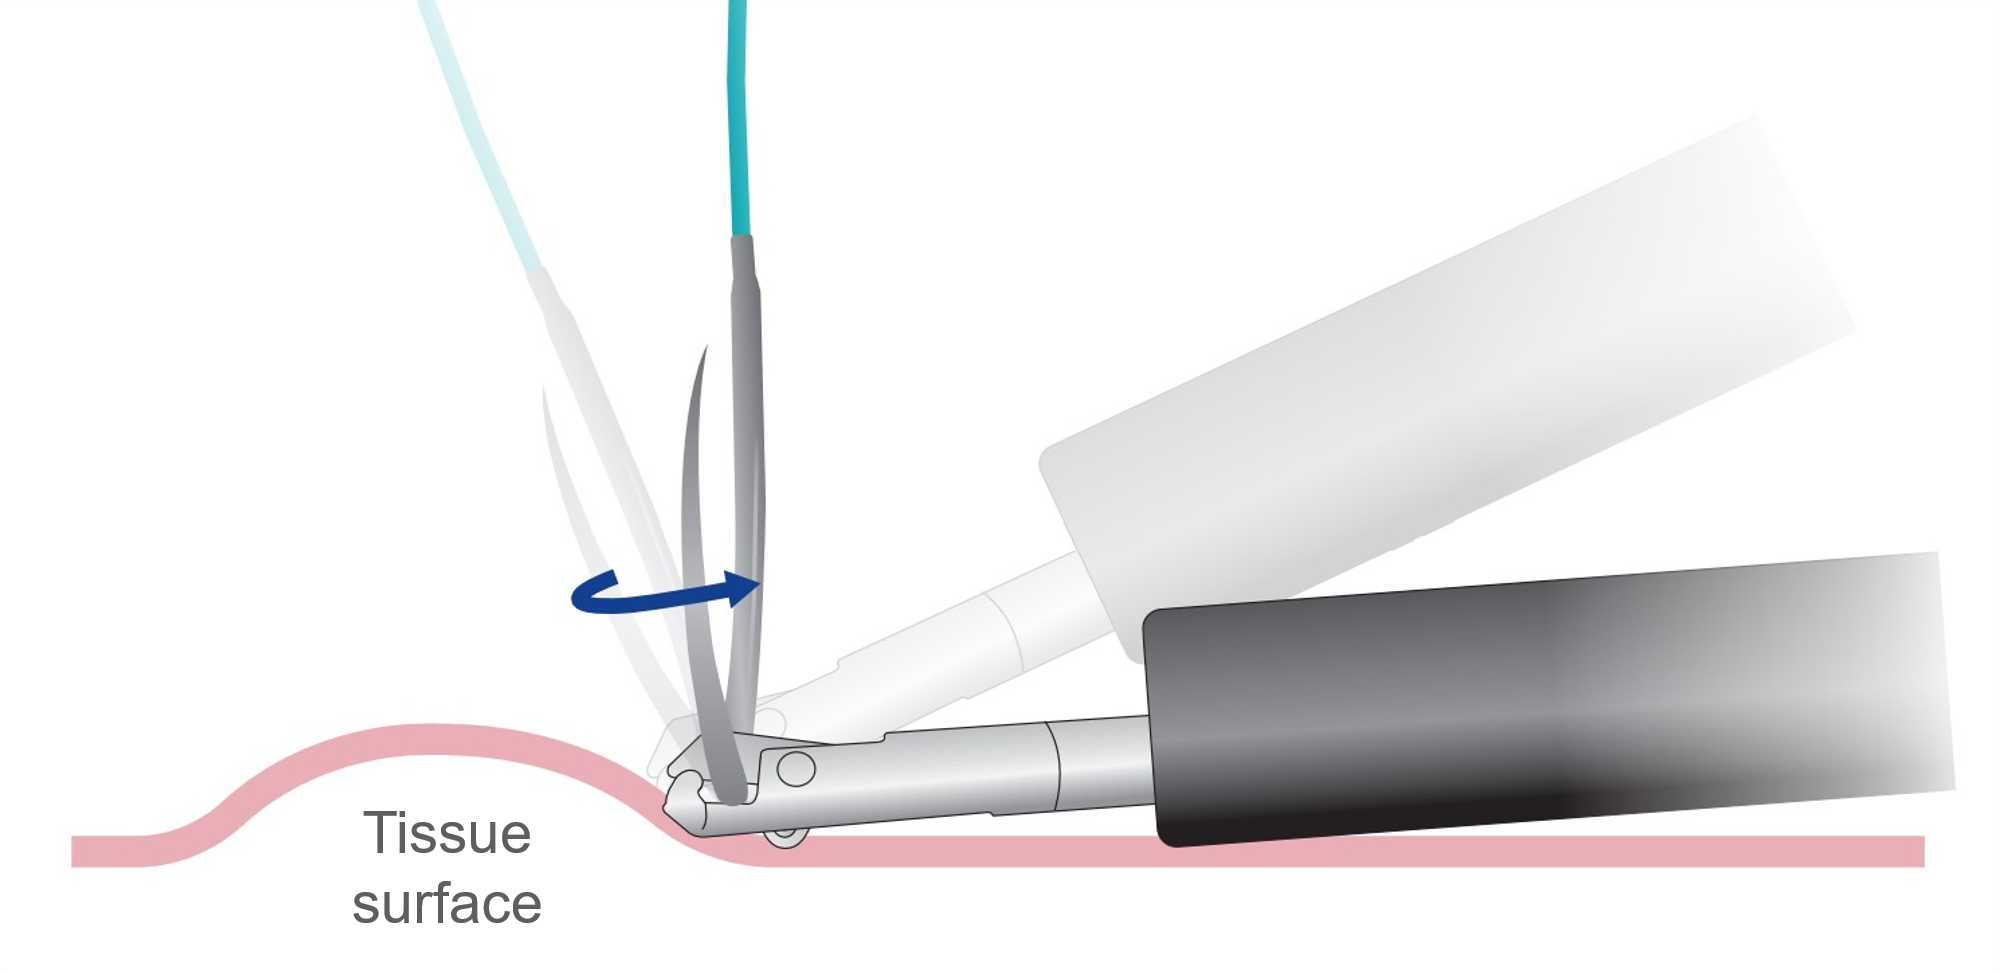
Press the needle against the wall to raise it
Gently grasp the needle and bend the scope tip downward to gently press the needle against the mucosa. The mucosa will push back on the needle and raise at it to an appropriate angle. When the arc of the needle is perpendicular to the needle-holder, pull the slider all the way to tightly grasp the needle.
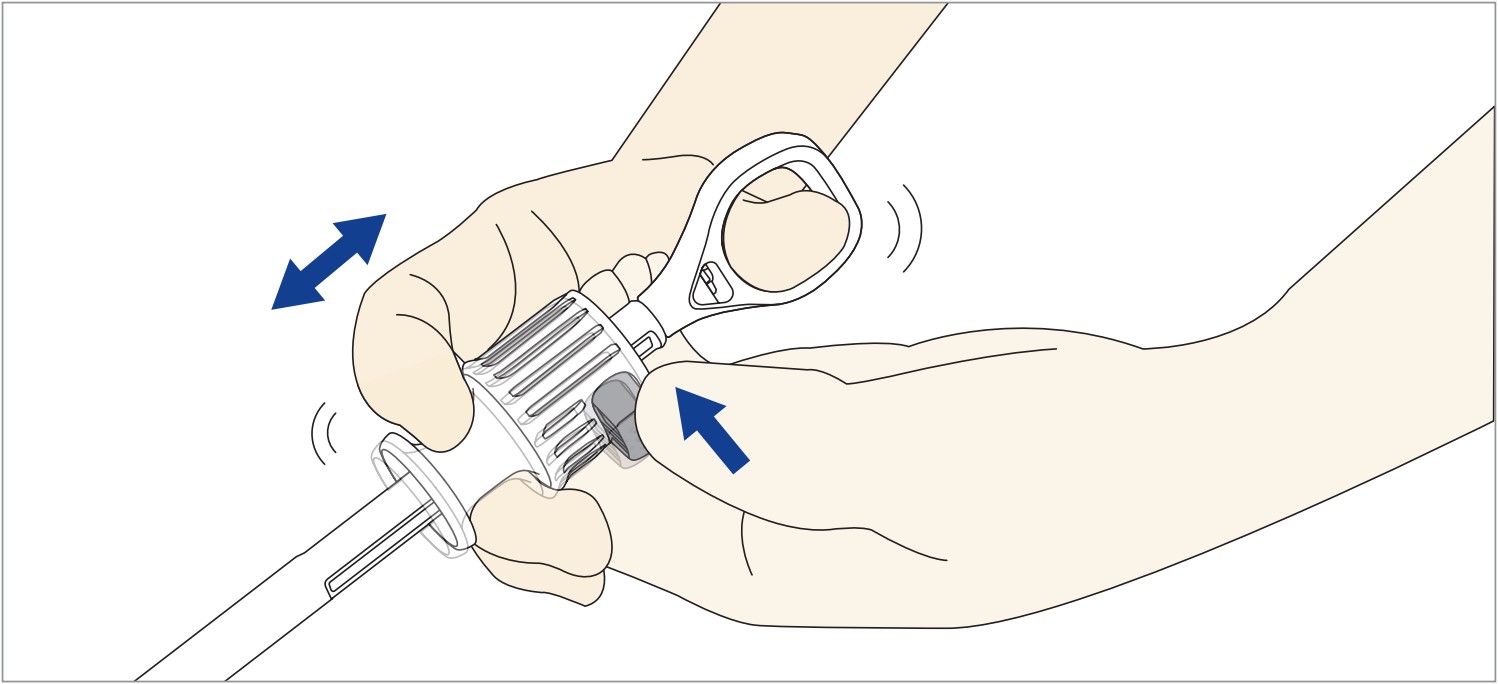
If the needle cannot be raised easily, move the slider back and forth in short strokes
If you find it difficult to raise the tip and the end of the needle, you should move the slider back and forth in short strokes to apply vibrations to the tip of the needle-holder. By doing so, you may be able to raise the arc of the needle properly.
When the needle is grasped obliquely
Loosen the grasp
As described above, gently release the ratchet while the tip of the needle-holder is gently pressed against the wall to make a loose grasping.
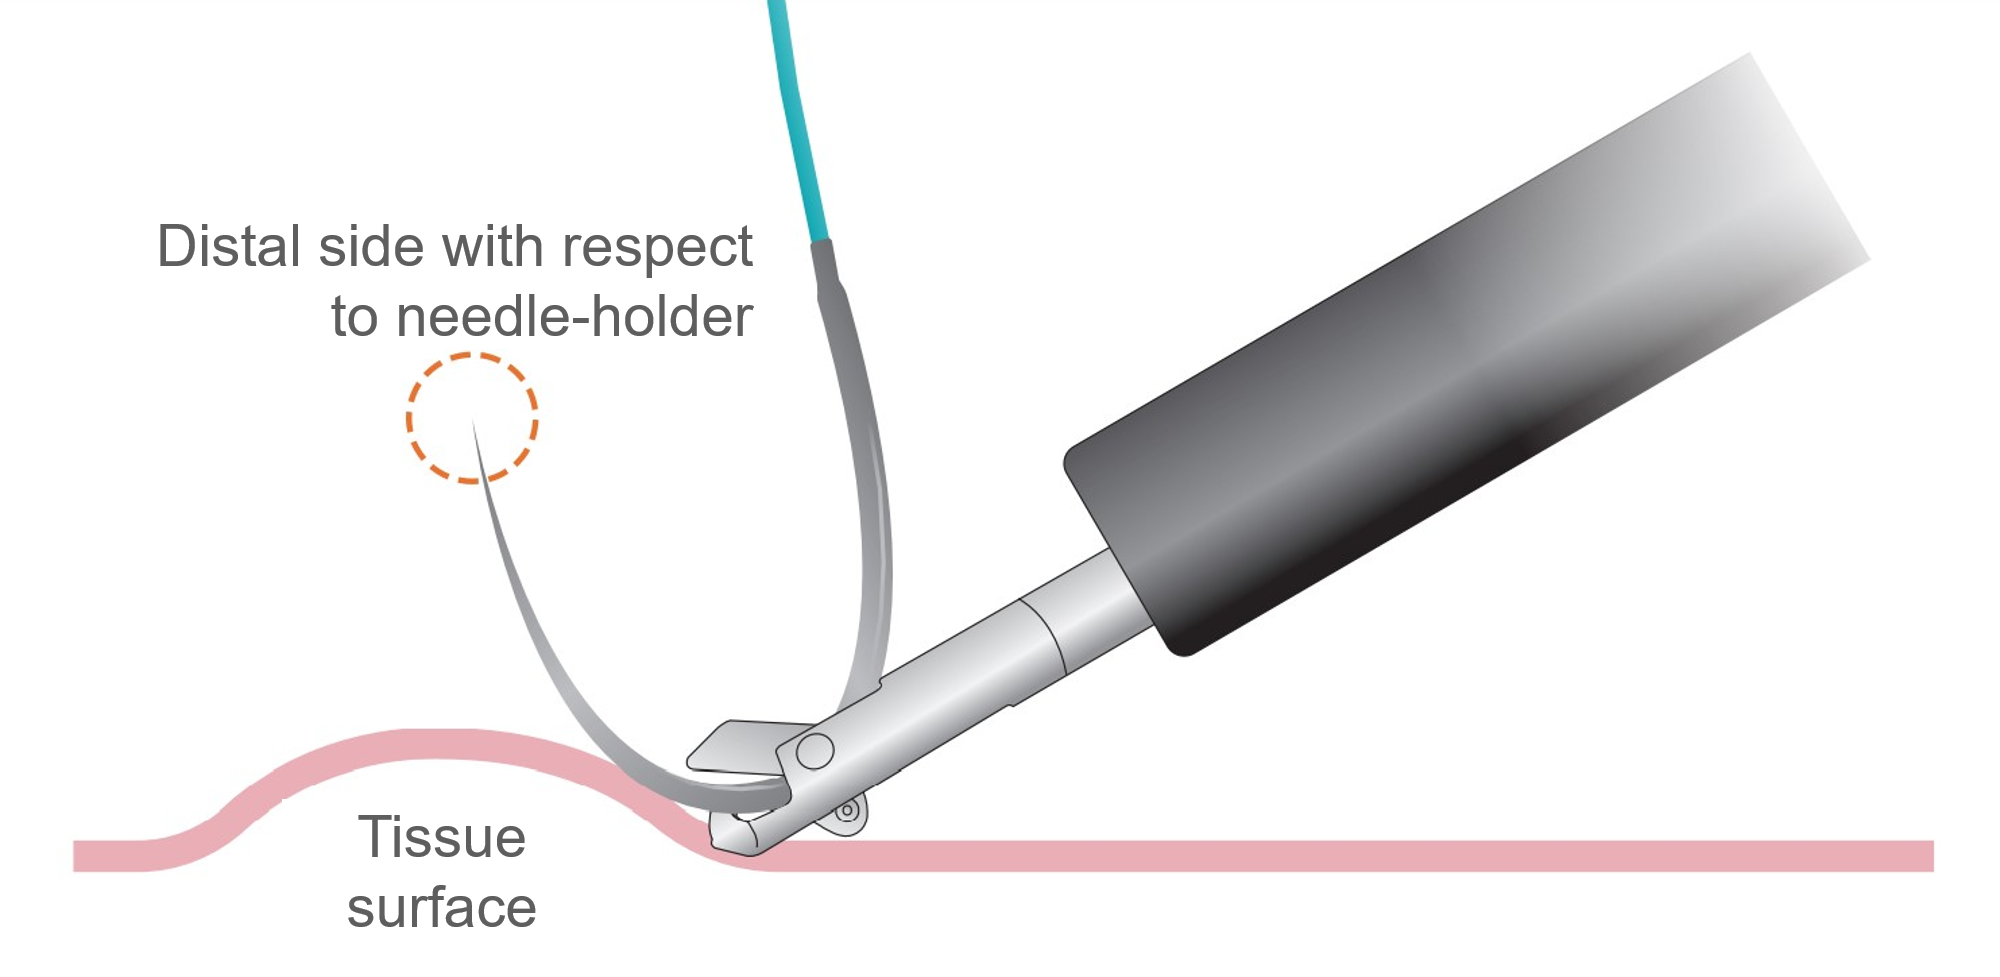
Press the distal side of the needle with respect to the needle-holder against the wall
Slowly press either end (point or swage ) of the needle on its distal side with respect to the needle-holder against a fold on the GI tract, for example, to correct the angle of the needle. When the line that connects the needle point and swage is perpendicular to the needle-holder, pull the slider all the way to tightly grasp the needle.
- Content Type