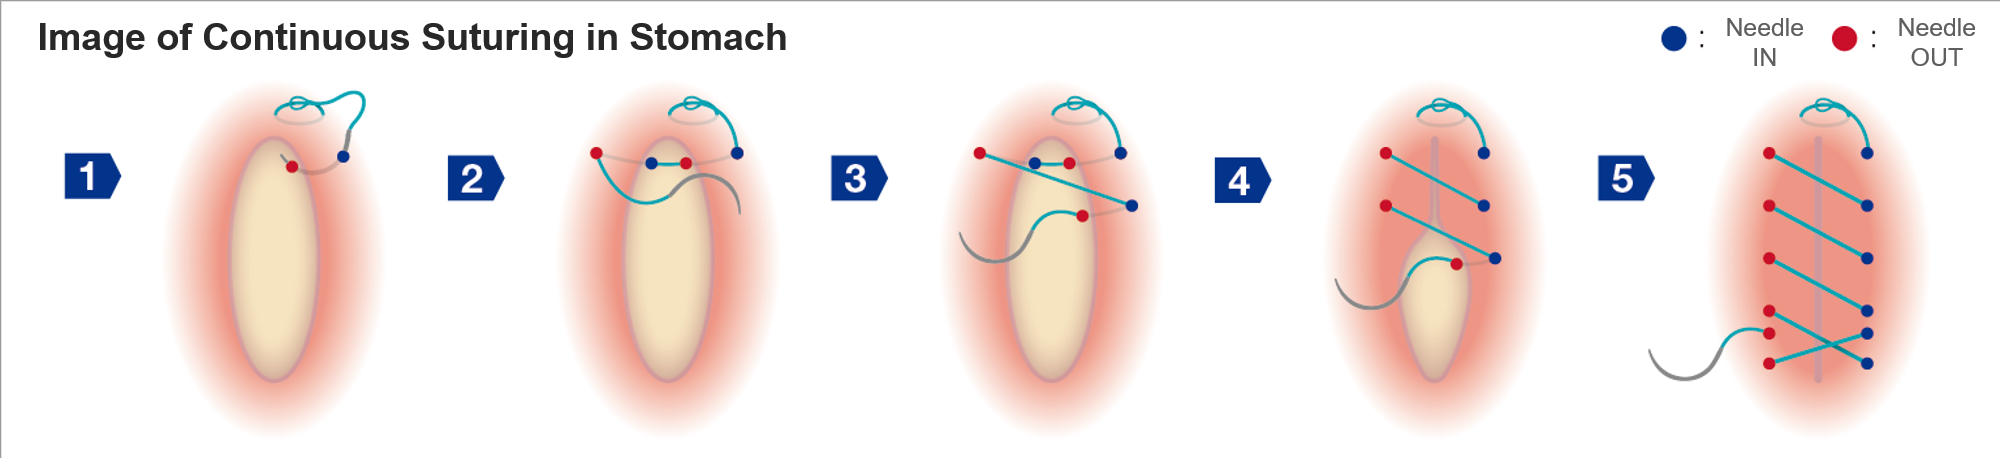
Continuous suturing
Keep the suturing target properly positioned in the field of view
In general, you should perform a continuous suture from the distal side to the proximal side of the endoscopic field of view. In other words, start suturing from the anal side when using a forward maneuver and from the oral side when using a retroflex maneuver. The easiest position for suturing is with the target tissue in the 6 o’clock direction. Maneuver the scope so that the puncture point is as low as possible in the field of view. When the needle is being maneuvered, the scope needs to follow the direction in which the needle is being advanced. The trick here is to position the scope tip so that there is plenty of room to move it around as much as the needle is going to be maneuvered. It is also a good idea to bend the scope tip in all directions to get an idea of how maneuverable it is.
Maintain sufficient distance between the scope and needle
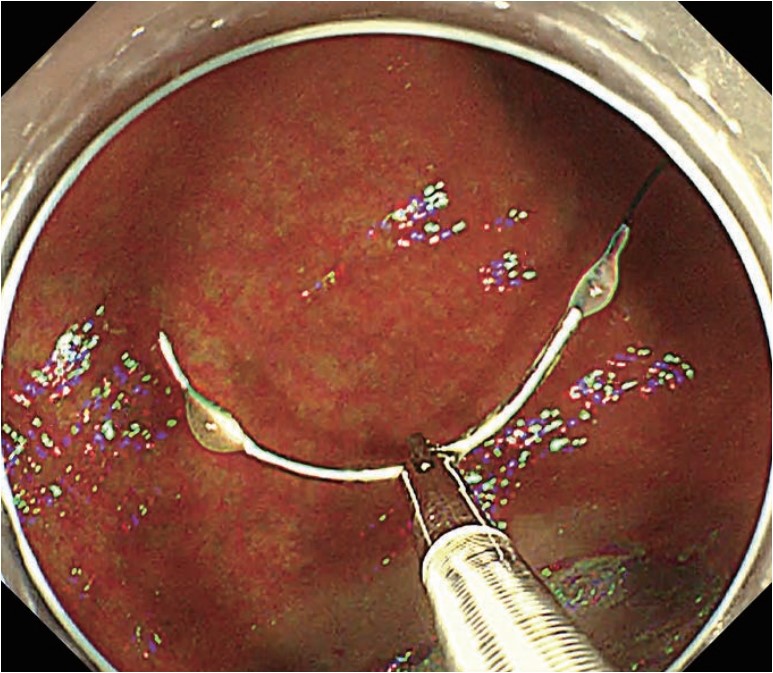
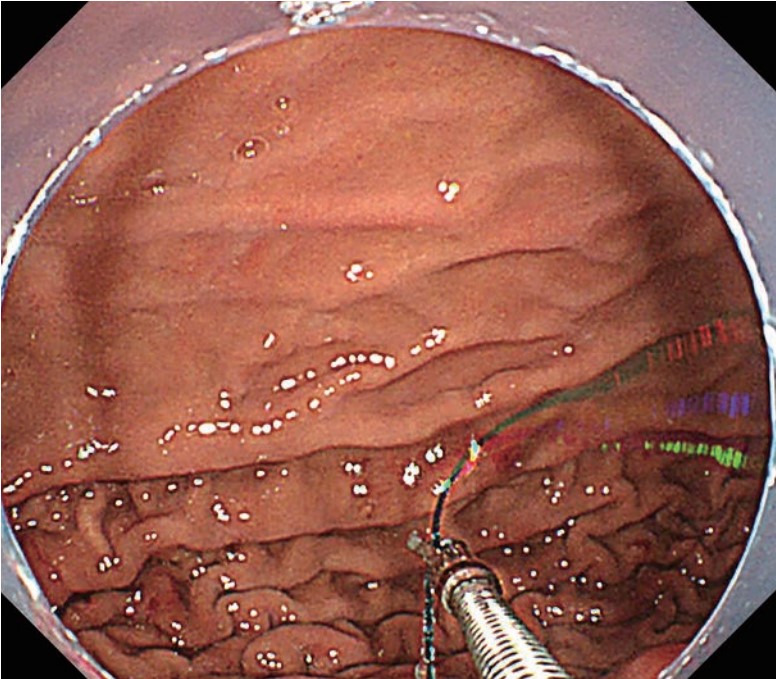
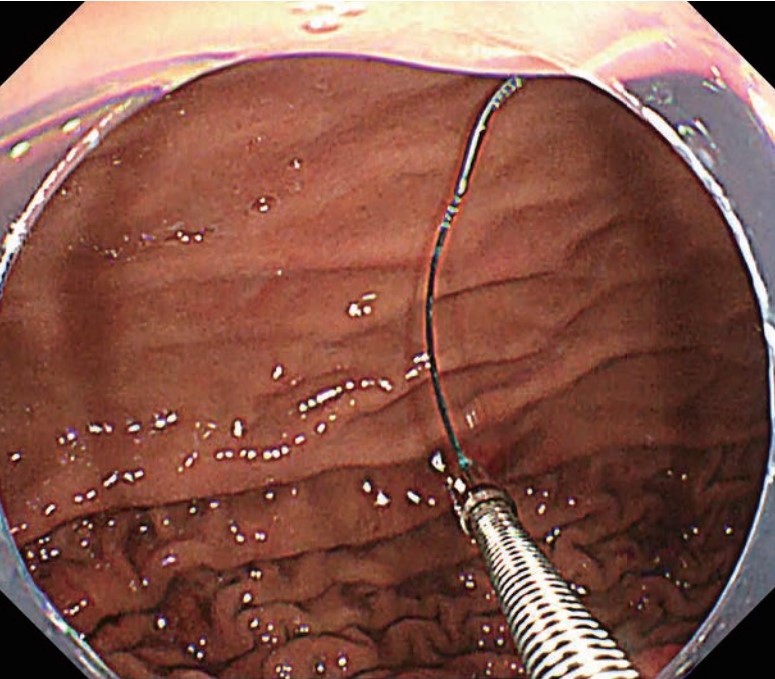
If the needle is too close to the scope when it is being maneuvered, you may lose sight of the needle point , making it impossible to safely puncture the tissue. If the needle is too far from the scope, accurate puncturing will be difficult because the needle-holder shaft will be warped, making it difficult to transmit force to the needle point. Be sure to keep the right distance between the needle and scope. (Photos 1–4)
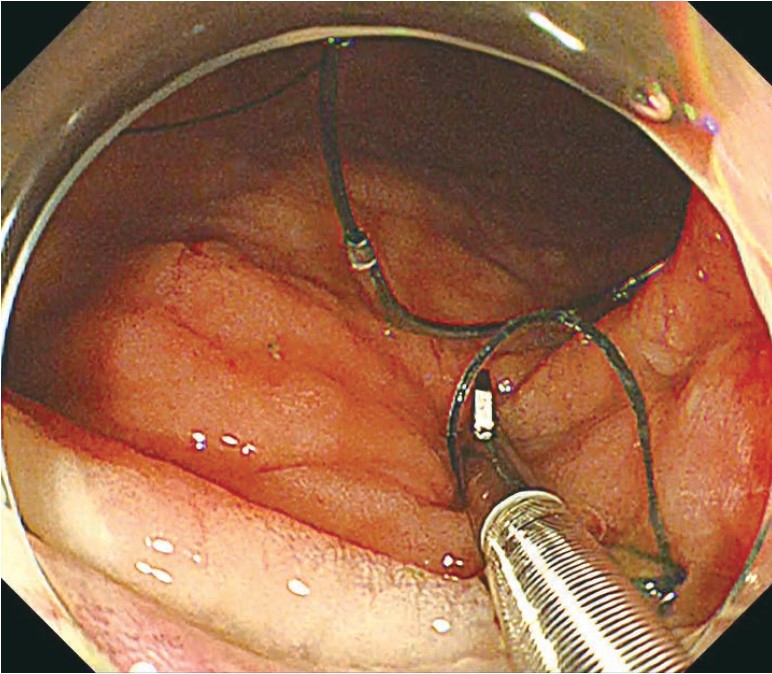
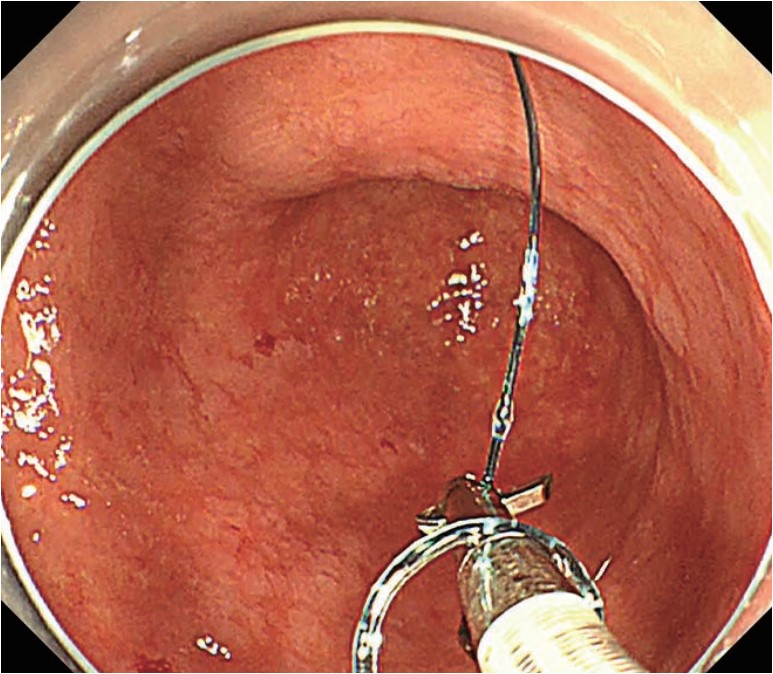
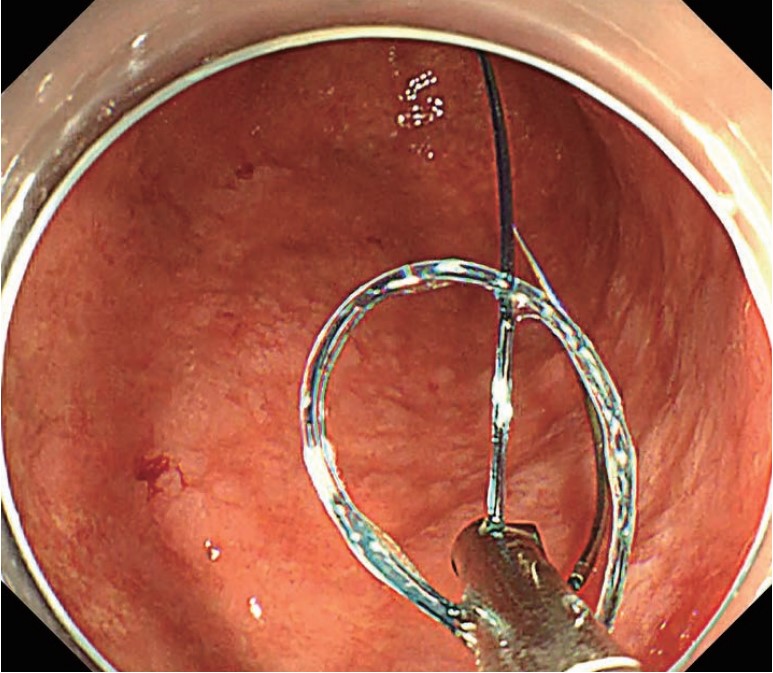
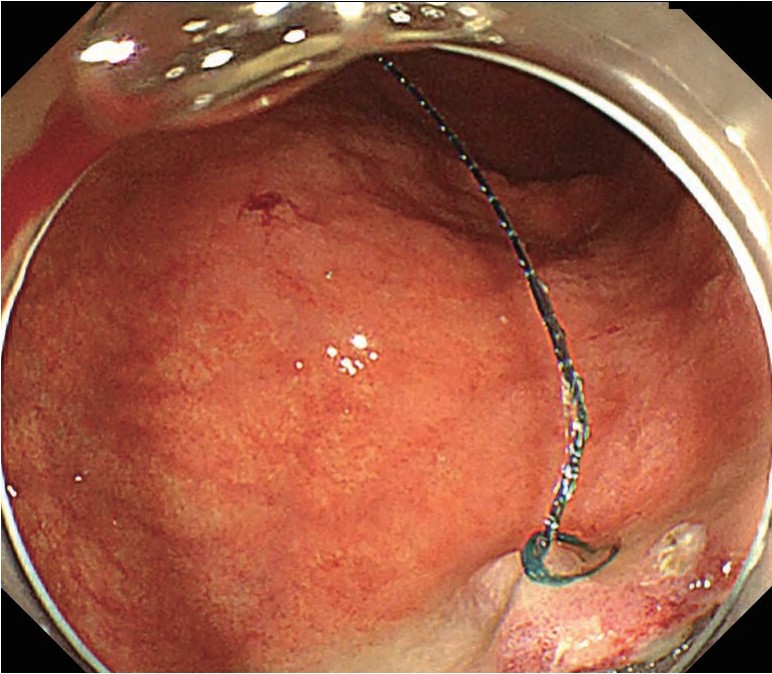
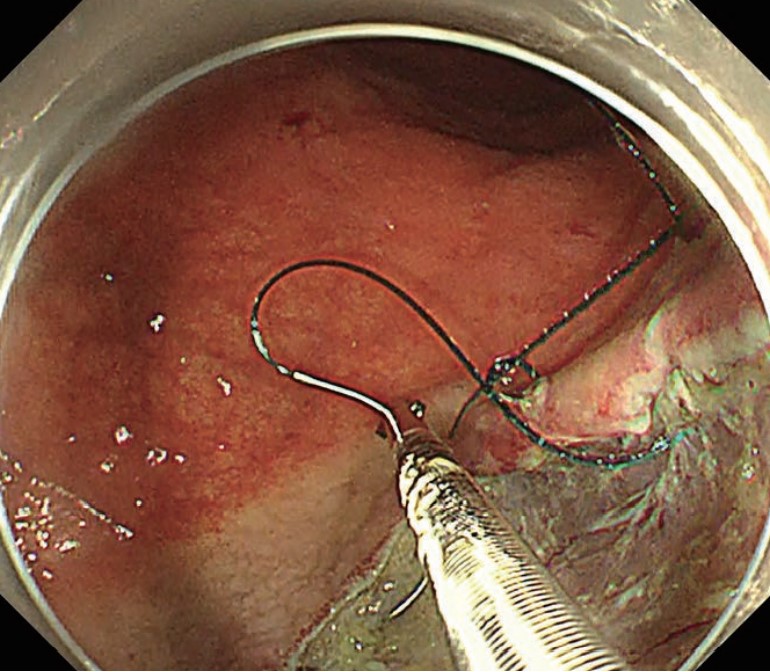
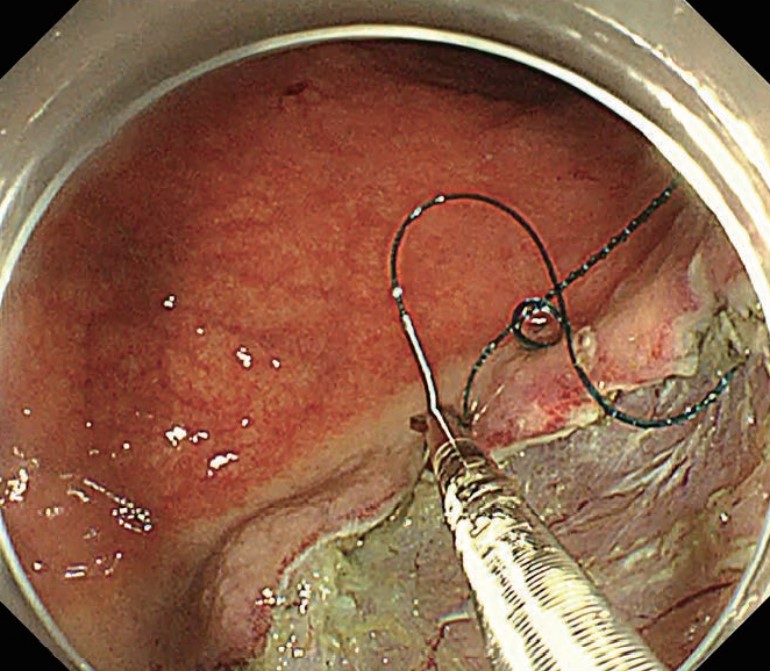
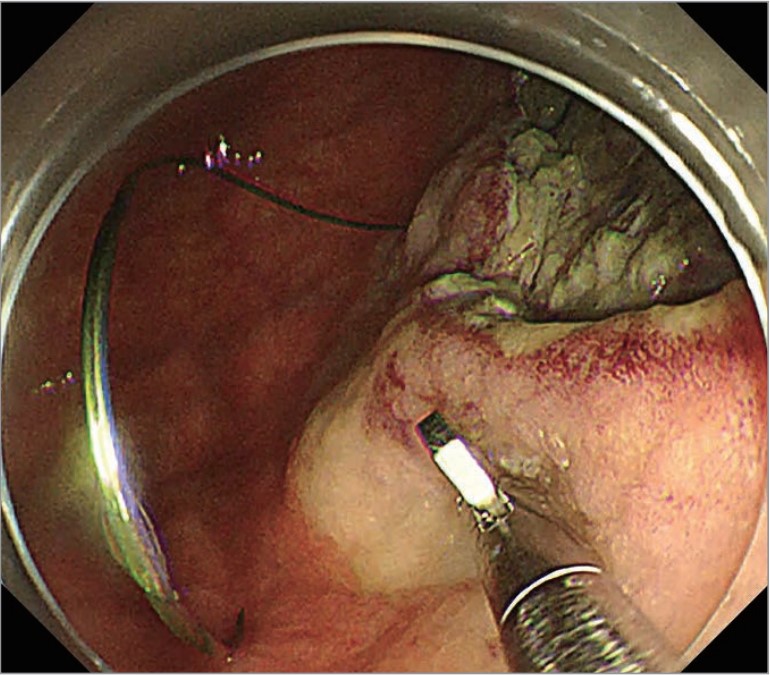
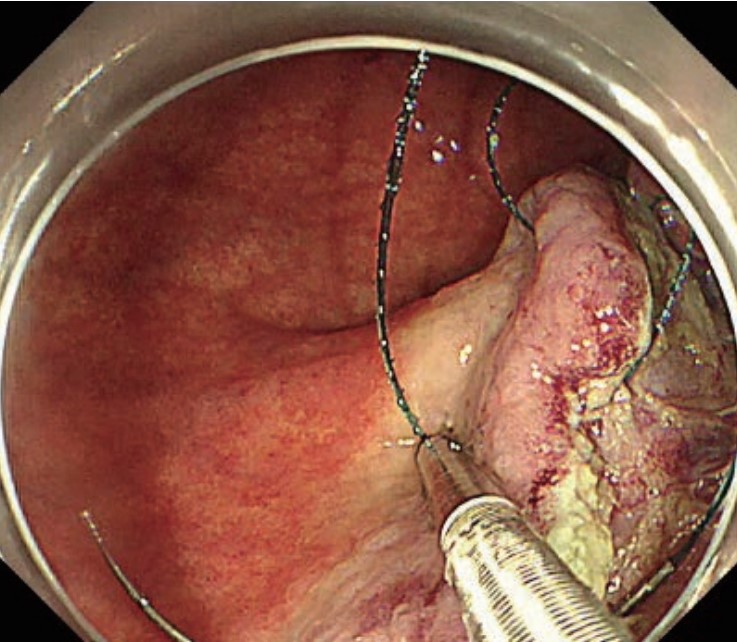
Secure the loop at the end of the suture after the initial puncture
After the initial puncture, pull the suture to bring the loop at the end of the suture close enough to the puncture and place the needle on the distal side of the loop (Photo 1). Pass the needle-holder through the loop, grasp the suture near the needle (Photo 2), and pull the needle-holder so that the entire needle passes through the loop (Photo 3). Confirm that the needle has passed all the way through the loop and then stitch the site securely by pulling the suture until the loop is almost closed to fix the suture (Photo 4). As for the needle and suture, use the Covidien V-Lock™. Use the 26 mm VLOCL0604 in the stomach. When space is limited as in the colon, use the 17 mm VLOC0804.
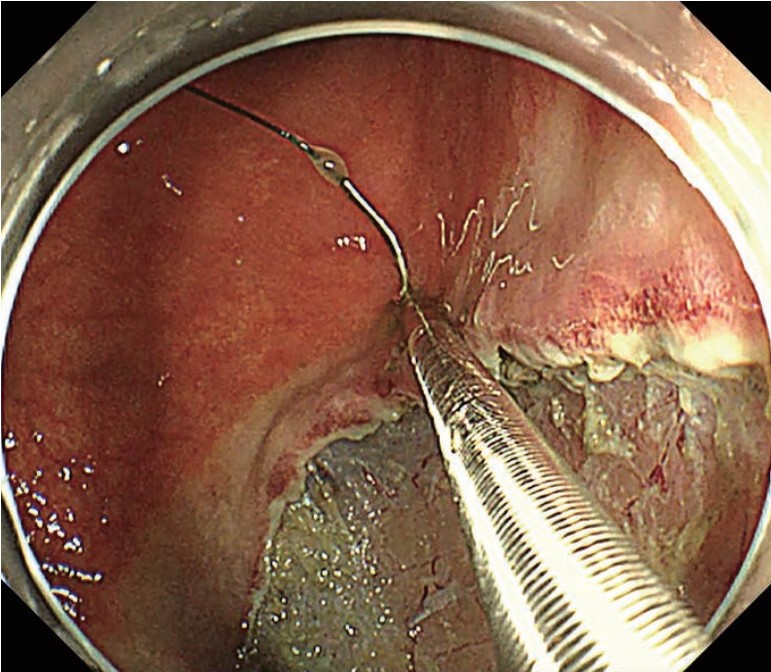
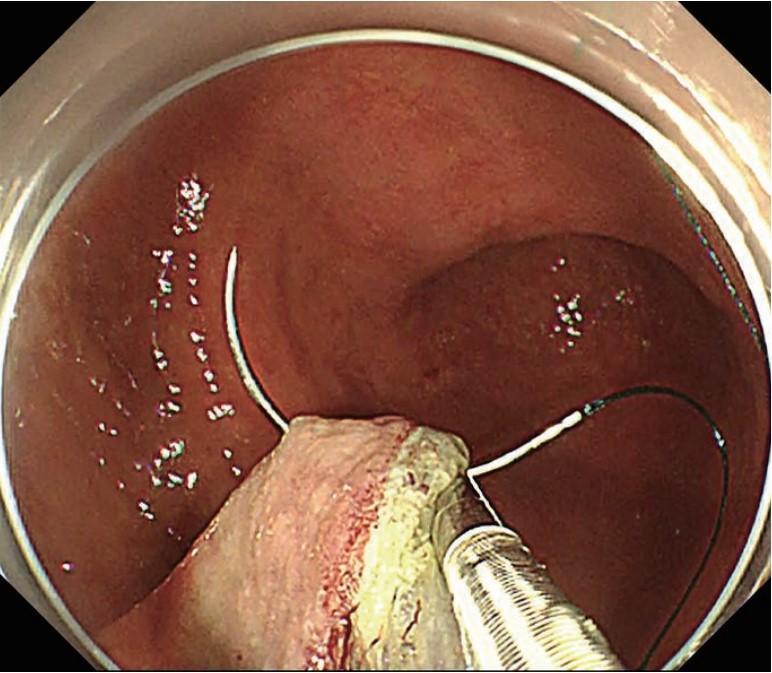
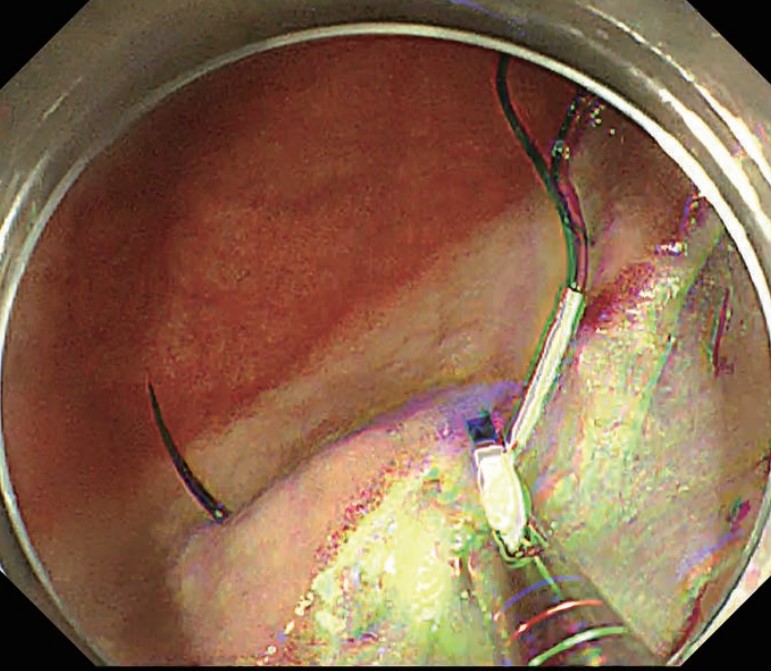
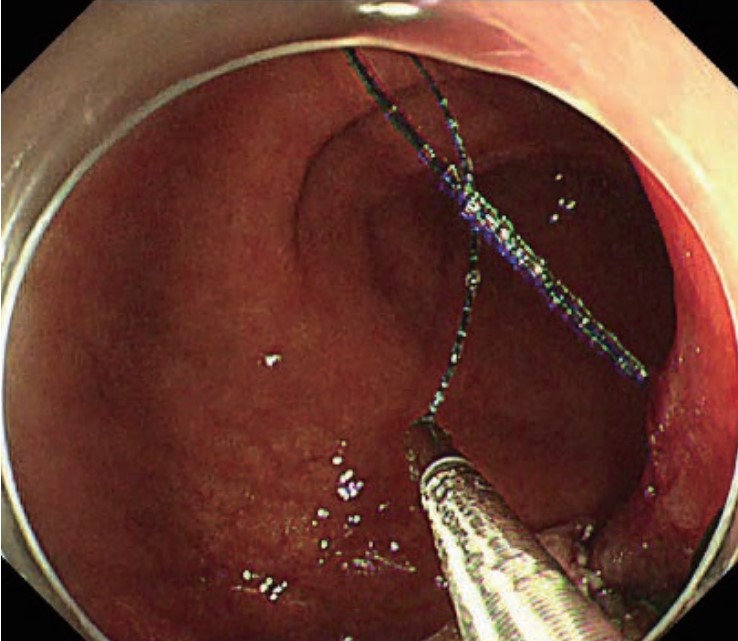
Move the needle in and out of the tissue by coordinating the scope and needle-holder. Have the assistant point the tip of the needle in the appropriate direction, then push, pull, and bend the scope to approach it to the target and puncture the tissue (Photo 1). The assistant should now twist the needle-holder until the orientation of the needle point is parallel to the muscularis. Advance the needle through the tissue by bending the scope tip to left and right (Photo 2). When the puncture is deep enough, bend the scope tip and twist the scope shaft as required, while the assistant twists the needle-holder as necessary to push the needle point out of the tissue (Photo 3). Once the needle has penetrated the tissue sufficiently, have the assistant slowly open the jaw to release the suture (Photo 4). While doing this, the assistant should twist the needle-holder to bring the jaw closer to the swaged end of the needle to make it easier to release the suture from the needle-holder. Then grasp the point of the needle again to pass the needle through the tissue.
Do not release the needle if possible
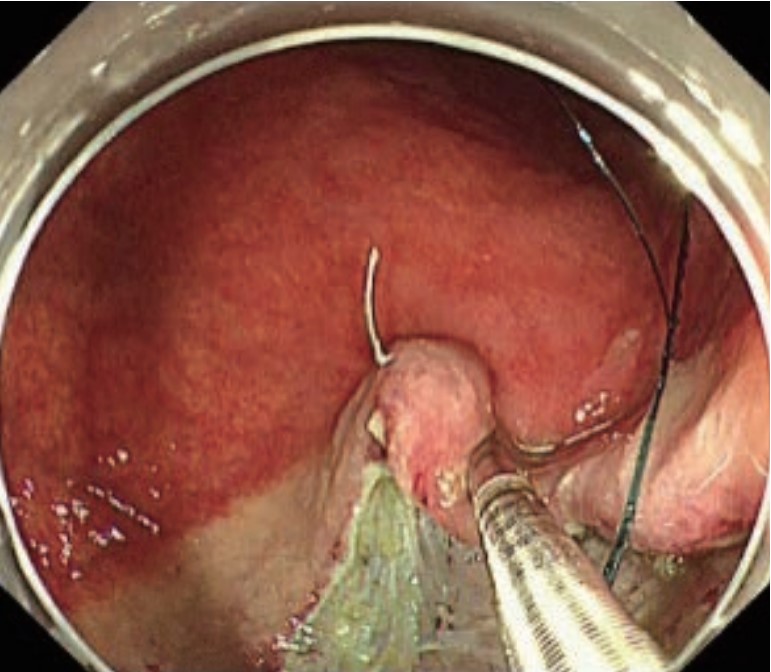
One of the most difficult aspects of this technique is to grasp the needle at the right point and angle when the needle is released (Photo 1). Avoid releasing the needle during manipulation and try to keep the needle in the tissue at all times (Photo 2). That way, the needle can be secured, and you can grasp it at the right point.
-

(Photo 1)
-

(Photo 2)
Basic maneuvering is the same
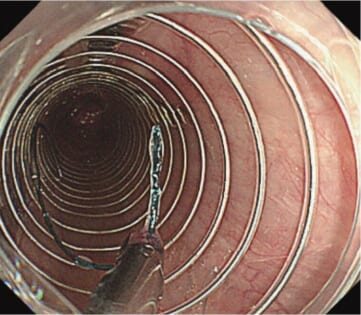
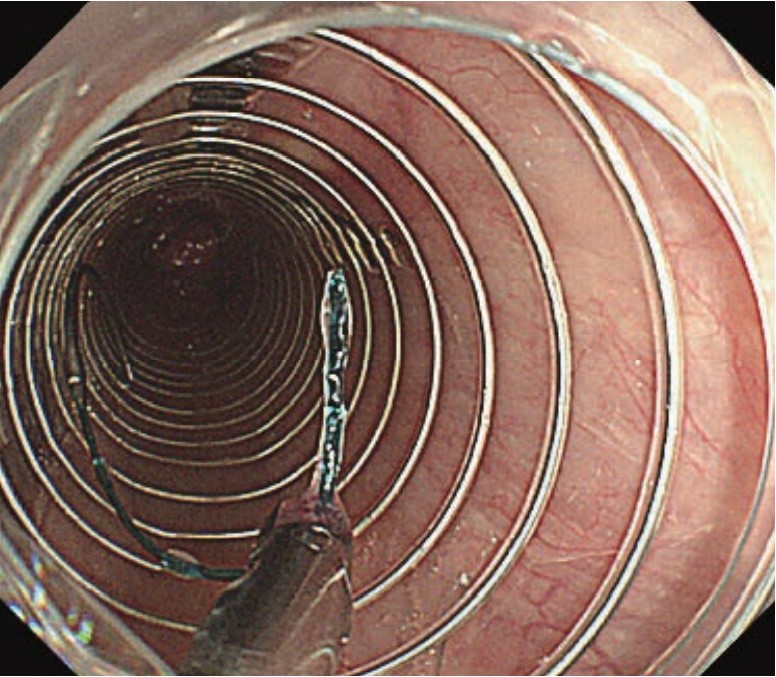
When you perform EHS in the colon, basic maneuvering of the needle is the same as in the stomach. Grasp the needle at an appropriate point and move the needle in and out of the tissue by coordinating the scope and needle-holder. As the colon has a smaller lumen and thinner mucosa than the stomach, use a small 17 mm needle.
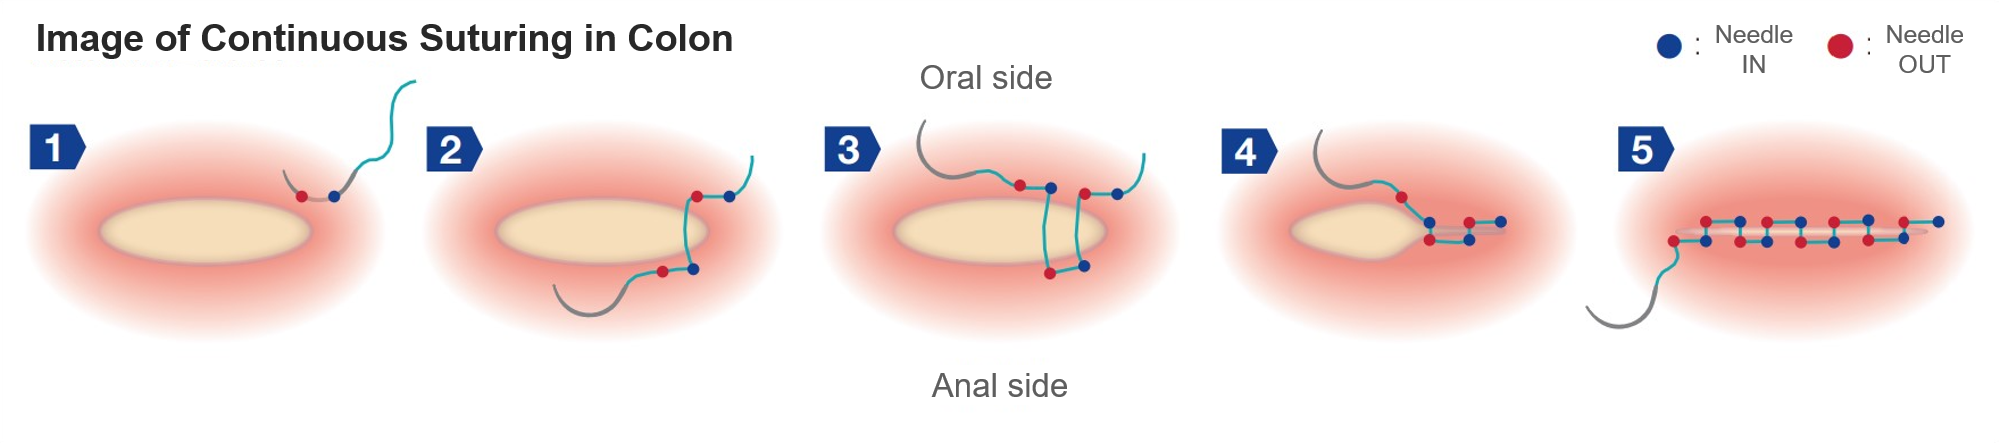
Suture the site along the long axis of the lumen to make the suture line in the short axis direction
Because space is limited in the colon, intestinal stenosis may occur if the suture line is made in the long axis direction of the lumen as in the stomach. Thus, suture the site while closing the mucosal defect as if bringing the tissue proximally and distally with respect to the lumen. In other words, pass the suture thread through the tissue alternately on the oral and anal sides and suture the site as if the stitches cross the defect longitudinally along the lumen.
Closure
Grasp and pull the suture on the needle after it has penetrated the tissue
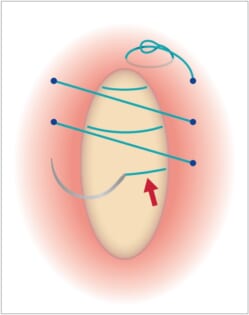
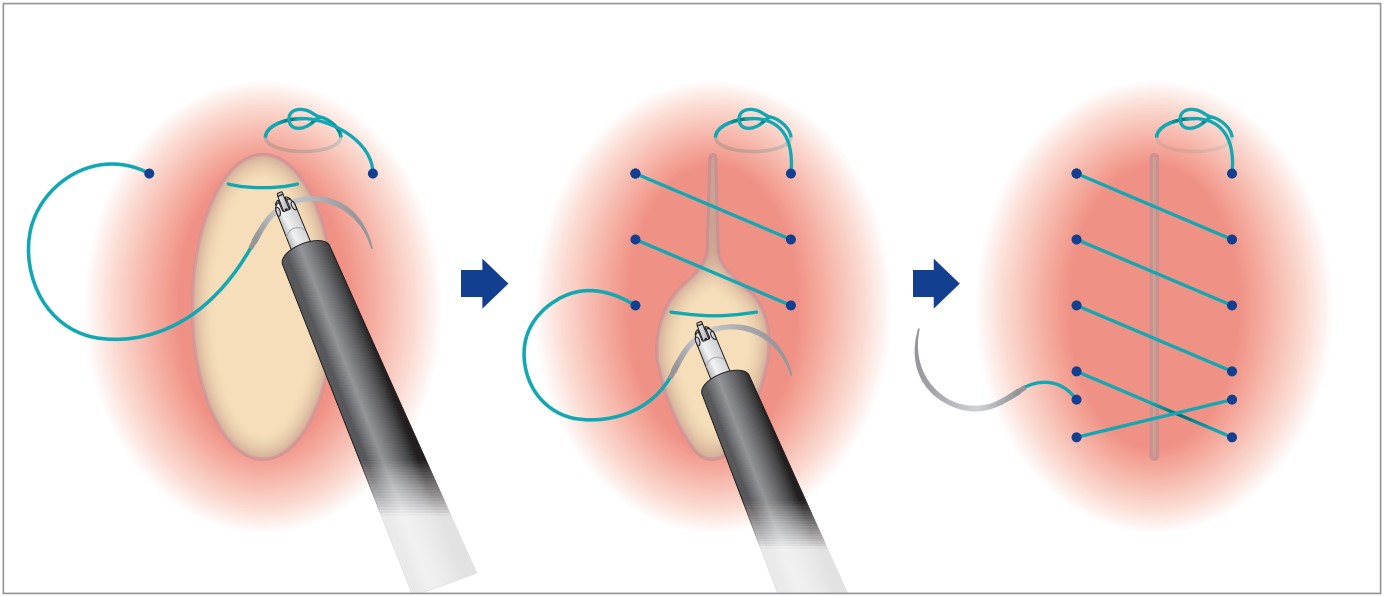
Unless you keep pulling the suture in continuous suturing, you won’t have enough suture left, making further procedure difficult. Close the mucosal defect while pulling the suture as necessary (Figure 1). Before pulling the suture, stick the needle in the next puncture point to minimize the possibility that the needle will be released.
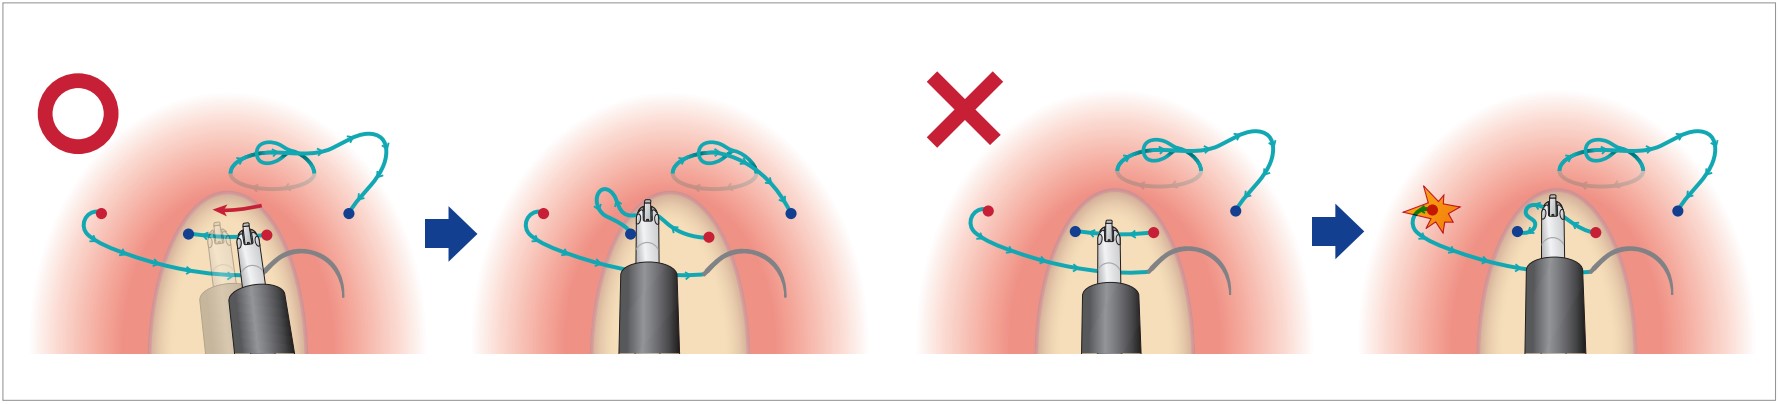
In continuous suturing, pull the suture in the direction in which the needle advances to tie the tissue (Photos 1–6). Grasp the suture near where the needle has exited the tissue and pull on it. The suture will be quite long at first, so pull it and regrasp it a few times. At the end, pull the suture firmly in the opposite direction of the needle exit side to tie the tissue securely. If the suture is pulled from the needle entry side, it may not only prevent you from getting enough traction, but also result in the application of excessive force in the opposite direction of the barbs on the suture, which could damage the tissue. (Figure 2).
-
(Figure 1)

Moreover, if excessive force is applied to the section that connects the suture at the swaged end, the suture may detach from the needle. Whether you’re just pulling the suture or tying the tissue, try not to pull the suture by grasping and pulling on the needle. Pull on the suture itself. After closing the mucosal tissue using continuous suturing, make a final stitch in the direction opposite to the stitching direction to complete the procedure (Figure 3).


Do not retract the needle-holder into the channel while grasping the suture
If you pull the suture while retracting the needle-holder into the channel, the needle may get stuck inside the distal attachment or the channel. Try to avoid retracting the needle-holder while grasping the suture. If you have no choice, make sure that the needle is far enough away from the scope tip.
Do not grasp the suture too tightly
The suture should be grasped tightly enough not to slip when tying the tissue. When grasping the suture with the needle-holder, however, open the jaw fully first and close it until the ratchet clicks a few times. Try not to pull the slider too much.
Cutting the suture
Cut the suture at a point 5–10 mm from the needle exit point
Having completed suturing, cut the suture using the dedicated single-use loop cutter (FS-410). Place the tip of the loop cutter at a point on the suture 5–10 mm from the needle’s exit point. Cut the suture while applying tension to it. To do this, open the jaw of the loop cutter to catch the suture gently, pull on the suture slightly, and then close the jaw all the way to cut it.
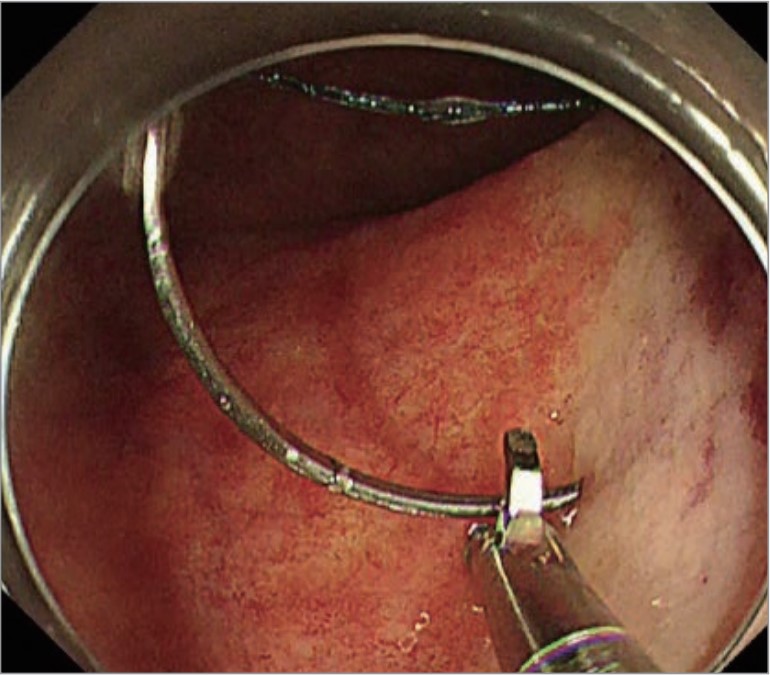
Place the bracket of the loop cutter perpendicular to the suture
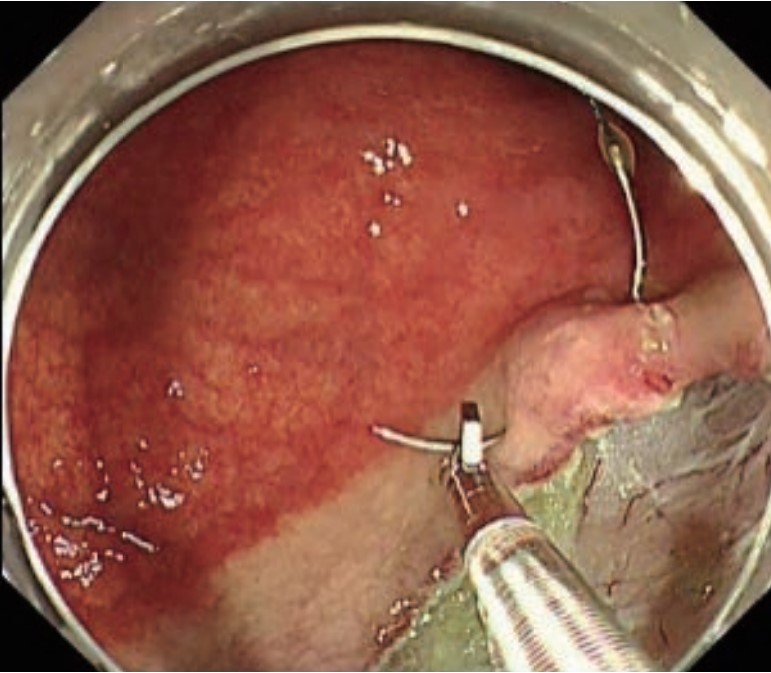
If you pull the slider on the control section of the loop cutter when the suture is roughly parallel to the blades on the tip of the loop cutter (i.e., not in a perpendicular condition), the suture may catch without getting cut. Place the bracket on the tip of the loop cutter perpendicular to the suture. Then while applying light tension to the suture so that there is no slack between the blades, cut it quickly (Photos 1–2). Do not use scissors forceps with reduced shearing capability. This will increase the risk of catching the suture. Always use the dedicated single-use loop cutter.
Retrieving the needle
Grasp the suture and pull the scope and needle-holder together
When retrieving the needle, do not grasp the needle; instead, grasp the suture in the same way during insertion (Photo 1). While holding the suture near the swaged end (5–10 mm from the end of the needle) so that the needle is able to move passively, slowly pull the needle together with the scope. While doing this, keep checking the position of the needle point. Perform insufflation as required to ensure visibility of the entire needle.
-
(Photo 1)
- Content Type