Nippon Medical School Hospital
Osamu Goto, MD, PhD
After graduating from Mie University School of Medicine in 2002, Dr. Goto completed a residency in internal medicine at the University of Tokyo Hospital and its affiliated hospitals. He then went on to study gastrointestinal endoscopic treatment and the basics of clinical research at the University of Tokyo Graduate School of Medicine, earning a doctorate in gastroenterology in 2010. In 2011 he went on to pursue a career at the Division of Research and Development for Minimally Invasive Treatment, Cancer Center, Keio University School of Medicine. During his tenure at Keio, he visited the Academic Medical Center in Amsterdam where he studied for six months. He has belonged to the Gastroenterology Department at Nippon Medical School since 2018.
Combined endoscopes and appropriate suturing directions
In endoscopic hand-suturing (EHS) , the suturing direction which best facilitates the procedure will vary depending on the position of the channel outlet at the distal end of the endoscope. When the channel outlet is positioned in the 5 o’clock direction in the endoscopic field of view, insert the needle from right to left (Photo 1 ). When the channel outlet is positioned in the 7–8 o’clock direction, insert the needle from left to right (Photo 2). In this section, we will focus on techniques using a scope with the channel outlet in the 5 o’clock direction. However, the basic concept remains the same when the channel outlet is in the 7–8 o’clock direction; only the suturing direction is different. For details on suturing from left to right, please review “Image of Continuous Suturing” on Pages 10–11. We also recommend watching the procedure videos, which can be accessed by scanning the QR codes on the following pages.
-
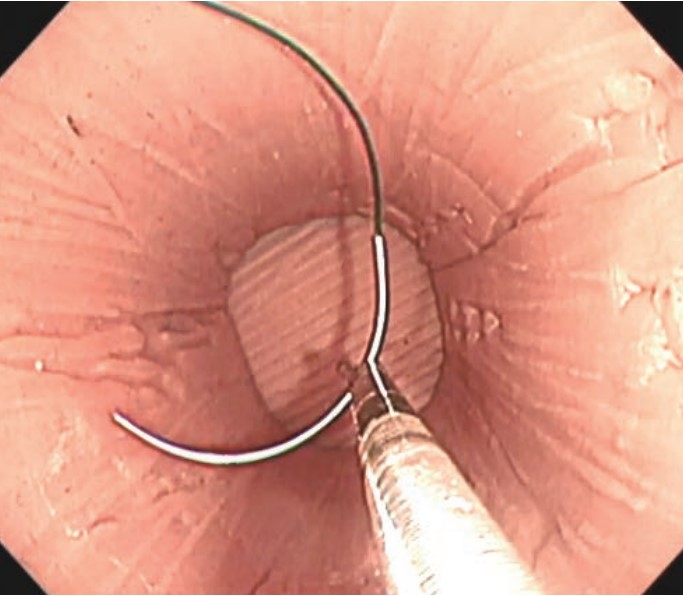
Photo 1: With GIF -2TQ260M
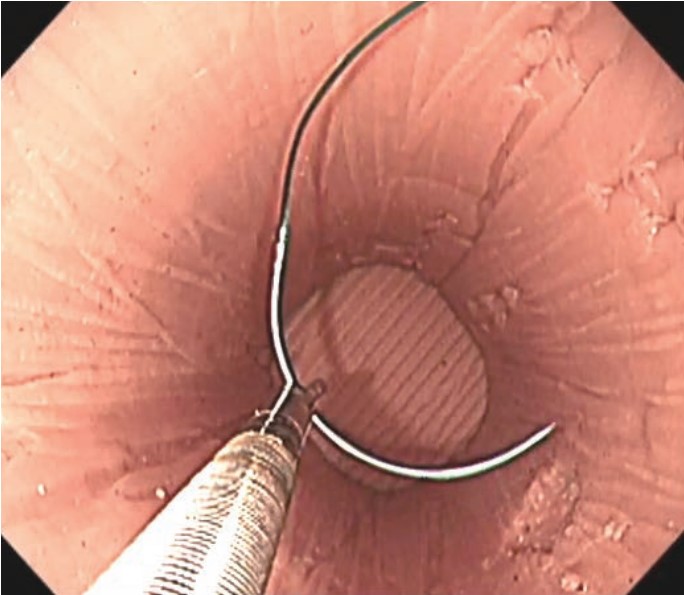
Photo 2: With GIF-H290T
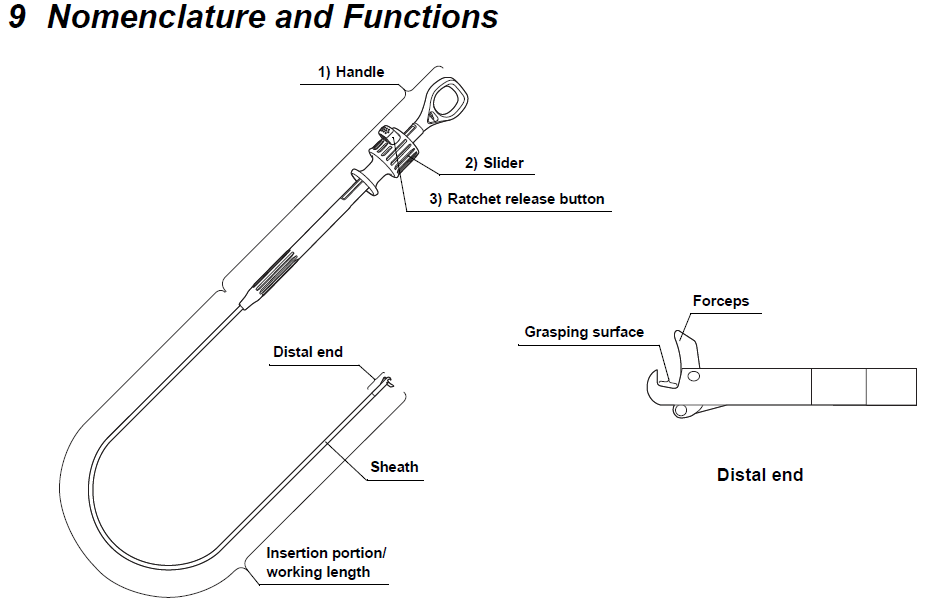
External view of the needle- holder
In most cases, the needle-holder is manipulated by an assistant. When the slider on the control section of the needle-holder is pulled towards the thumb ring , the movable jaw at the tip closes over the needle/suture bracket . A ratchet mechanism incorporated in the control section allows grasping strength to be gradually increased as the slider is pulled closer to the thumb ring with the target object held in the jaw. To open the tip of the needle-holder, press the ratchet release button and push the slider forward to raise the jaw . This device has high torque capability, which means you can turn the tip to the desired angle by turning the control section.
Preparation
Preparation of the suture thread
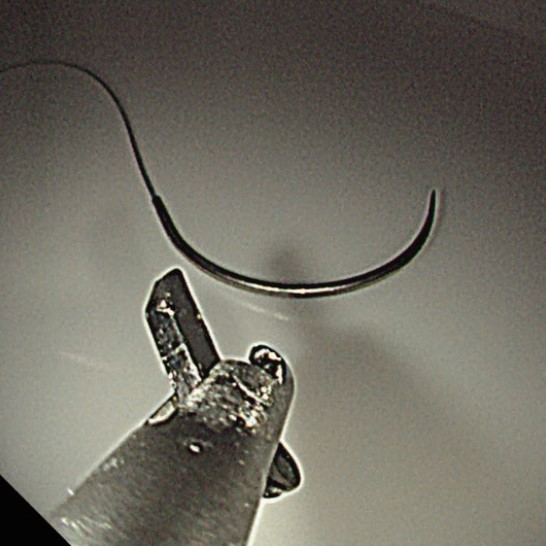
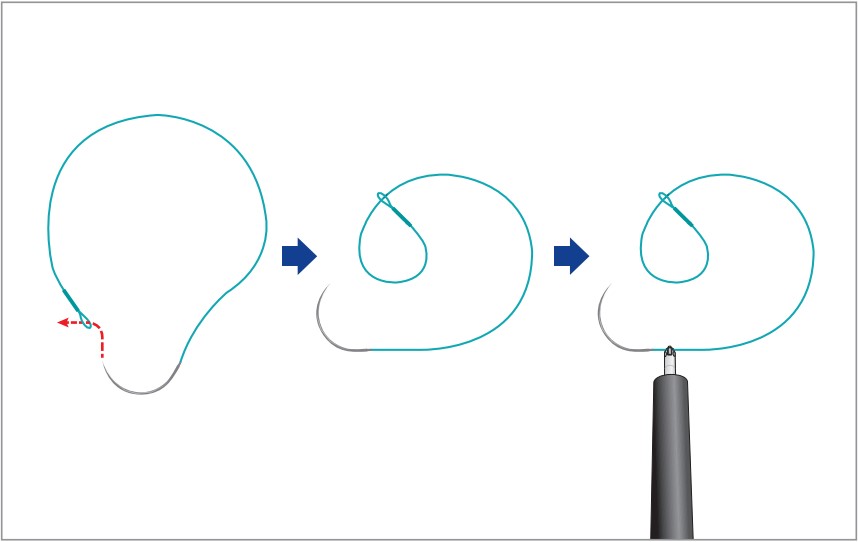
The suture thread used here is provided with a welded loop at the end . After a single stitch is made, the needle is passed through this loop to make a knot and the suture is left on the tissue. It is often difficult, however, to pass the needle through this small loop in the digestive tract. It is recommended to pass the needle through the small loop and make a larger loop outside the patient’s body in advance. This will make it easier to make a knot and leave the suture in the digestive tract.
Insert the needle-holder into the scope’s channel before starting the procedure
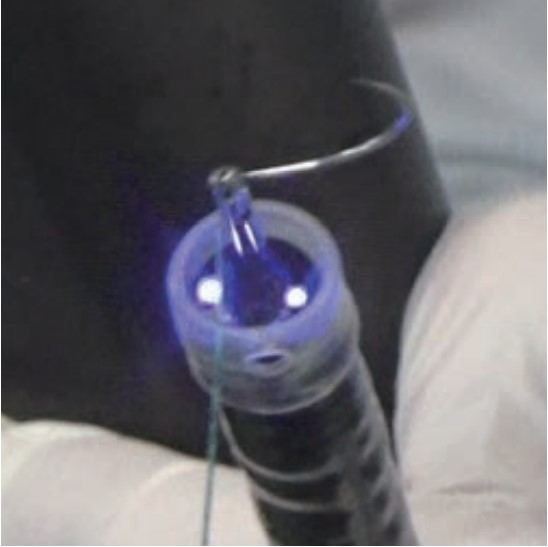
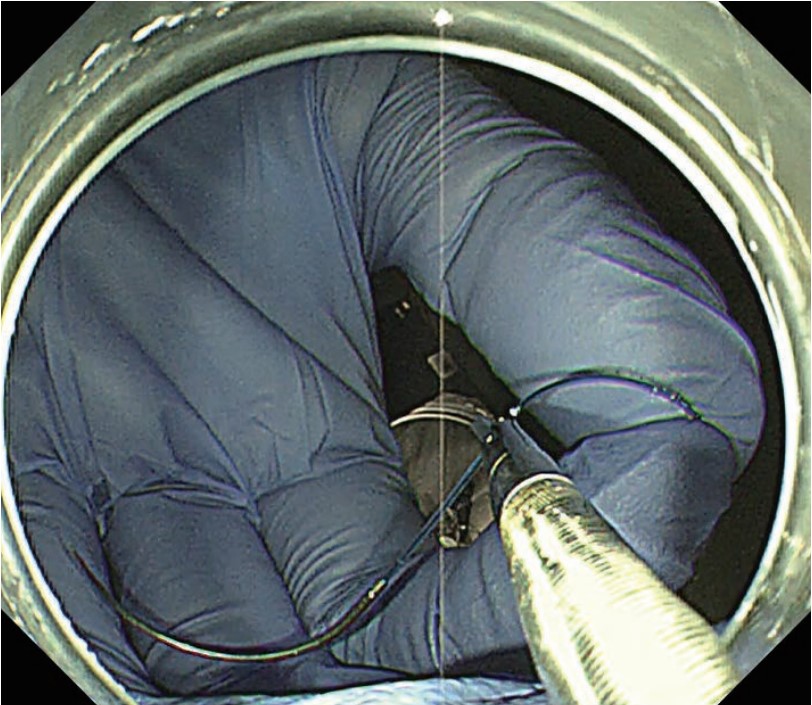
When the movable jaw at the tip is closed, the needle-holder can be passed through channels 3.2 mm or more in diameter. Since the needle cannot be inserted into the channel, insert the needle-holder into the scope’s channel before inserting the scope into the patient. Push the needle-holder until the tip is projecting slightly from the scope tip. Open the jaw and grasp the suture.
(In the overtube method described below, grasp the suture at a point 5–10 mm from the swaged end of the needle . Similarly, in the hood method , also discussed below, grasp the suture at a point about 5 mm from the swaged end.)
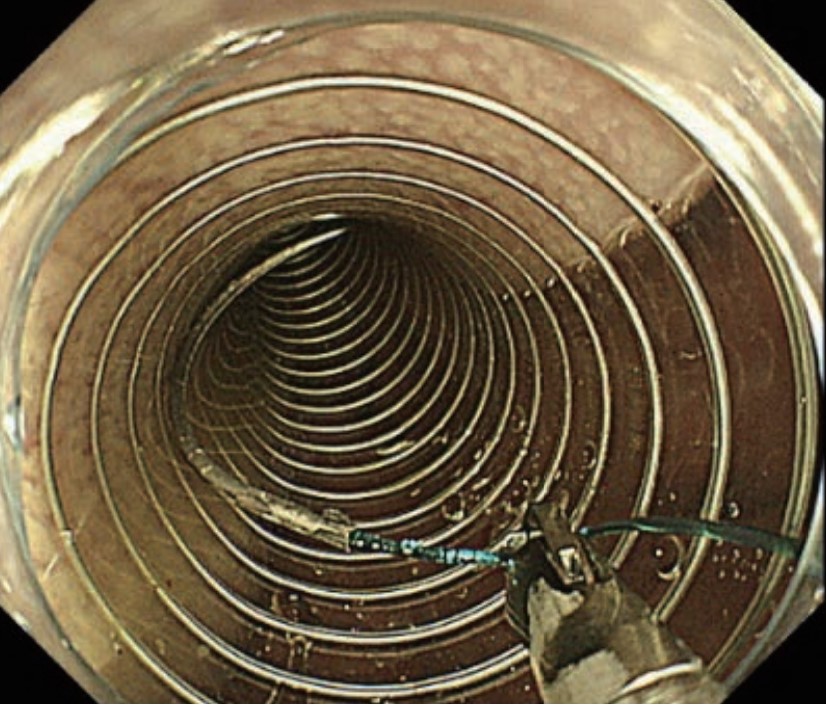
Insertion into the gastrointestinal tract
Insert the needle and suture into the GI tract using the following methods.
Overtube method
With this method, an overtube is used to insert the needle and suture into the GI tract. (Use the Covidien 26 mm VLOCL0604 in the stomach. If space is limited, e.g., in the colon, use the Covidien 17 mm VLOC0804.)
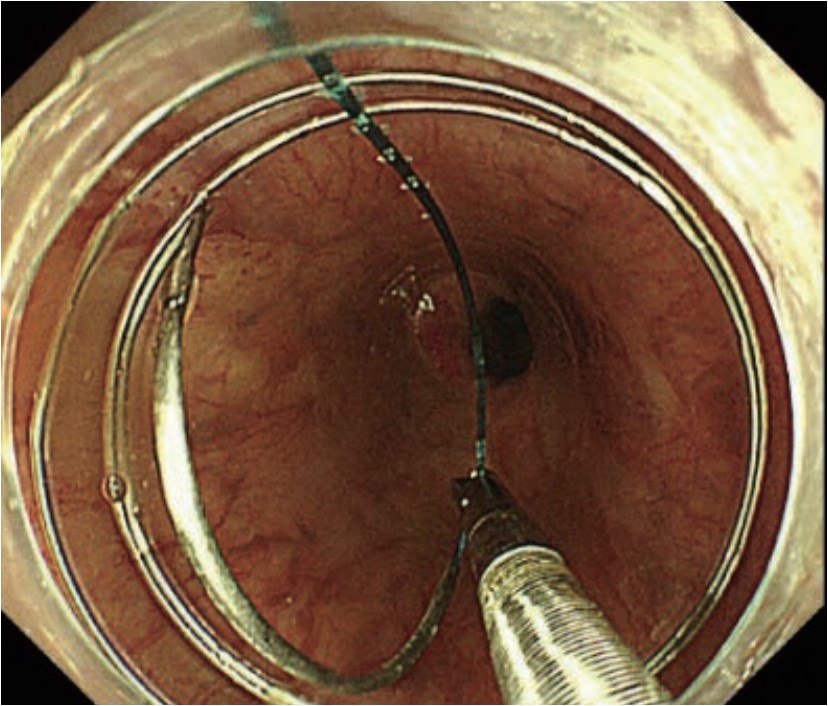
Before inserting the scope into the patient, project the needle-holder slightly from the scope tip and hold the suture at a point 5–10 mm from the swaged end of the needle. Do not hold the needle directly. Doing so increases the risk of injuring other structures when the scope is inserted into the GI tract. Conversely, if the suture is held at a point too far from the needle, the needle may get caught between the scope and the GI wall, which could make it impossible to confirm the tip of the needle, thereby posing a risk of erroneous puncture or damage to the endoscope. Holding the suture near the needle makes it impossible to apply force towards the needle point , preventing the needle from making an unwanted puncture.
Project the needle-holder from the scope tip so that the entire needle is visible in the field of view and keep it in that position. Perform insufflation as required to ensure sufficient luminal space. Advance the scope slowly, bending the scope tip as necessary to keep the tip of the needle-holder in the center of the lumen.
- Content Type