Imaging Techniques Trans-D1 (duodenal bulb) approach
In the “long-scope” position from the duodenal bulb, observe the extrahepatic bile duct as well as the pancreatic head, gallbladder, and cystic duct. Advance the scope from the duodenal bulb to the descending part’ to observe the pancreatic head and the vicinity of the duodenal papilla. It is difficult, however, to image the duodenal papilla and the lower part of the head of the pancreas in this scope position. Switch to the “short-scope” position to observe them. Since there is a risk of perforation, it is important to avoid forcible scope manipulation.

STEP 1 | Head of the pancreas (short axis of the portal vein)
Insert the scope into the duodenal bulb and visualize the portal vein on the lower left of the screen to observe the pancreatic head between the transducer and the portal vein.

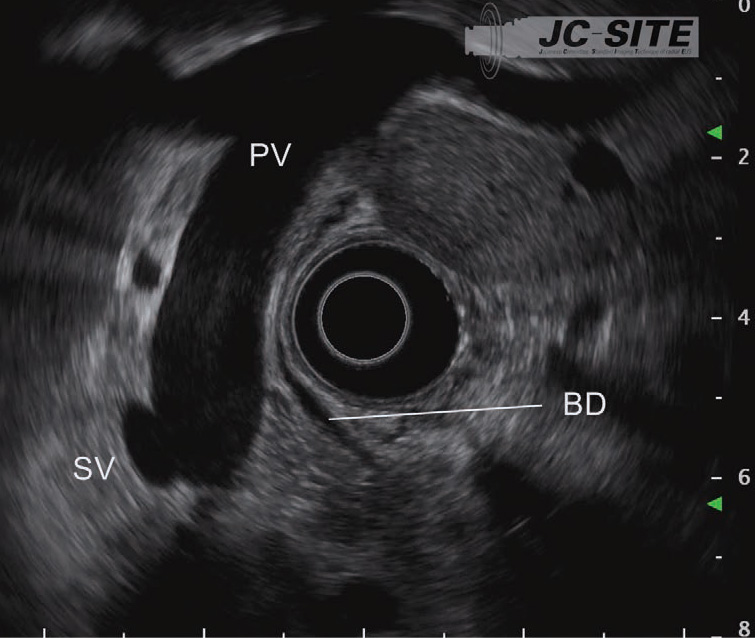
STEP 2 | Head of the pancreas (long axis of the portal vein)
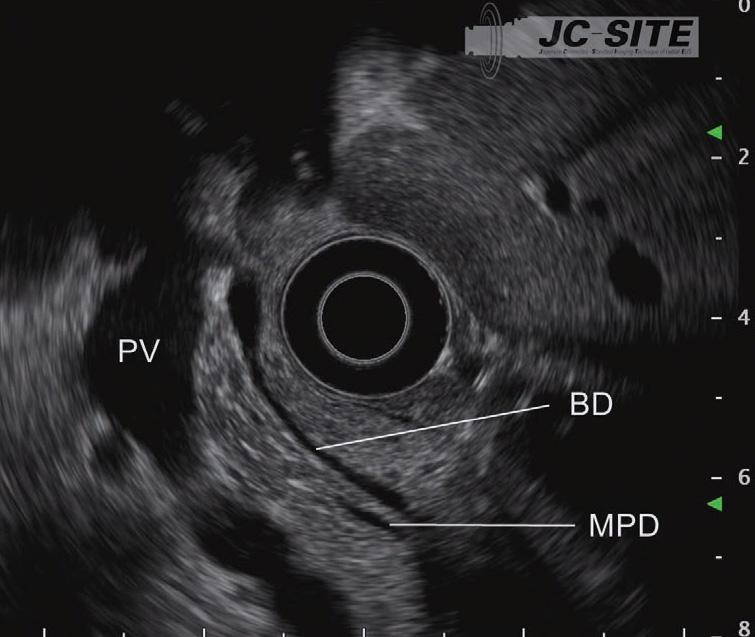
Advance the scope a little further. Then bend the tip up to visualize the portal vein on the long axis. Observe the bile duct imaged between the transducer and the portal vein. Use the Doppler function to make it easier to differentiate the bile duct from vessels.

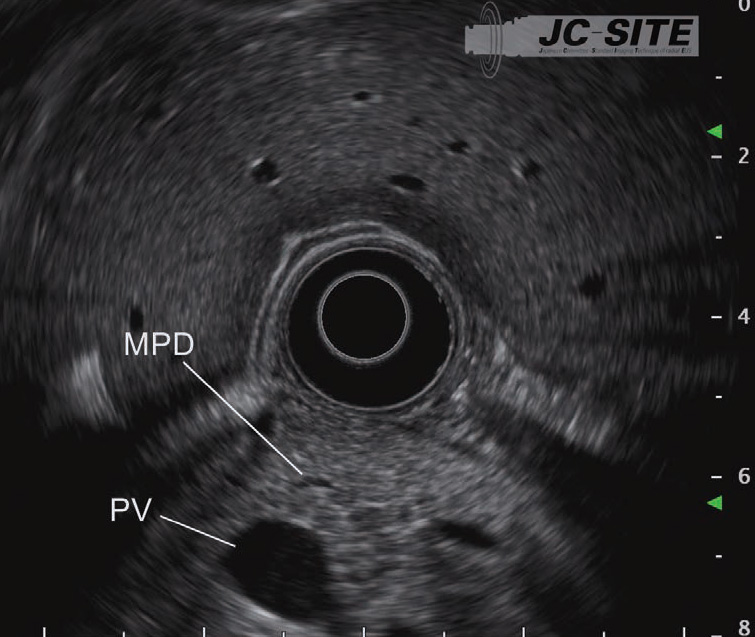
STEP 3 | Distal bile duct
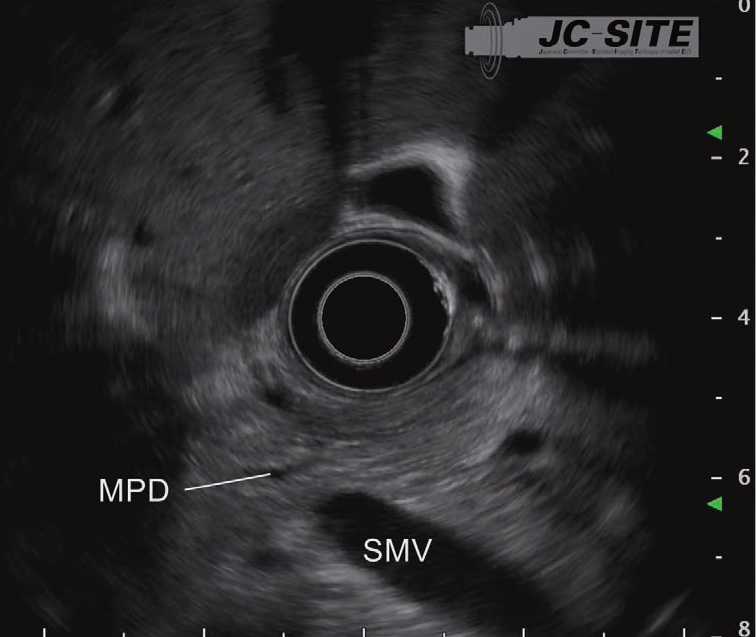
While rotating the scope clockwise, advance it slowly. Observe the head of the pancreas while following the bile duct towards the papilla. At this time, the main pancreatic duct is imaged on the distal side of the bile duct.

STEP 4 | Vicinity of the duodenal papilla
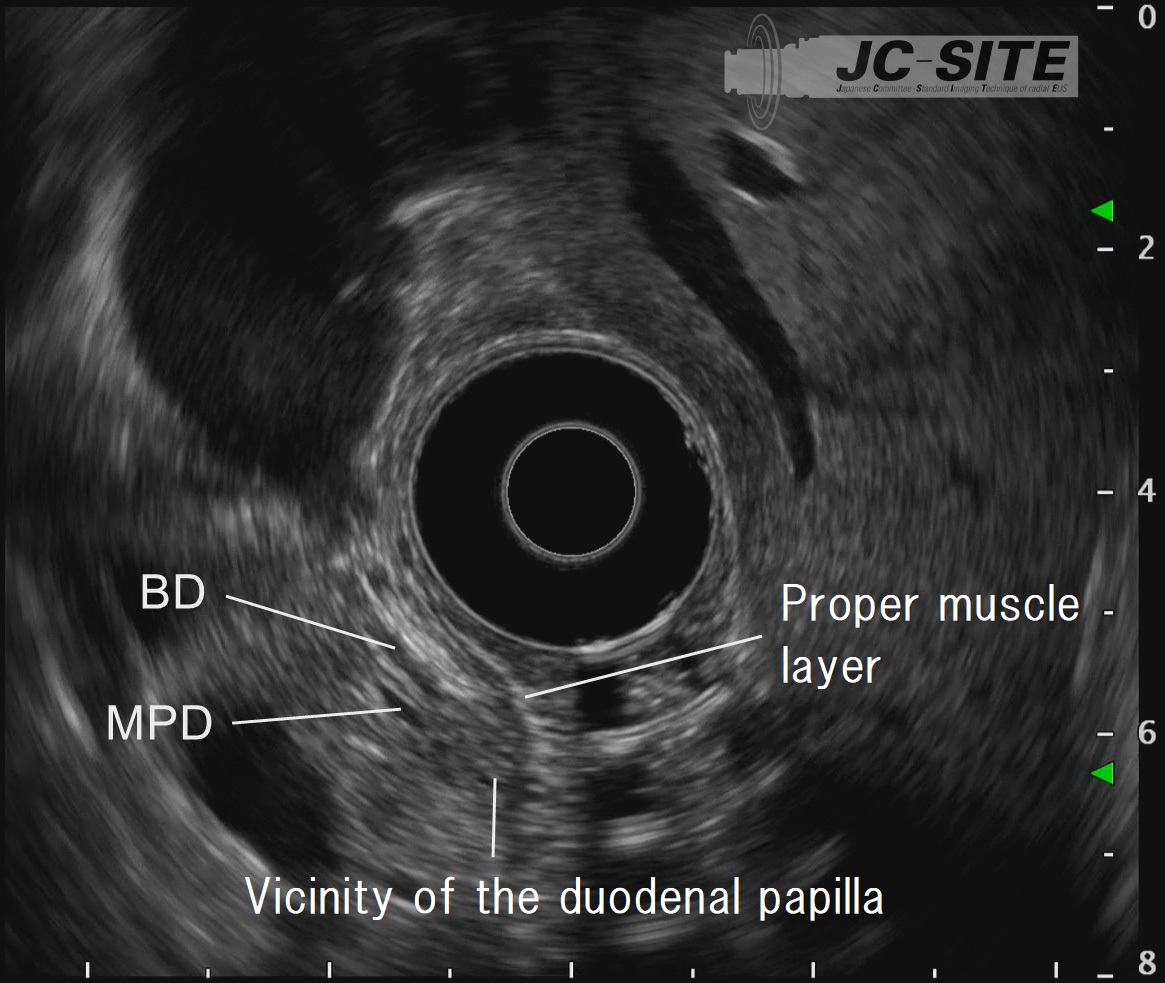
Advance the scope while rotating it clockwise. Follow the bile duct until reaching the vicinity of the duodenal papilla. The vicinity of the papilla is recognized as a hypoechoic area.
STEP 5 | Distal bile duct
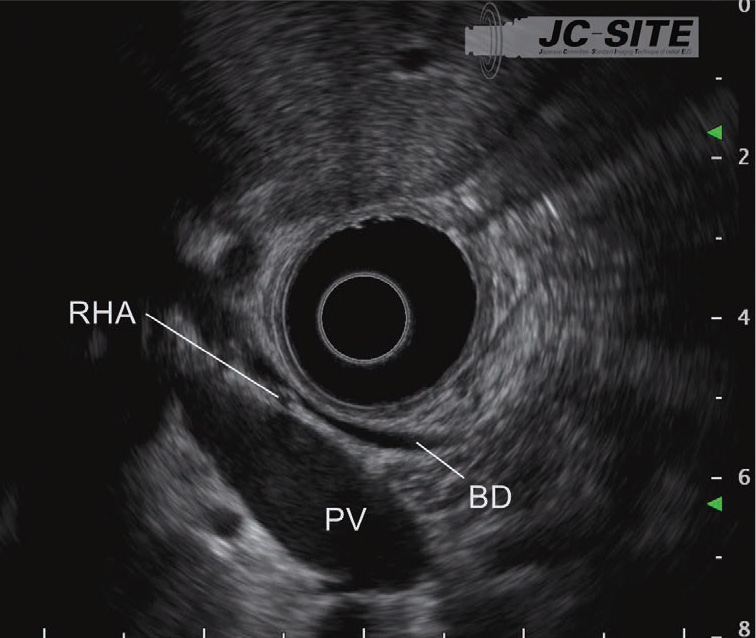
Rotate the scope counterclockwise to observe the bile duct in the direction of the hepatic hilum.

STEP 6 | Pancreatic head/body junction
Rotate the scope counterclockwise and follow the main pancreatic duct towards the body to observe the pancreatic head/body junction which crosses the portal vein.

STEP 7 | Gallbladder
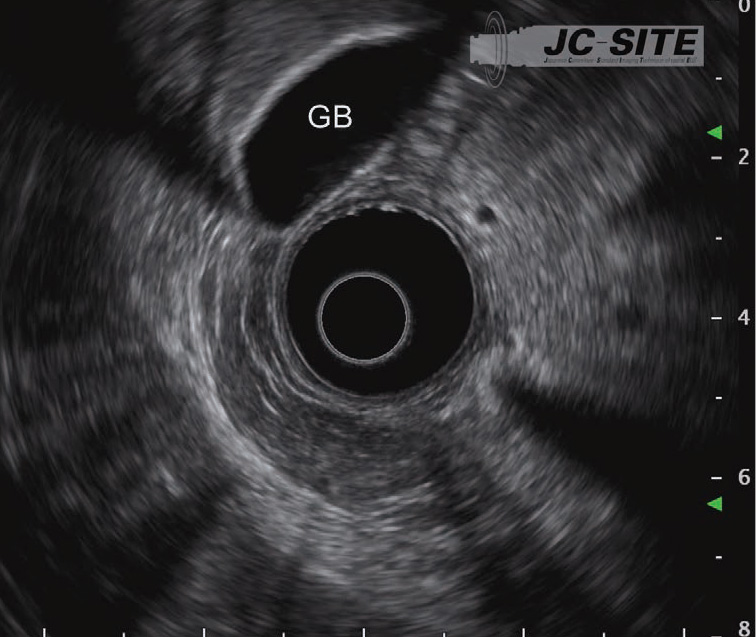
Rotate the scope clockwise to return to the head of the pancreas and visualize the bile duct again. Then rotate the scope counterclockwise to observe the cystic duct and the neck of the gallbladder. Keep in mind that the cystic duct and the gallbladder can look quite different depending on the individual (see “3-4 Gallbladder”).
 ⑤
⑤Visualizing the duodenal papilla
When observing the duodenal papilla with EUS, it is important that you be aware of the relationship between the papilla and the pancreas, as well as the proper muscle layer of the duodenum.
To observe the papilla, start by using the hypoechoic area of the pancreatic head – which is visualized from the descending part of the duodenum – as a landmark in the “short-scope” position. At this time, do not suction air from the duodenum. Doing so could cause the transducer to distort the papilla, making it impossible to perform detailed observation.
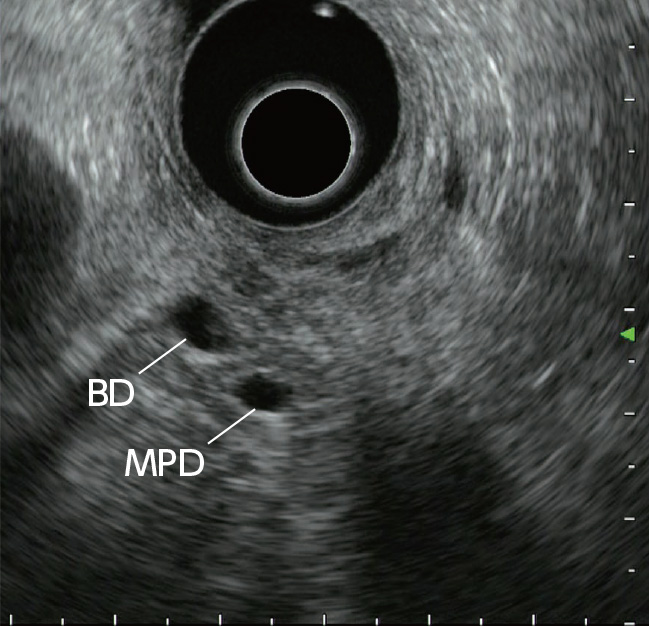
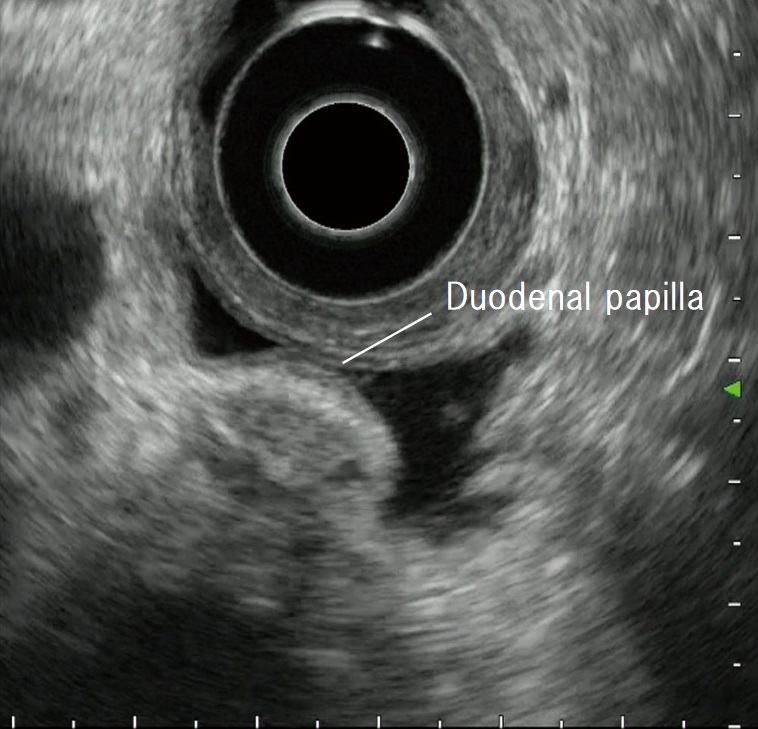
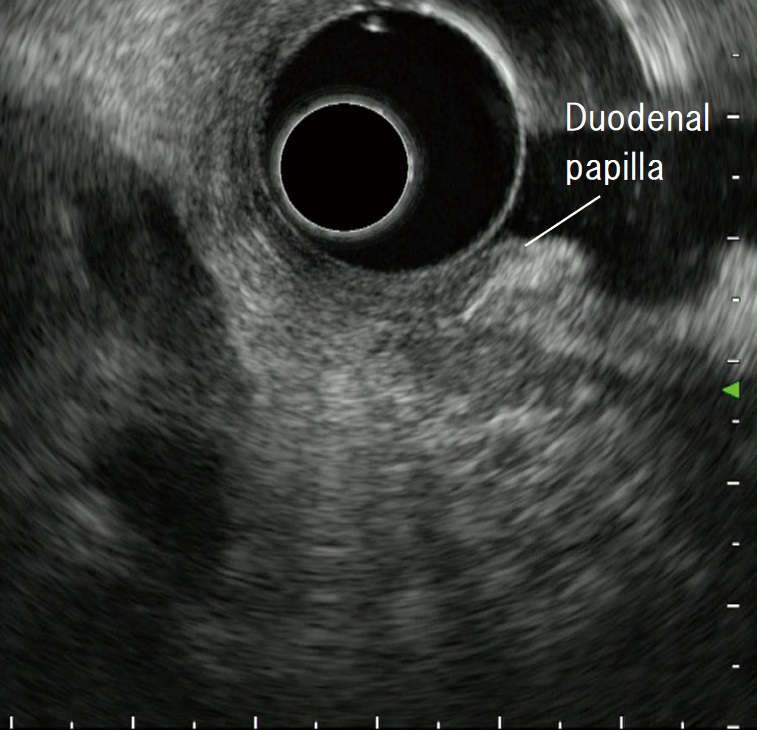
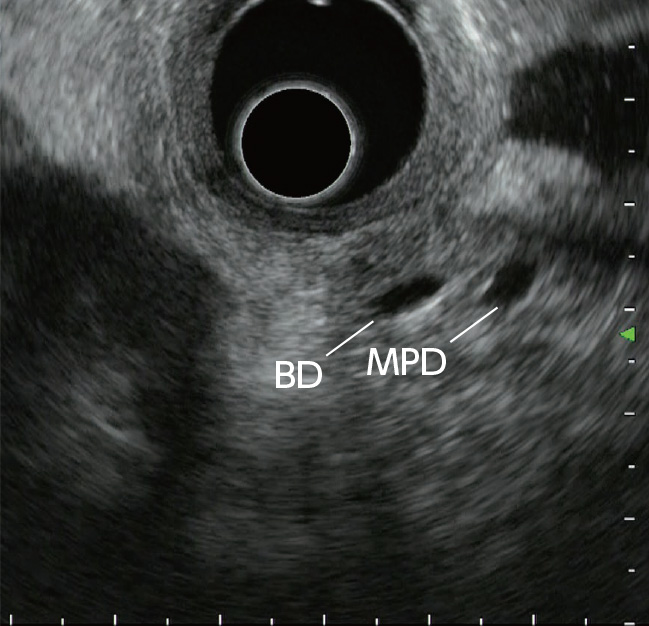
The trick to visualizing the papilla is to inject lukewarm water into the descending part of the duodenum so that the region can be observed, while maintaining some distance between the transducer and the papilla. This can be achieved by applying down and left angulation. After the cross-sectional views of the bile and pancreatic ducts (Fig. a) have been visualized, the short-axis view of the papilla (Fig. b) can be visualized continuously in the six o’clock direction from the transducer. Then slowly rotate the scope counterclockwise while bending the scope tip up to visualize the long-axis view of the papilla and vicinity (Fig. c) , as well as the cross-sectional views of the bile and pancreatic ducts (Fig. d).
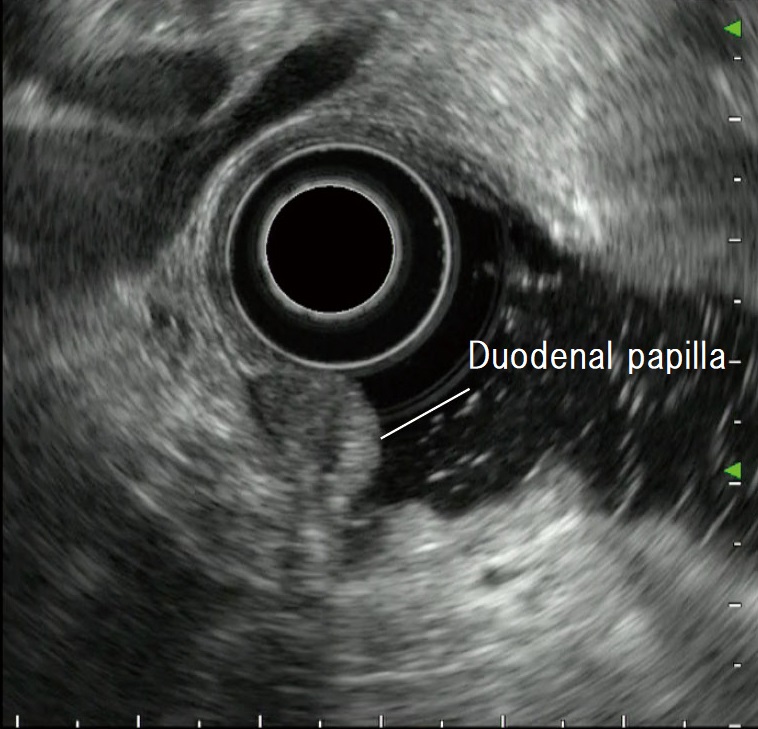
If it is difficult to maintain scope positon when observing the papilla in the ‘short scope’ positon, you can also visualize the papilla by positioning the bile duct on the side of the papilla in the “long-scope” position (Fig. e). Pooling water makes it possible to maintain some distance between the scope tip and the duodenal wall. Not only does this facilitate observation, it can also help prevent perforation.
If you find it difficult to pool water in the descending part of the duodenum with the patient in the left lateral position, shift them to the dorsal position or incline their body to an approximately prone. An endoscope is useful for pooling water.

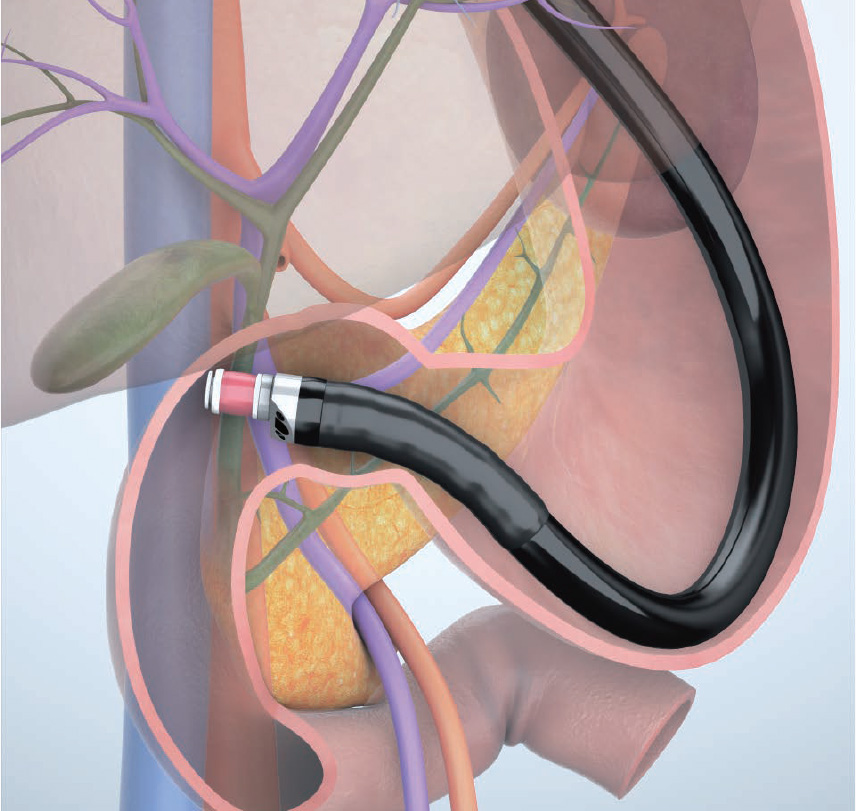
Understanding the anatomy when scanning in the trans-D1 (duodenal bulb) approach (“long-scope” position)
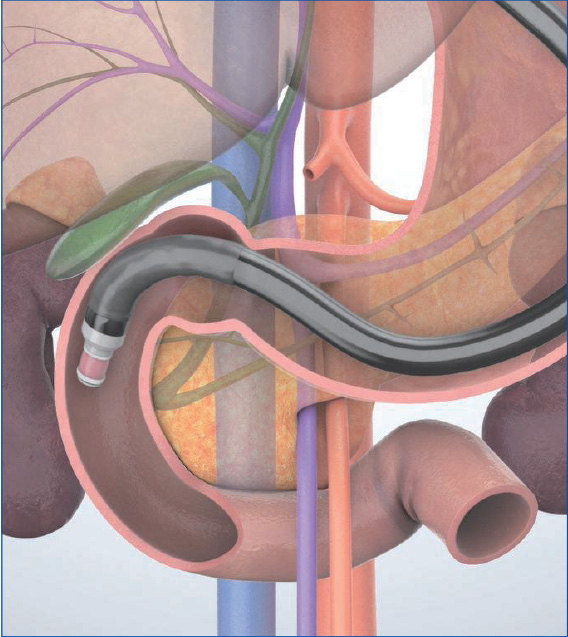
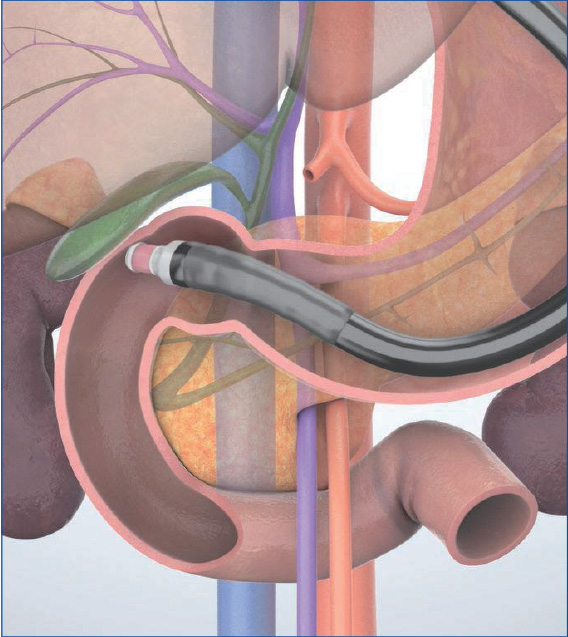
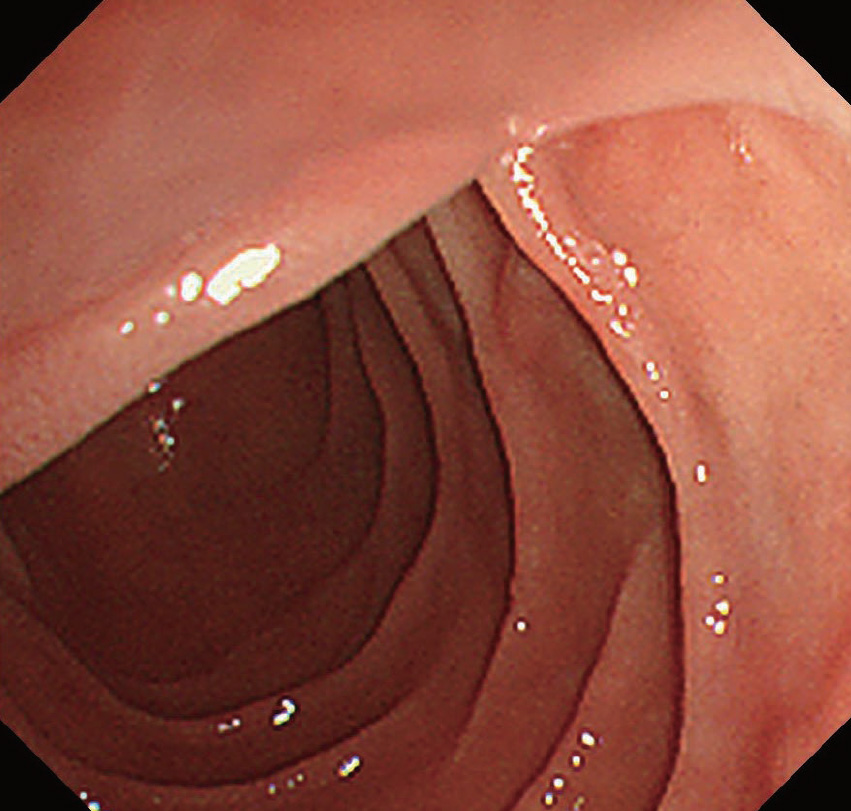
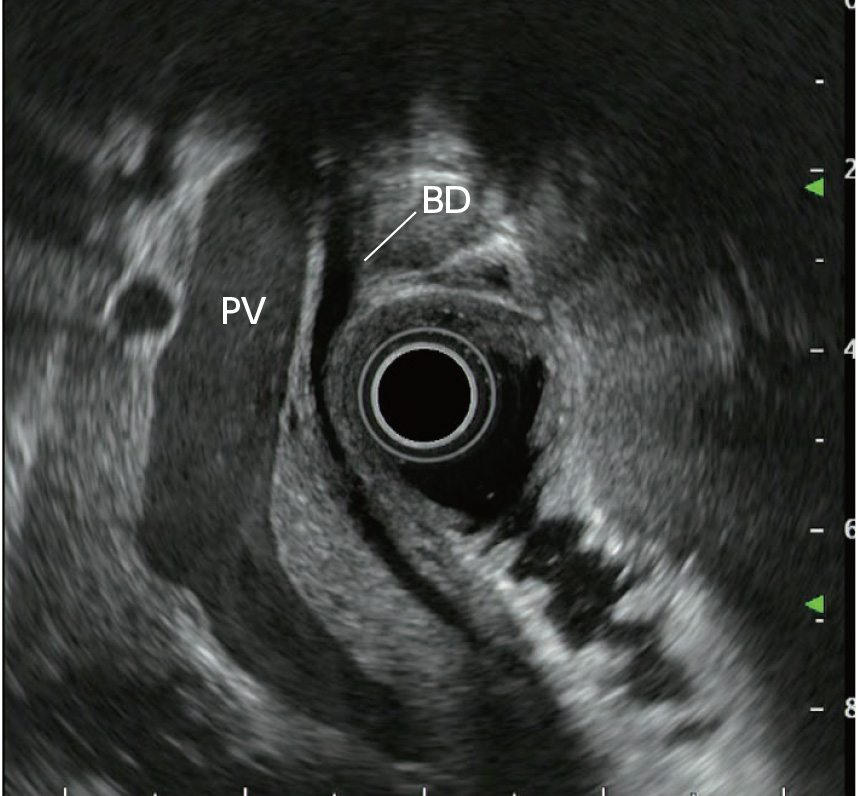
When you start scanning in a position at the superior duodenal angle (SDA) once the scope tip has passed the pylorus, it is relatively easy to visualize the portal vein and the bile duct in a long axis. The reason the bile duct is visualized in a long axis in this position is because the duodenum is located in the retroperitoneal space, so the tip of the transducer points to the dorsal side from the ventral side when inserting the scope (Fig. a). At this point, the descending part of the duodenum viewed downward from the SDA appears in the endoscopic view (Fig. b). When the scope tip points to the feet of the patient and is bent up, the long-axis view of the bile duct is imaged to the left of the transducer (Fig. c).
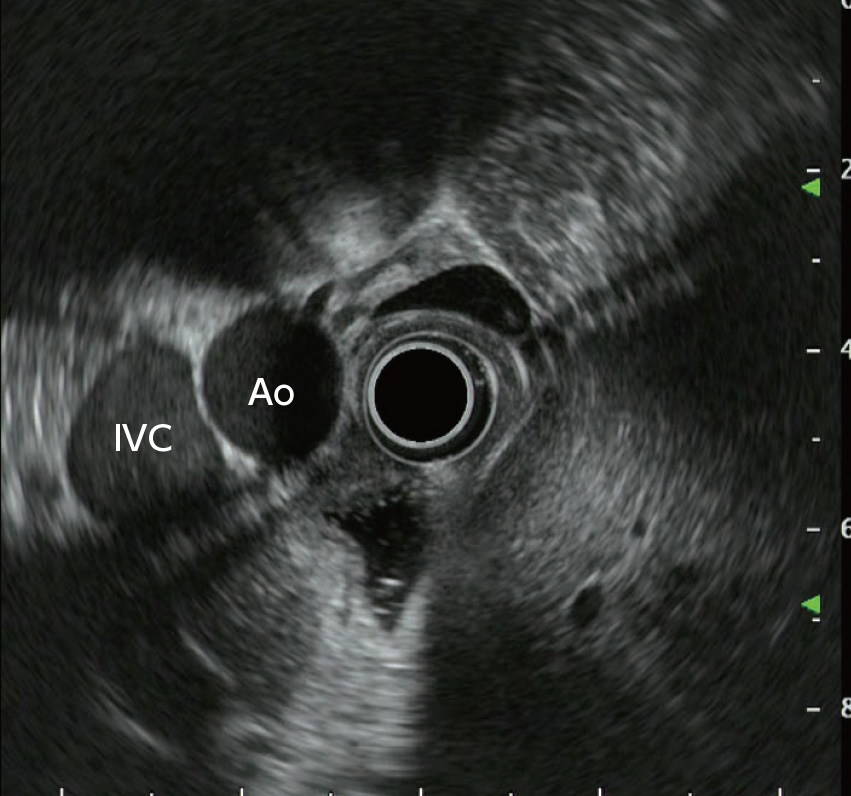
When the scope is further advanced past the SDA, the aorta and the inferior vena cava are visualized on the short axis instead of the long axis due to the change in transducer position, which is now being directed towards the patient’s feet instead of their back. (Fig. d). You can surmise the position and the shape of the scope in the duodenum from the way that the aorta and the inferior vena cava are visualized.
- Content Type