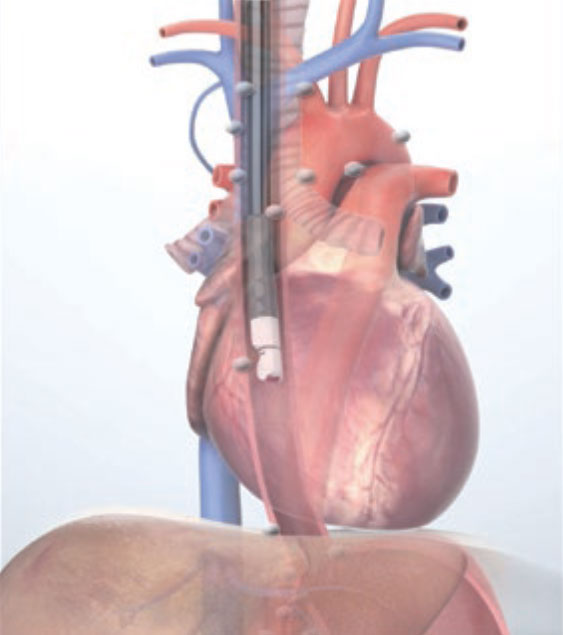
Imaging Techniques Transesophageal approach
STEP1 Celiac artery bifurcation; crus of the diaphragm
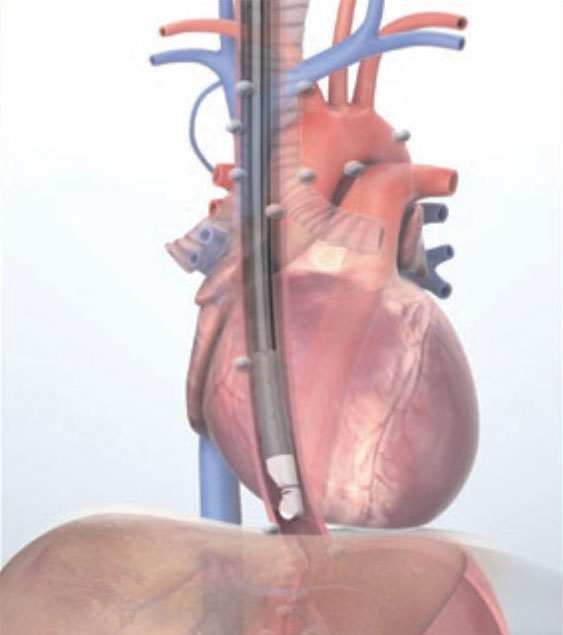
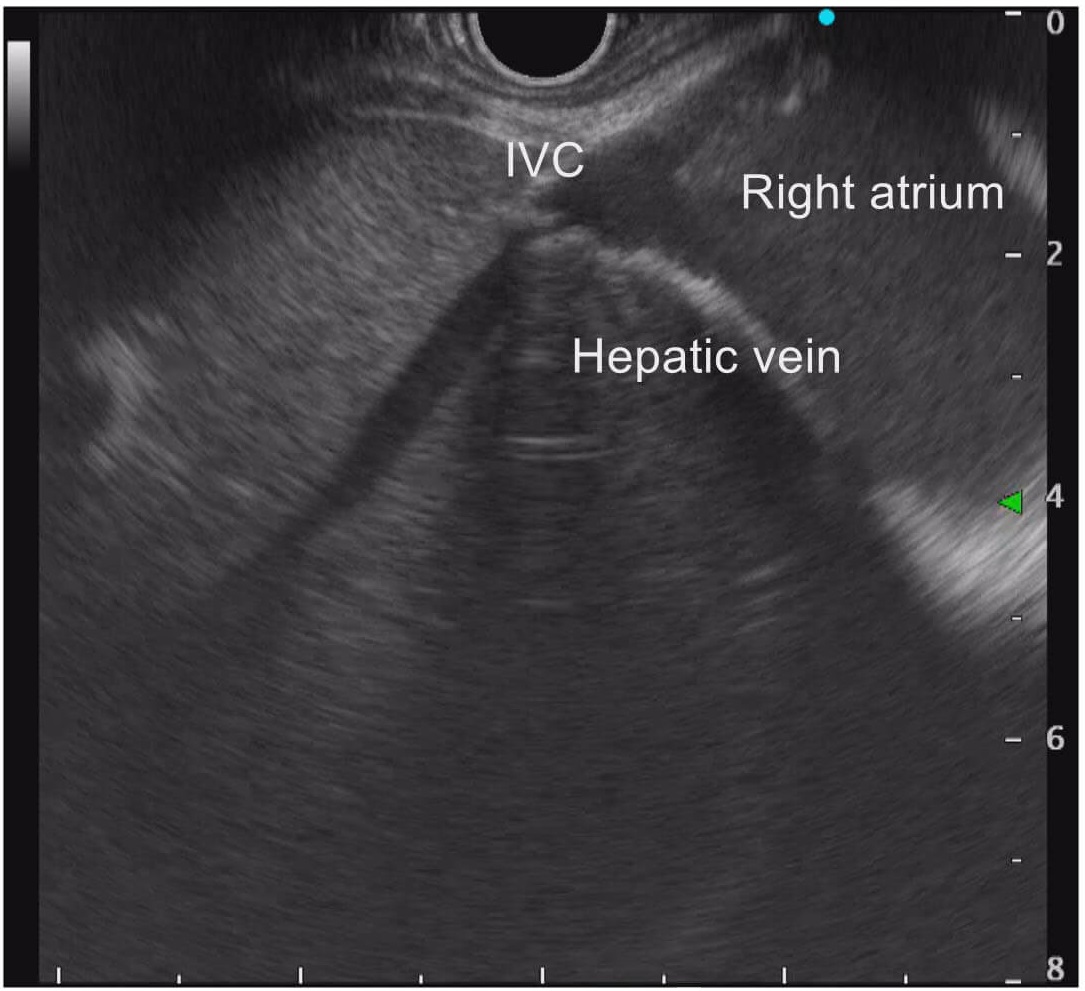
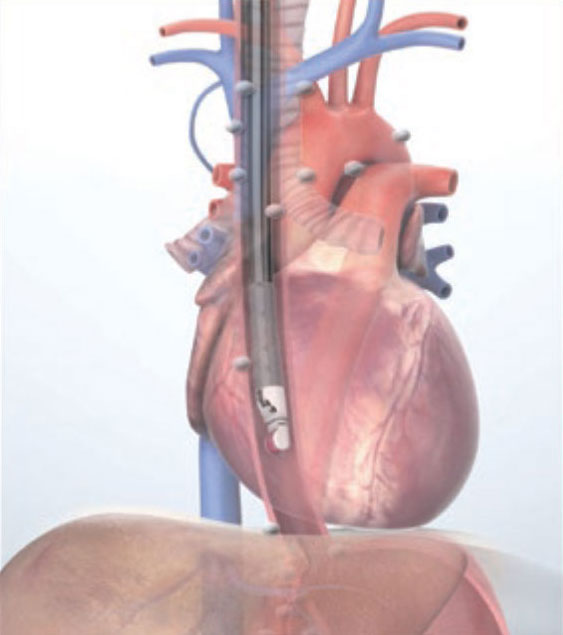
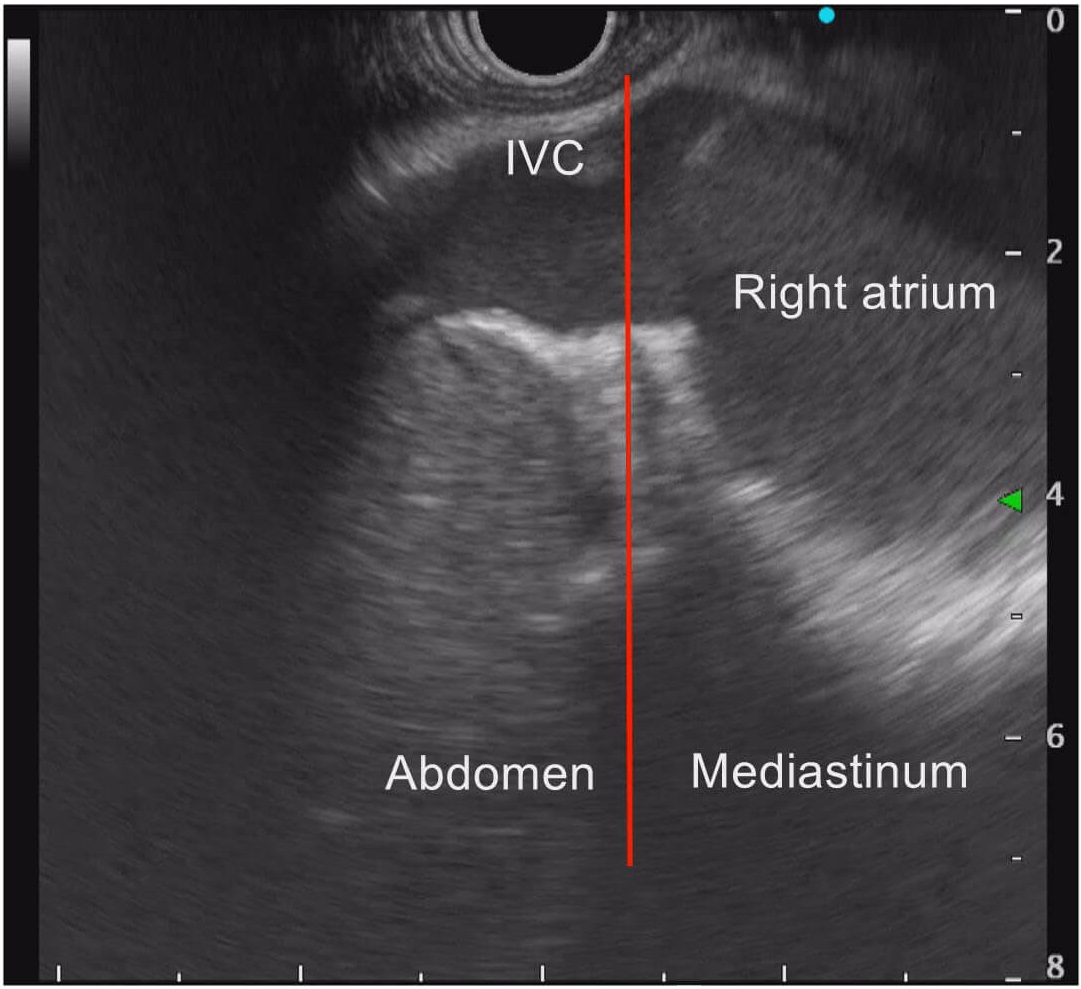
STEP2 Hepatic vein/inferior vena cava; inferior vena cava passing through the diaphragm
STEP3 Left heart system/pulmonary artery; tracheal bifurcation
STEP4 Trachea; AP window
STEP5 Left subclavian artery
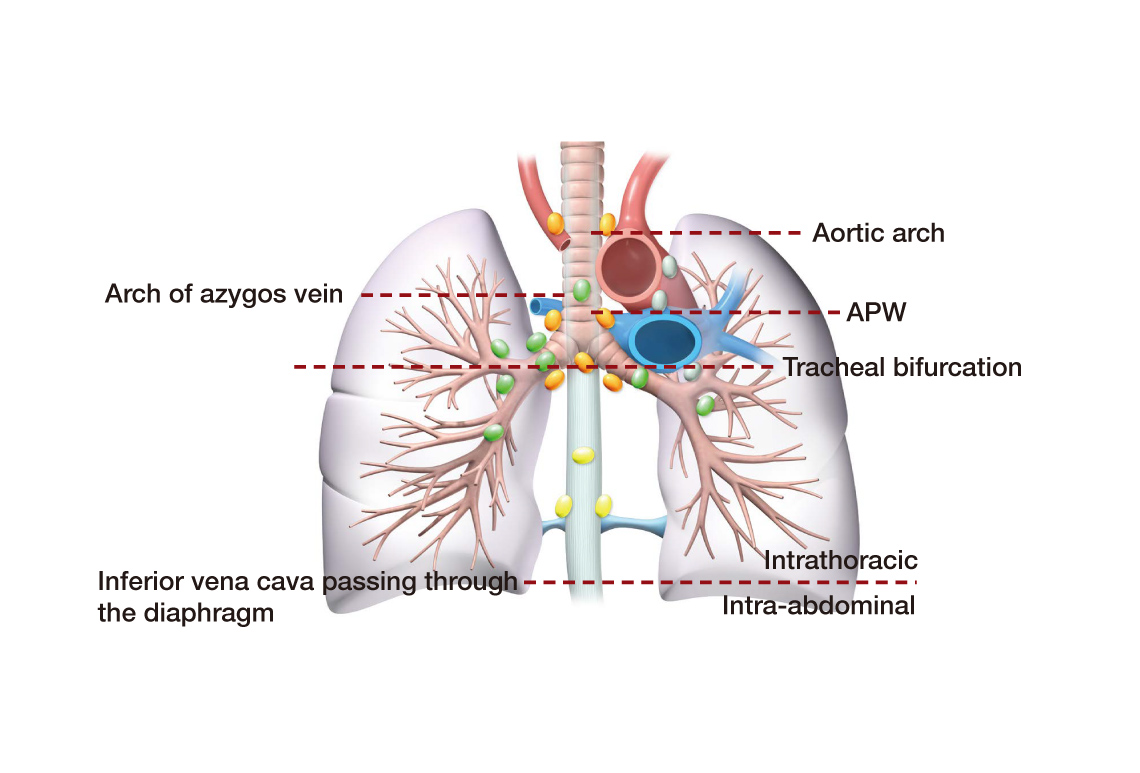
To recognize the locations in the mediastinum, you will need to know the height and left/right indices. The indices for height are — from inferior to superior — the inferior vena cava passing through the diaphragm (boundary between the abdomen and mediastinum), tracheal bifurcation, aortopulmonary window (AP window), arch of azygos vein, and aortic arch. The left/right index is the trachea.
Ⅰ. Confirmation of indices for height and left/right
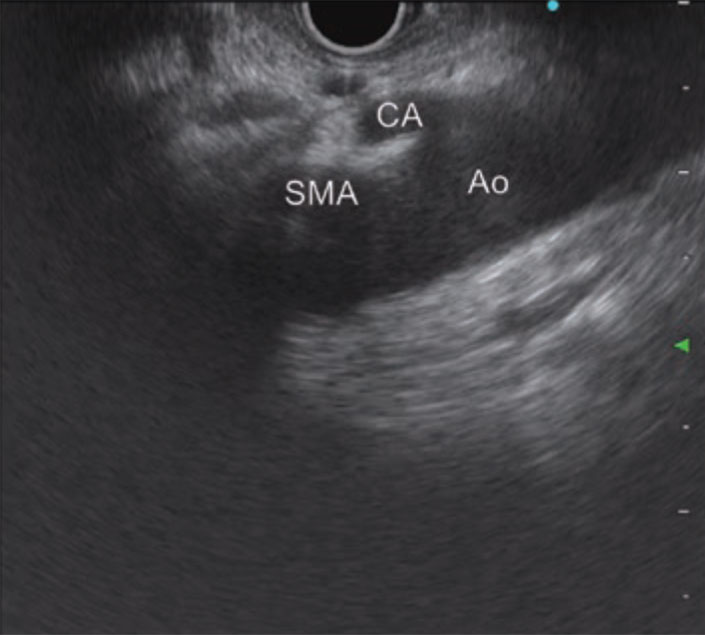
STEP 1-1 Celiac artery bifurcation
After inserting the scope in the distal gastric body, observe the abdominal aorta by turning the scope clockwise. Follow the abdominal aorta towards the superior side while pulling the scope to confirm the celiac artery bifurcation. Observe the lymph nodes around there.

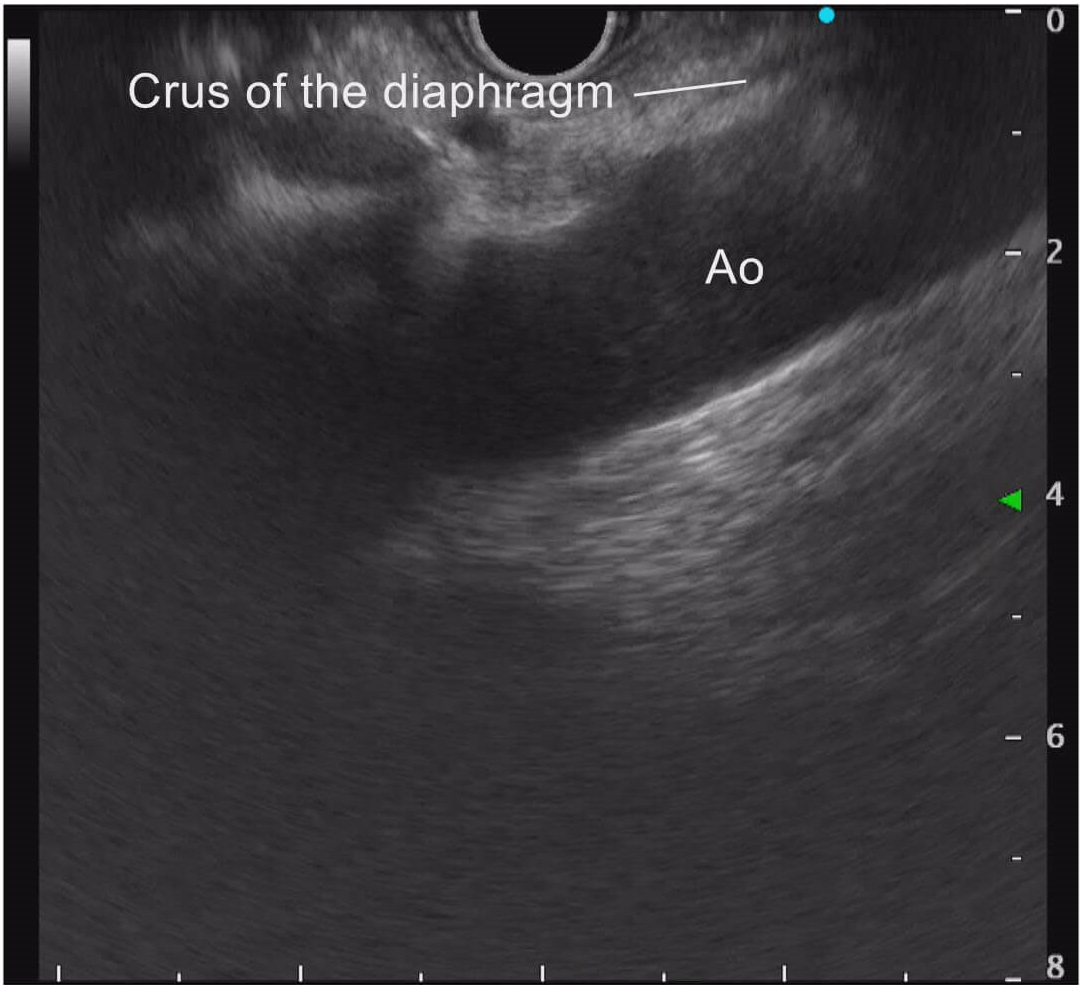
STEP 1-2 Crus of the diaphragm
As you slightly withdraw the scope from the celiac artery bifurcation, a long and narrow low-echo image is imaged immediately above the aorta. This is the crus of the diaphragm and serves as a reference to let you know the boundary between the abdomen and mediastinum.

STEP 2-1 Hepatic vein/inferior vena cava
Now turn the scope counterclockwise to image the left hepatic lobe. While slowly withdrawing the scope, follow the left hepatic vein that appears towards the upper screen. This enables you to observe the inferior vena cava.
STEP 2-2 Inferior vena cava passing through the diaphragm
By following the inferior vena cava towards the superior side while slightly withdrawing the scope, you can observe the inferior vena cava passing through the diaphragm. This is the boundary between the abdomen and mediastinum (red line). On the screen, the mediastinum is on the right side of this border.
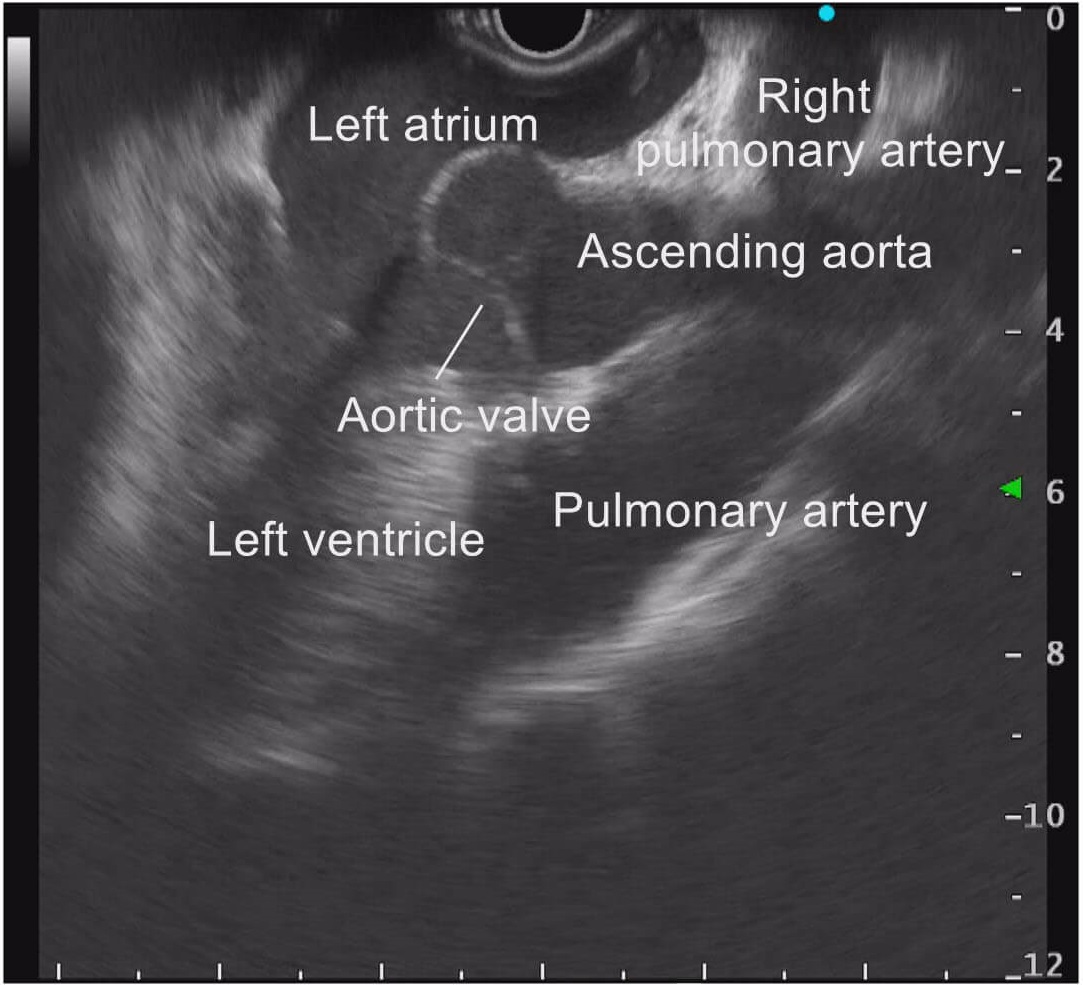
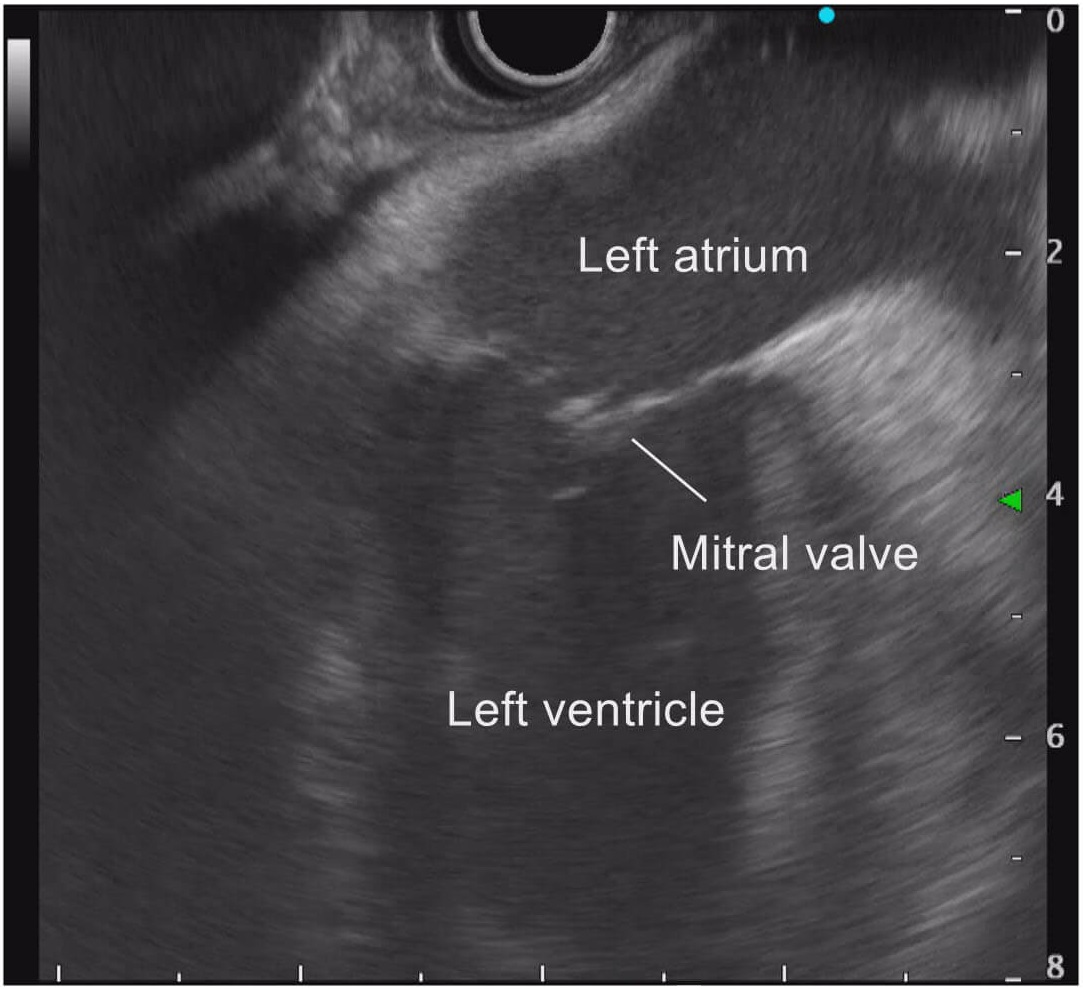
STEP 3-1 Left heart system/pulmonary artery
While viewing the inferior vena cava, slowly pull the scope and turn it clockwise. This allows you to visualize from the inferior vena cava to the right atrium as well as the left atrium, left ventricle, and ascending aorta. The pulmonary artery is also imaged on the bottom of the same screen.

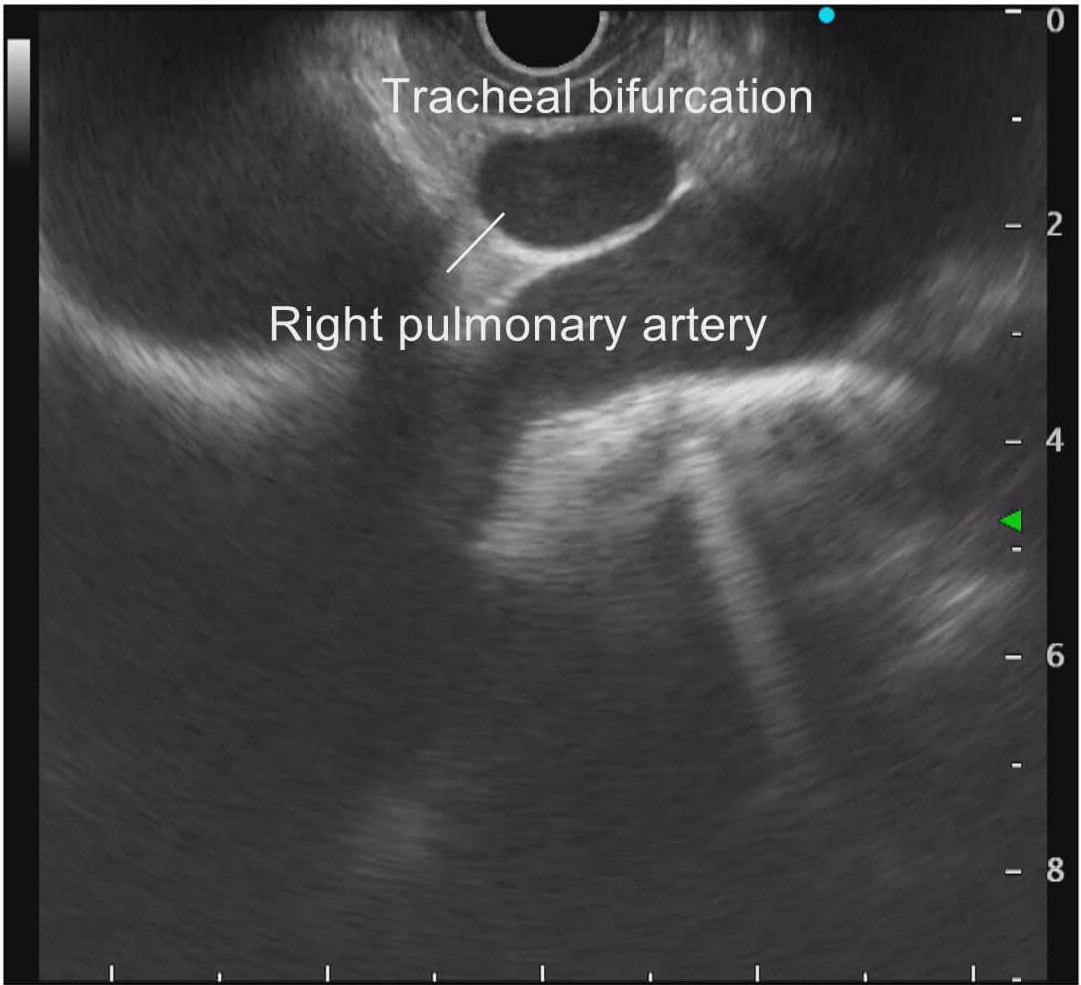
STEP 3-2 Tracheal bifurcation
When you follow the pulmonary artery towards the transducer side while pulling the scope, the cross section of the right pulmonary artery will emerge. The tracheal bifurcation is found in this region. Repeat the counterclockwise rotation and clockwise rotation of the scope in this position to visualize multiple linear echoes. This enables you to accurately identify the tracheal bifurcation.
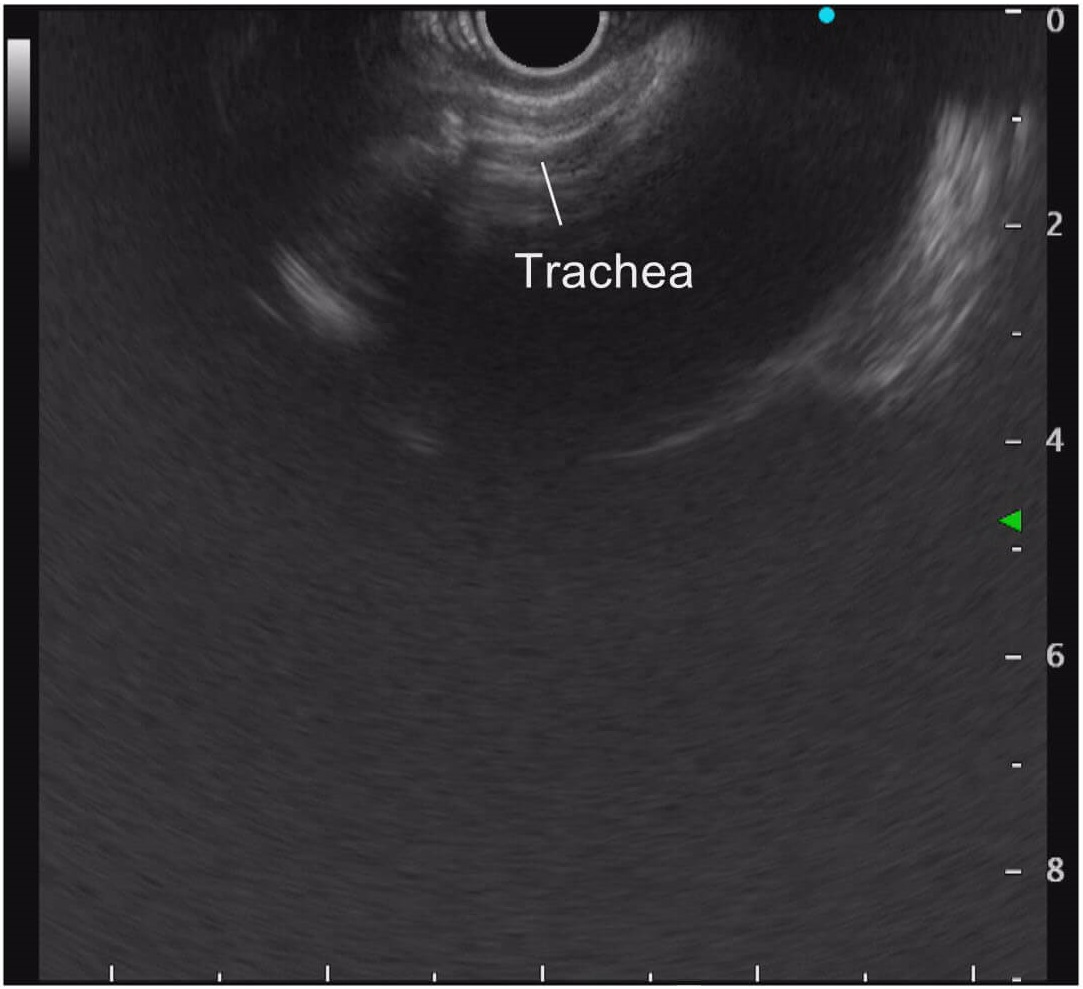
STEP 4-1 Trachea
As you pull the scope from the tracheal bifurcation, you will be able to identify the trachea visualized as multiple linear hyperechoes.

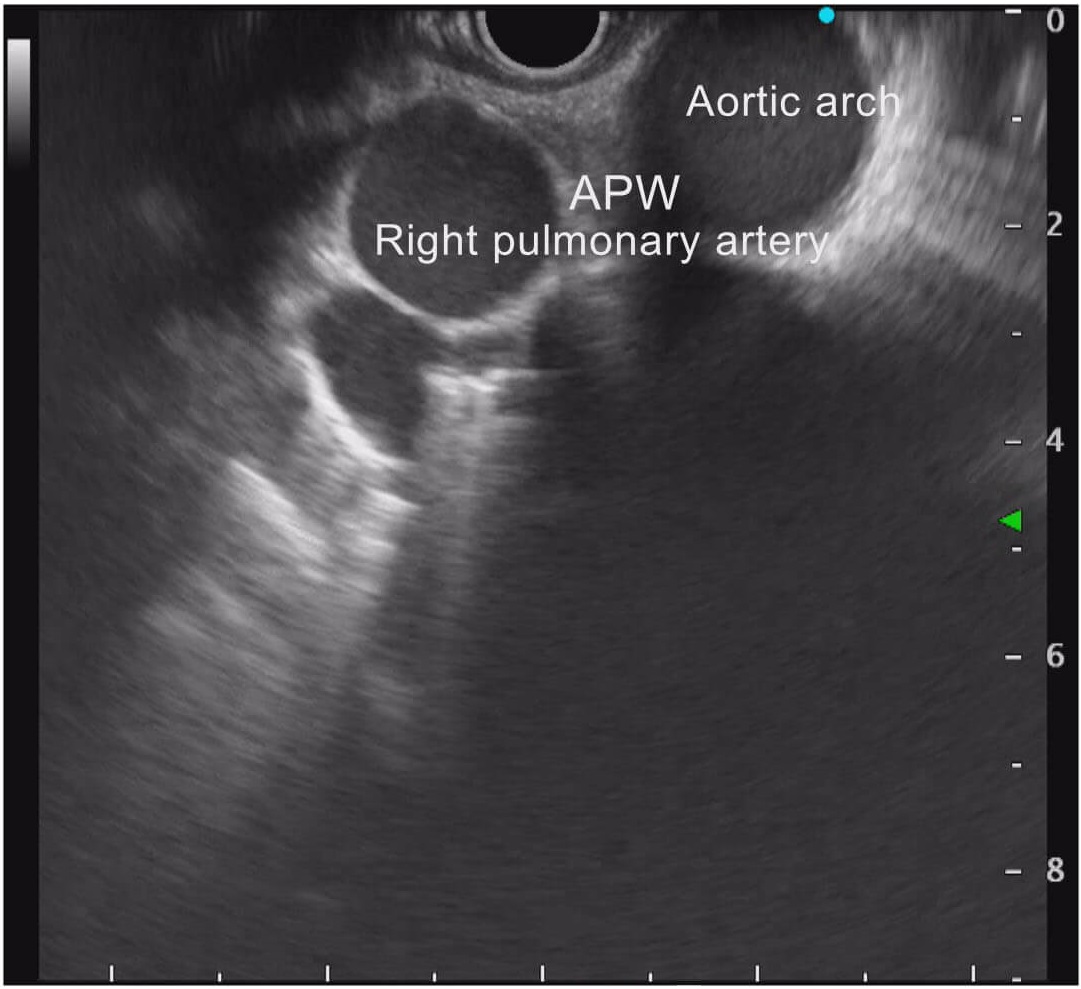
STEP 4-2 AP window
Withdraw the scope slowly to follow the trachea towards the superior side (right side of the screen). While doing this, turn the scope counterclockwise and angulate it upward to visualize the cross section of the right pulmonary artery on the left side of the screen and the cross section of the aortic arch on the right side. The region sandwiched by these two vessels is an area called the “AP window”.

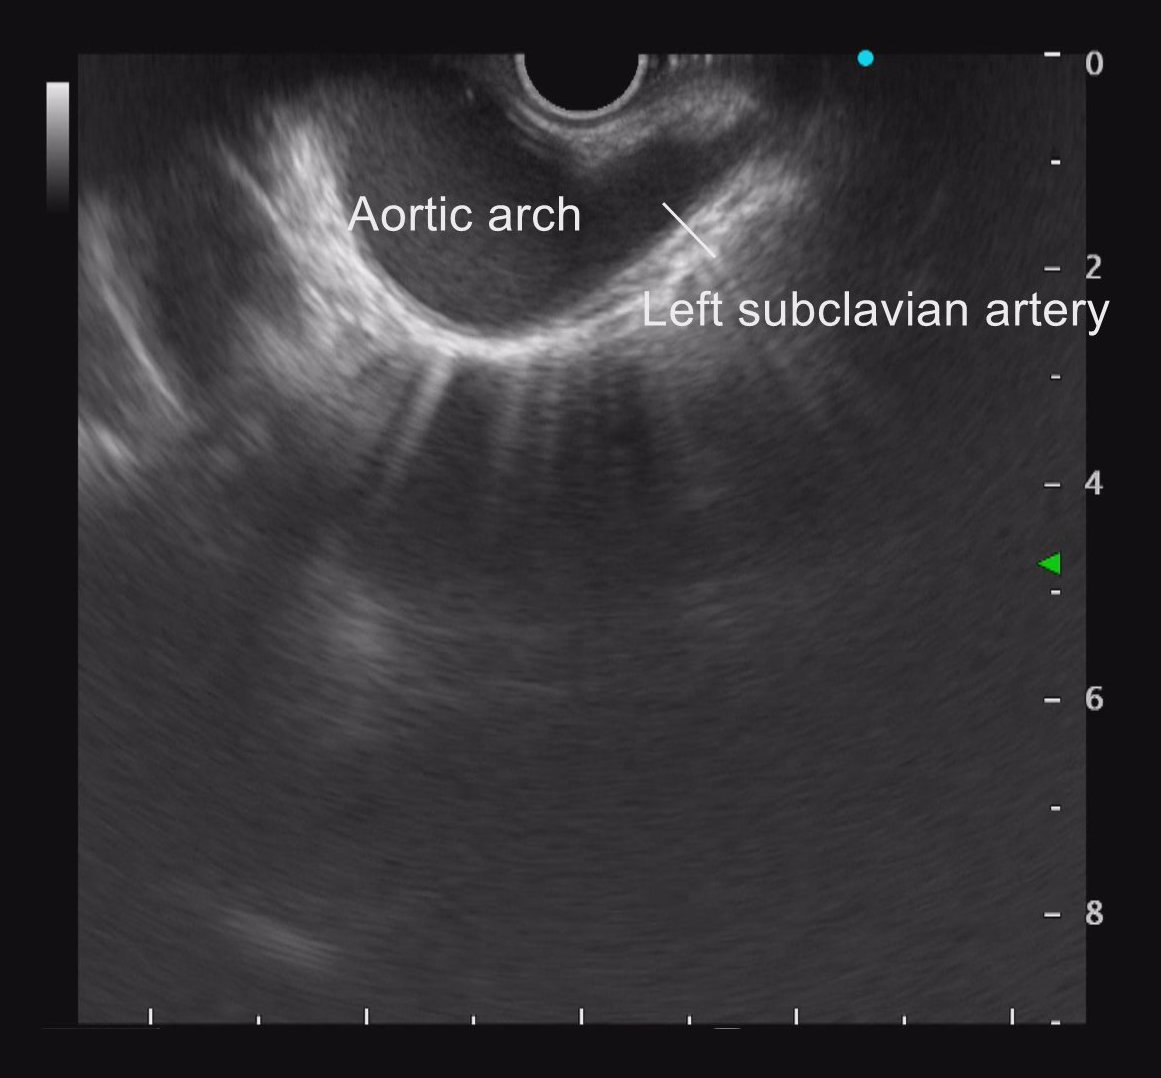
STEP 5 Left subclavian artery
Withdraw the scope further to identify the artery that branches from the aortic arch. Usually, the clockwise rotation of the scope will first visualize the left subclavian artery, then the left common carotid artery, and the brachiocephalic artery on the right side.
Ⅱ. Circumferential observation of the area surrounding the esophagus
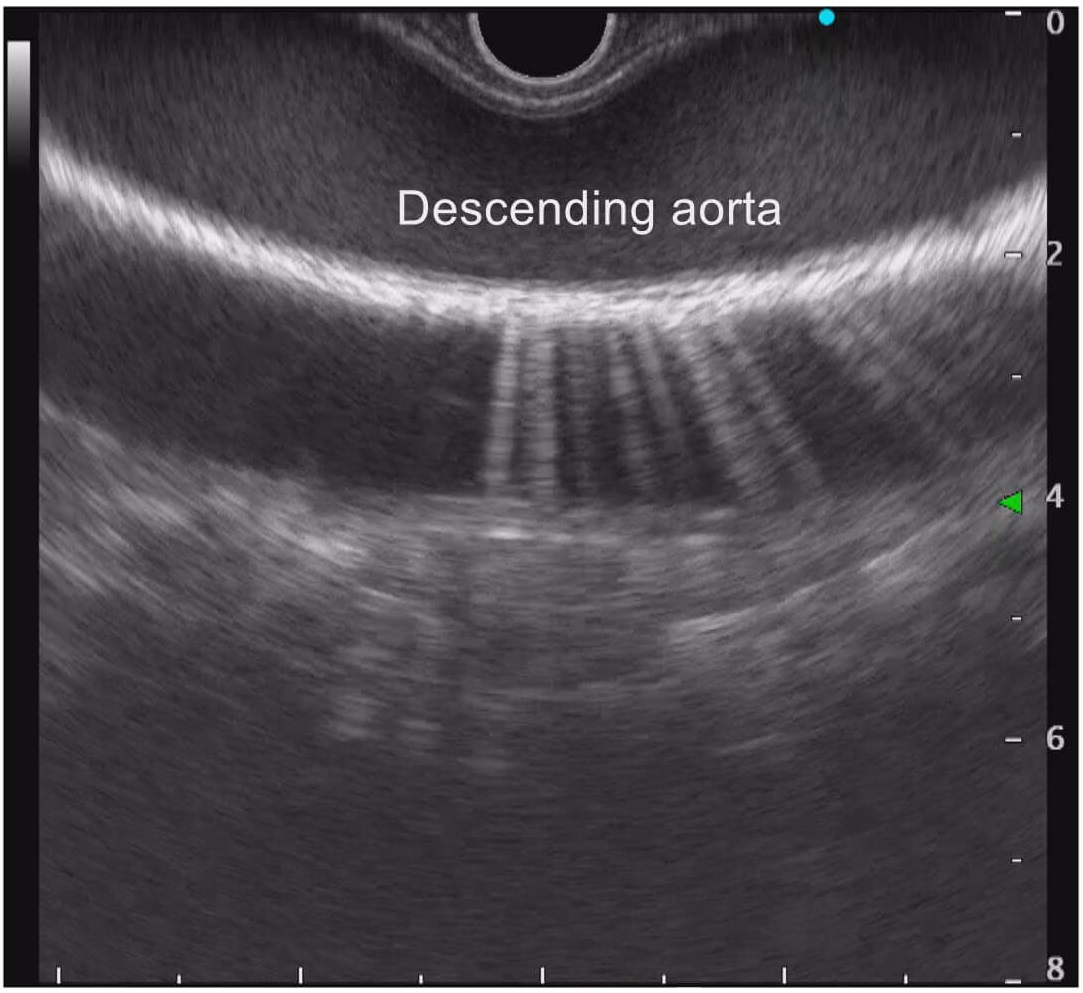
Descending aorta
Using the descending aorta as the start point and end point, observe the posterior mediastinum circumferentially by turning the scope clockwise or counterclockwise. Doing this at various heights makes it possible to observe the entire area of the posterior mediastinum.

Left heart system
Turn the scope clockwise from the descending aorta on the level of the inferior mediastinum to image the left heart system.

Azygos vein/vertebral body
Turn the scope clockwise some more at the point where the left heart system is visible. You will be able to recognize the azygos vein and vertebral body.

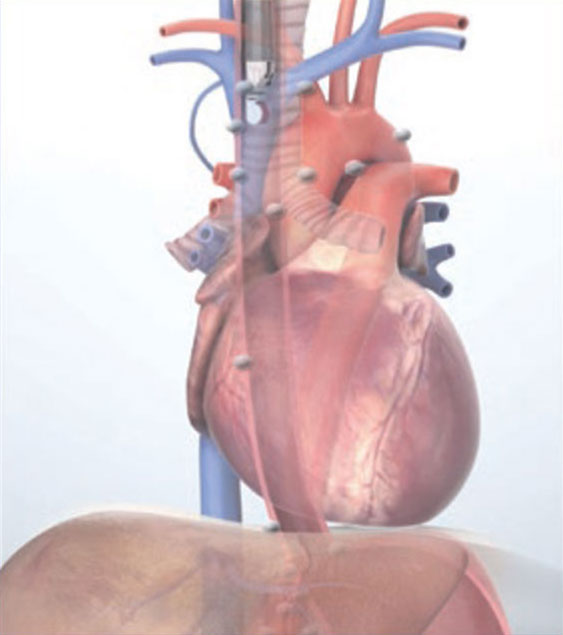
EUS-FNA of mediastinal lymph nodes
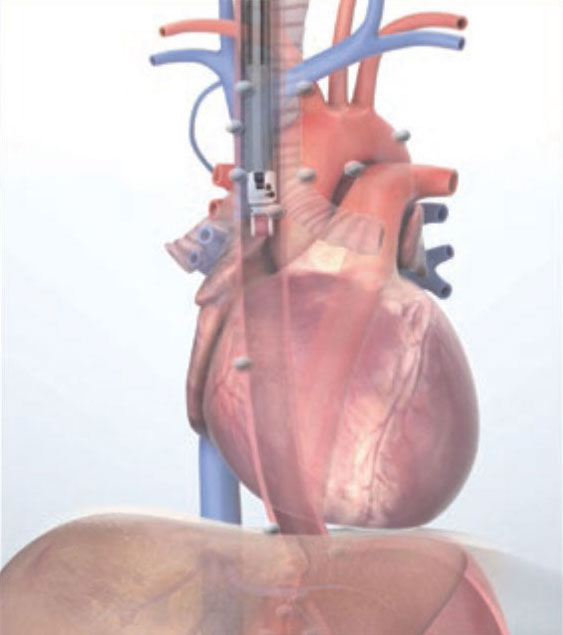
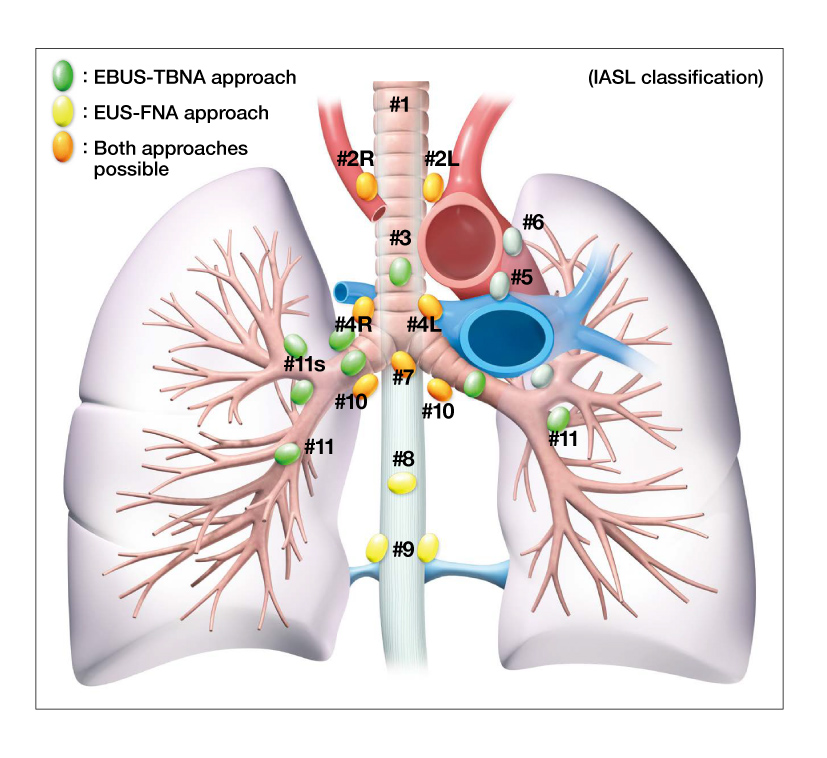
When you perform EUS-FNA of the mediastinal lymph nodes, the points where an approach from the esophagus is possible include both lateral sides and the posterior side of the trachea, as well as the lymph nodes in the inferior mediastinum (Fig.). Both imaging and puncturing of the lymph nodes in front of the trachea are difficult to perform transesophageally. Only the hilar lymph nodes around the main bronchi near the tracheal bifurcations can be approached. However, in endobronchial ultrasonography (EBUS) performed in the respiratory field, you can approach the anterior surface of the trachea and even the hilar and intrapulmonary lymph nodes. The inferior mediastinum, on the other hand, cannot be approached. Puncturing the region sandwiched by the aortic arch and right pulmonary artery (AP window) is also considered difficult.
#1 Supraclavicular fossa
#2 Upper paratracheal
#3p Anterior mediastinal
#4 Lower paratracheal
#5 Subaortic
#6 Paraaortic
#7 Subcarinal
#8 Paraesophageal
#9 Pulmonary ligament
#10 Hilar
#11 Interlobar
- Content Type