Endoscopic Ultrasound-Guided Fine Needle Aspiration
Doing an actual procedure
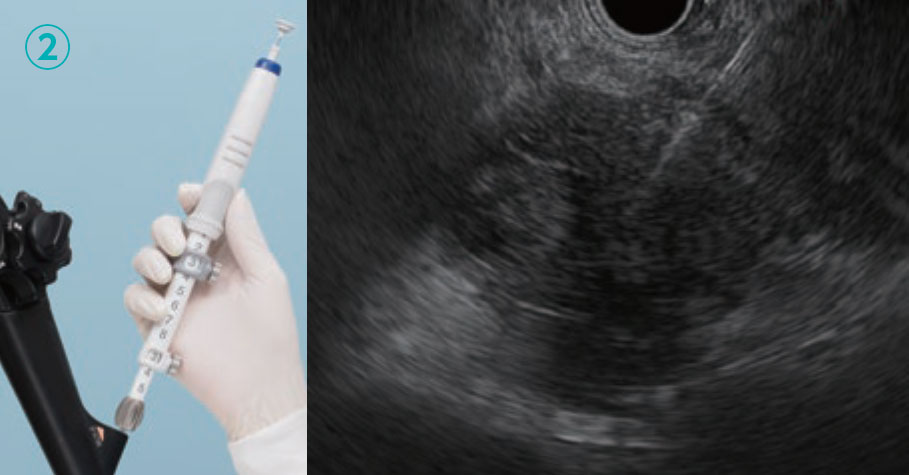
Confirmation of puncture target and route
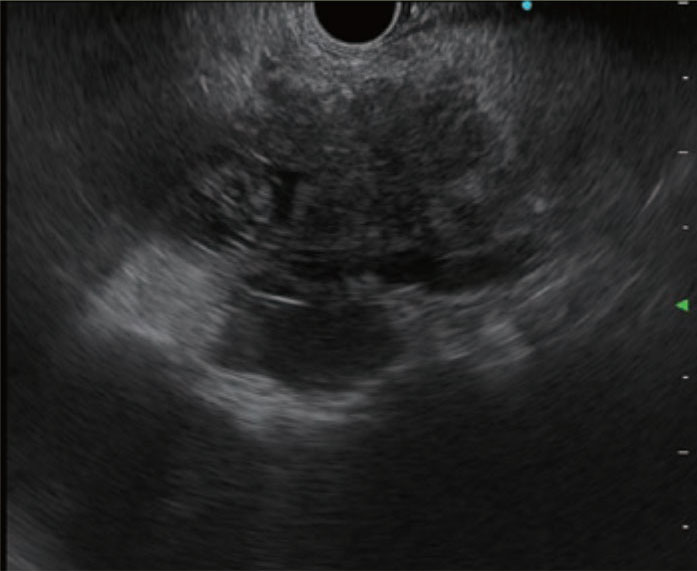
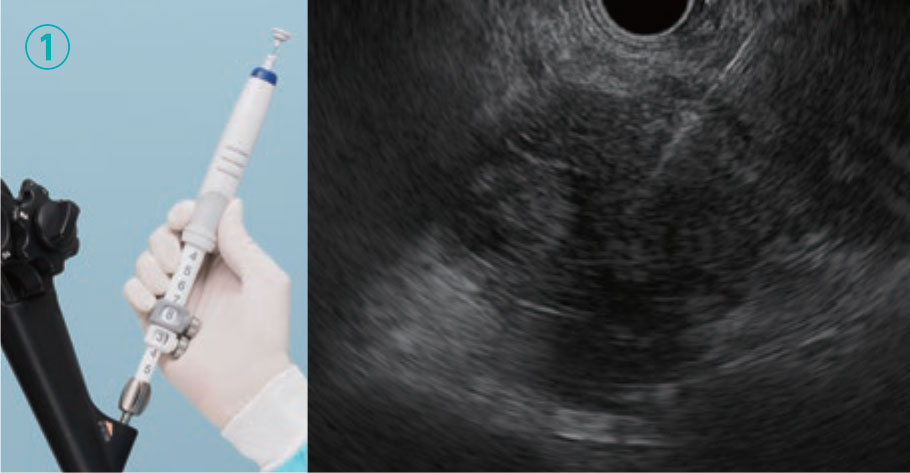
Visualize the target. Insert the needle into the scope and check the tip of the needle sheath in the ultrasound image.

Using Doppler, confirm that there are no intervening vessels on the puncture line
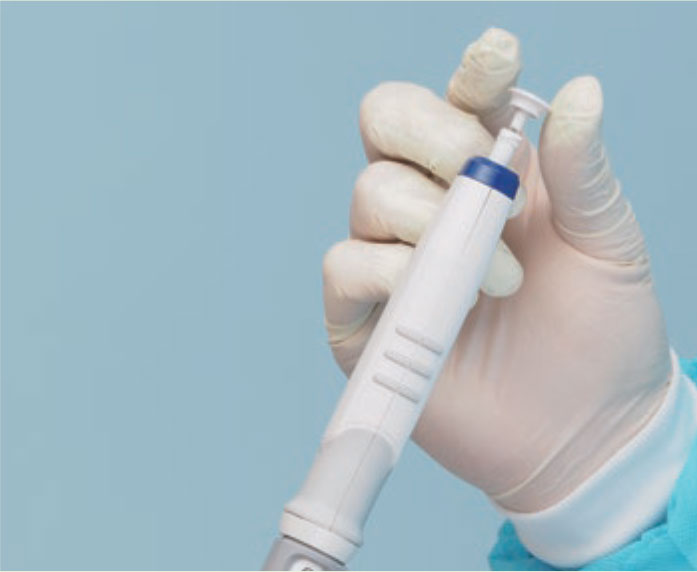
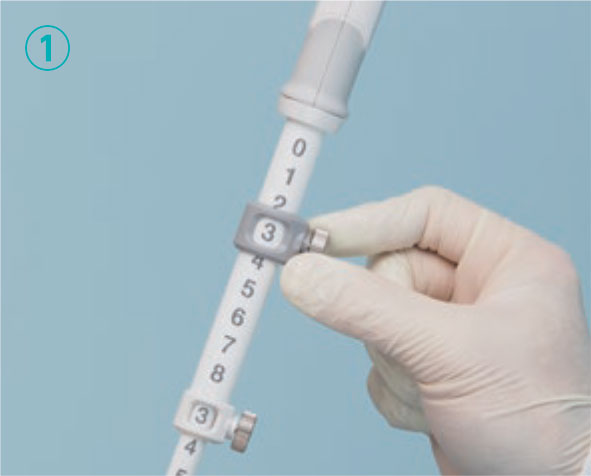
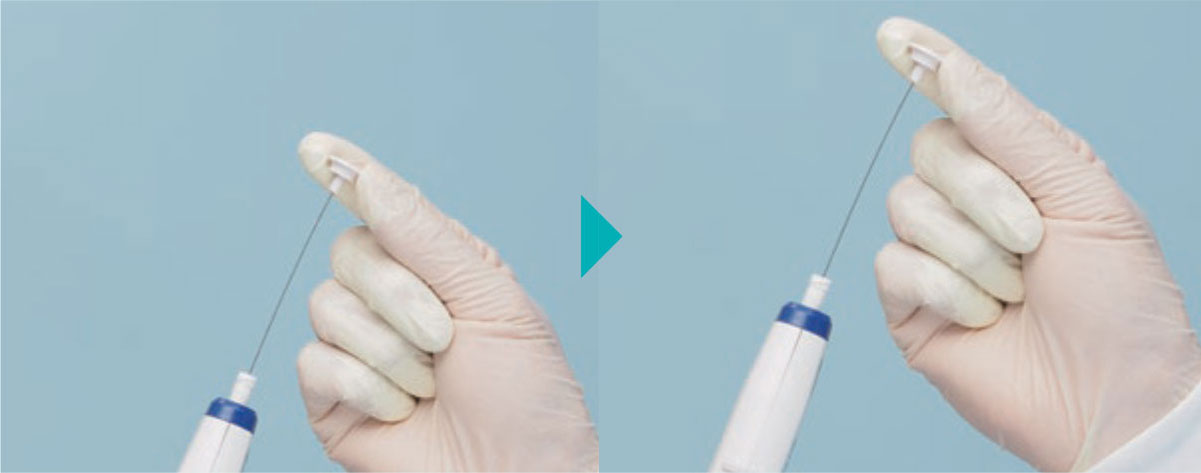
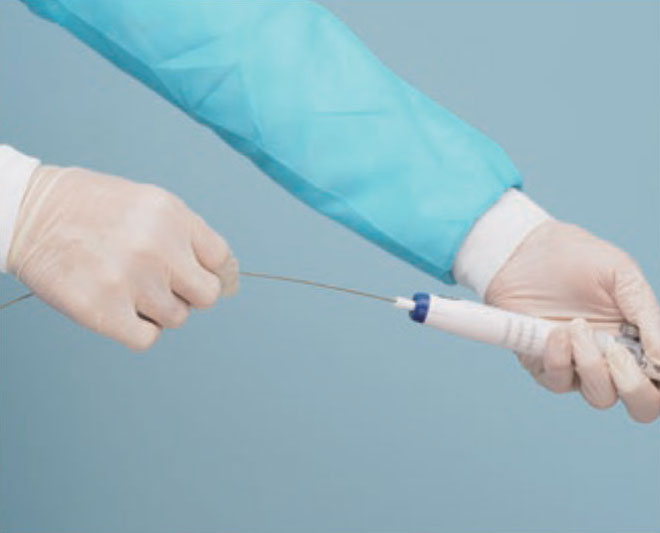
Pull the stylet cap about 1 cm out of the handle beforehand.
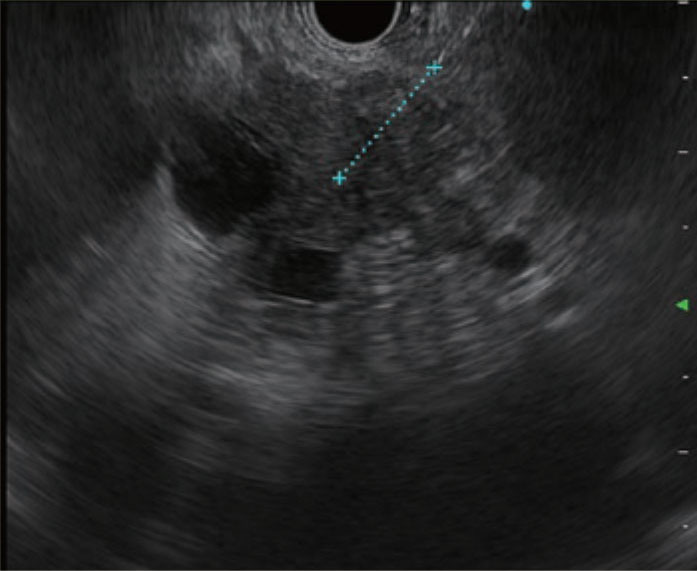
Measure the distance from the tip of the sheath to the distal side of the target lesion on screen.
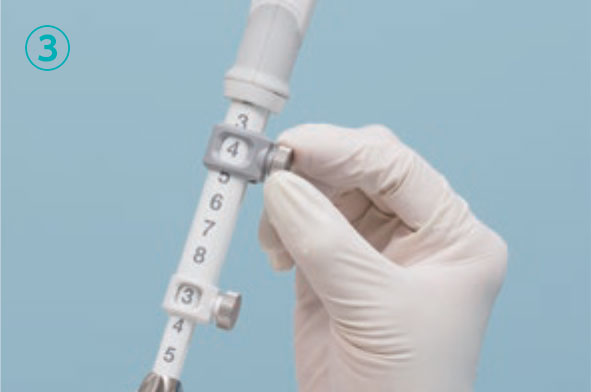
Puncturing
[Tip]
When EUS-FNA is performed by a beginner or when the lesion is hard and quick puncture is required, [Step 5-1] is recommended to avoid deep needling.
[Step 5-1] In case the stopper is fixed beforehand
[Step 5-2] In case the stopper is fixed after puncturing

[Step 6]
Suction – End of Procedure
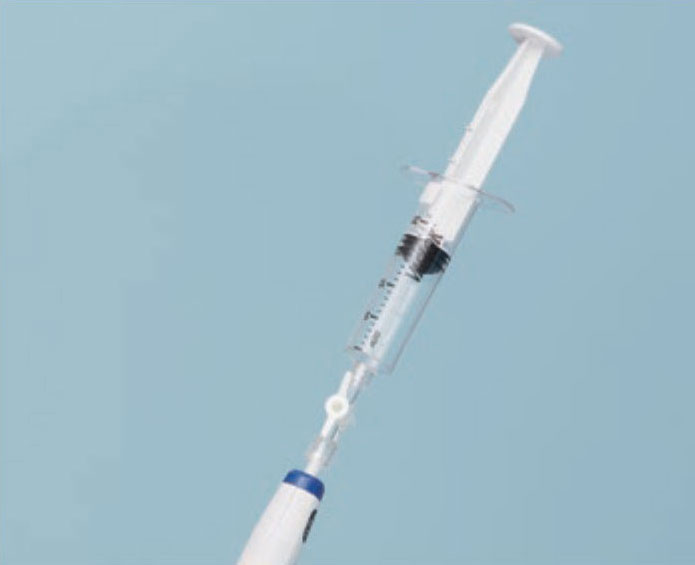
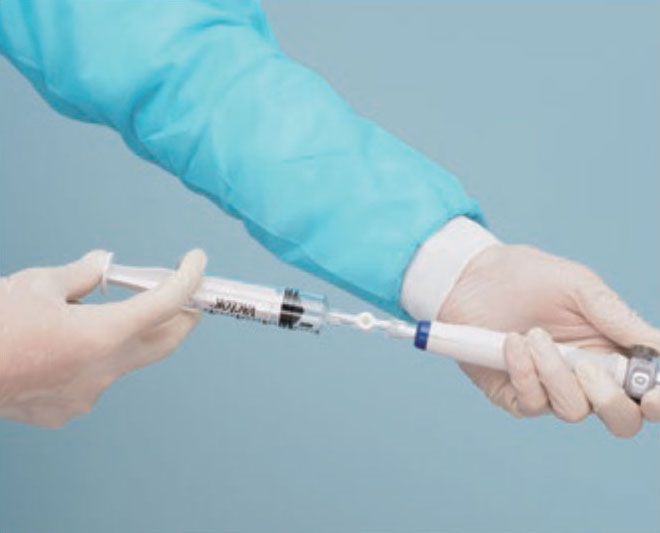
Connect a syringe with 10–20 mL negative pressure to the needle handle. Open the stopcock to suction while applying negative pressure.
Move the needle back and forth inside the target lesion (10–20 times).
After releasing the negative pressure, pull the needle out. Return the stopper to the “0” position and remove the whole needle device from the scope.
Confirm if there is bleeding from the punctured site in the ultrasound image and endoscopic image.
How to handle the sample
Put the sample directly into formalin or place it on a dish or slide and send it for histological/cytological examination. To get the sample out of the needle, apply pressure using air, a stylet, or saline. Your medical facility can decide which method should be used.

How to handle the sheath of the aspiration needle
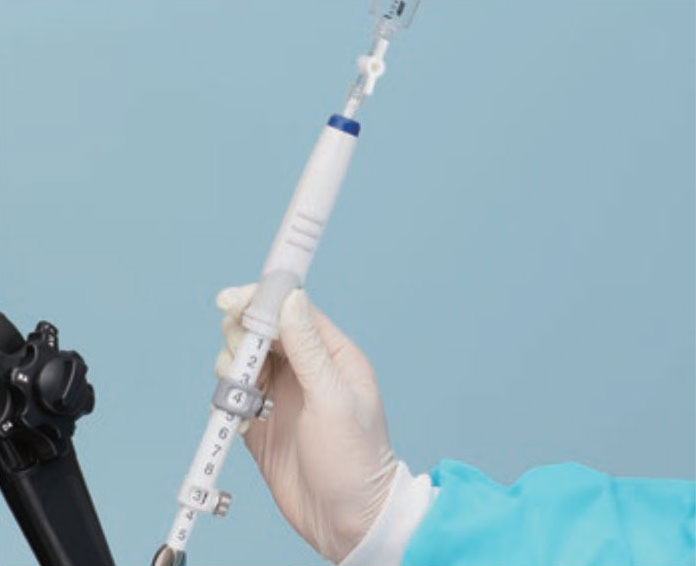
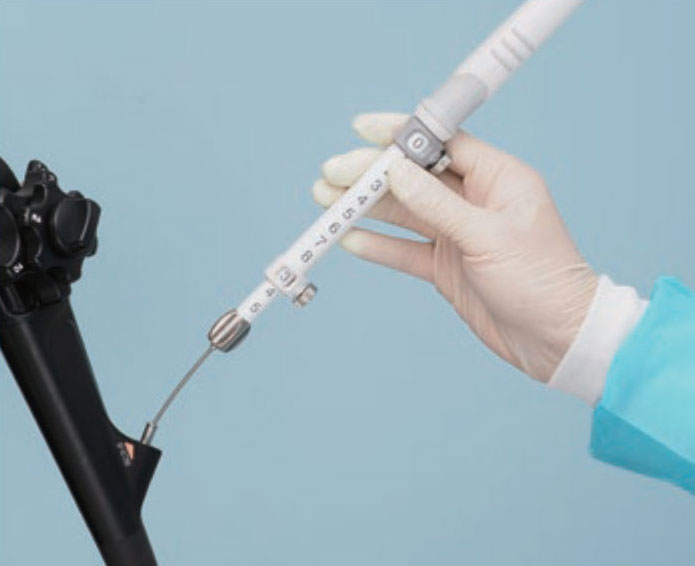
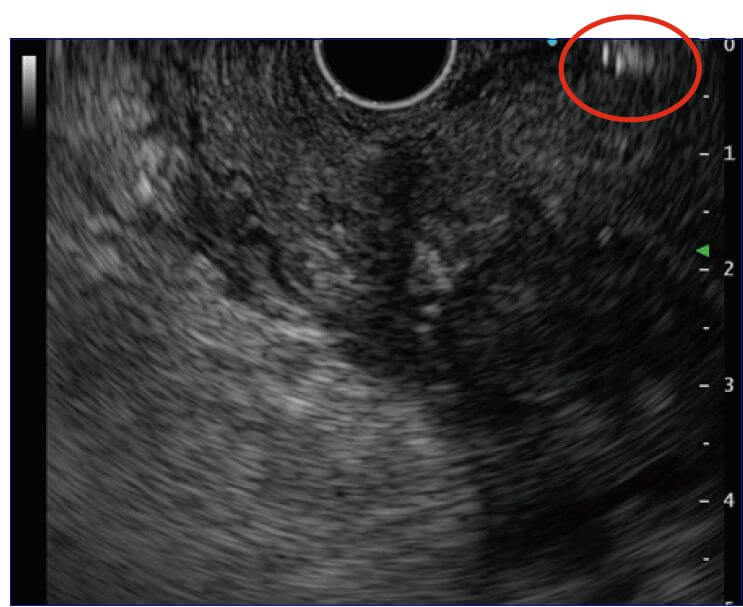
Insert the aspiration needle into the scope’s accessory channel. After fixing it, adjust the length of the sheath. You can confirm the sheath position in the ultrasound image (Fig. a, circled section) or in the endoscopic image (Fig. b). If the sheath tip is projected too far, it may create pressure, which could result in damage to the GI tract mucosa while the scope is being maneuvered and could cause the transducer to detach from the GI tract, resulting in poor-quality ultrasound imaging. The sheath only needs to be projected from the scope tip a little. At this time, do not use force to push out the needle if you feel strong resistance when the needle is projected from the scope tip. Reduce the sharpness of the scope’s angulation to ensure that there is no resistance; then advance the needle tip to avoid damaging the scope’s channel interior.
How to apply negative pressure during EUS-FNA
In conventional EUS-FNA, the stylet is pulled out after puncturing and the procedure is performed while 10–20 mL negative pressure is applied with the provided syringe. Other techniques include: the slow pull technique in which the stylet is slowly pulled out after puncturing and the procedure is performed while the needle is moved back and forth and very gentle negative pressure is applied; and the no suction technique in which the needle is moved back and forth without the application of negative pressure after the stylet has been pulled out.
None of these techniques have been properly verified, so their efficacy is not known. Use whichever technique seems most appropriate under the circumstances. For example, if too much blood is mixed in the sample when negative pressure of 10–20 mL is applied, the slow pull technique with low negative pressure or the no suction technique with no negative pressure is believed to be most suitable. On the other hand, if the collected sample is small, it would be a good idea to perform the procedure with high negative pressure. Also, before removing the needle from the lesion, be sure to release the negative pressure to keep GI tract fluid and tissue from getting mixed in.
“Fanning Technique” and “Door Knocking Method” during EUS-FNA
The “Fanning Technique” is a sample collection method in which the needle punctures different areas instead of repeatedly punching through the same portion of the target. Fanning can be performed by angulating the scope upwards or by raising the forceps elevator. In most cases, it is done by raising the forceps elevator. This technique is suitable when EUS-FNA is executed with a small-diameter needle such as a 22G or 25G needle.
The “Door Knocking Method” facilitates collection of a larger amount of tissue by “cutting” the tissue, so to speak. This involves advancing the needle quickly through the target lesion until it hits the stopper, then withdrawing the needle slowly and repeating as necessary. The reason it is called the “Door Knocking Method “is because there is a knocking sound when the needle hits the stopper. Be sure that the stopper is locked securely so that its position doesn’t deviate. Otherwise, excessive puncturing could damage blood vessels.
The secret to puncturing hard or small lesions
If puncturing is difficult because the target lesion is too hard or you can’t advance and withdraw the needle smoothly because the gastric wall has been stretched during puncturing, you should use the “Door Knocking Method” . If you cannot make a deep enough puncture the first time because the lesion is too hard, you should repeat the puncturing procedure using the “Door Knocking Method” inside the lesion. Doing so helps the needle tip gradually reach the deep portion of the lesion.
During EUS-FNA of a submucosal lesion, it can be effective to puncture the lesion in conjunction with continuous suctioning to keep the transducer in close contact with the gastric wall, while angulating the scope upwards so that the needle stays in the lesion (“Shovel Car Method”). When the target lesion is small, it can be a good idea to penetrate the lesion once and then withdraw the needle tip to adjust the length to collect tissue (not permitted with a subepithelial lesion suspected to be a GIST). If there’s not enough length to take the stroke length after puncturing, you may be able to collect tissue by gently vibrating the needle tip inside the target lesion (“Method”).
About rapid on-site evaluation (ROSE)
Rapid on-site evaluation (ROSE) is a technique where a pathologist or cytology technician performs a quick cytological examination every time a sample is collected to evaluate whether the specimen is appropriate and to provide a pathological diagnosis.
There are contradictory reports on the efficacy of ROSE in improving the accuracy rate of EUS-FNA diagnoses. Many have claimed significant improvement, while others have not found it be particularly useful. However, ROSE does make it possible for a decision to be reached by the end of the procedure, using the real-time evaluation of specimens. Regardless of whether it improves the number of correct diagnoses, ROSE makes sense from a purely economic and safety perspective so is worth doing for that reason alone — assuming a pathologist is available.
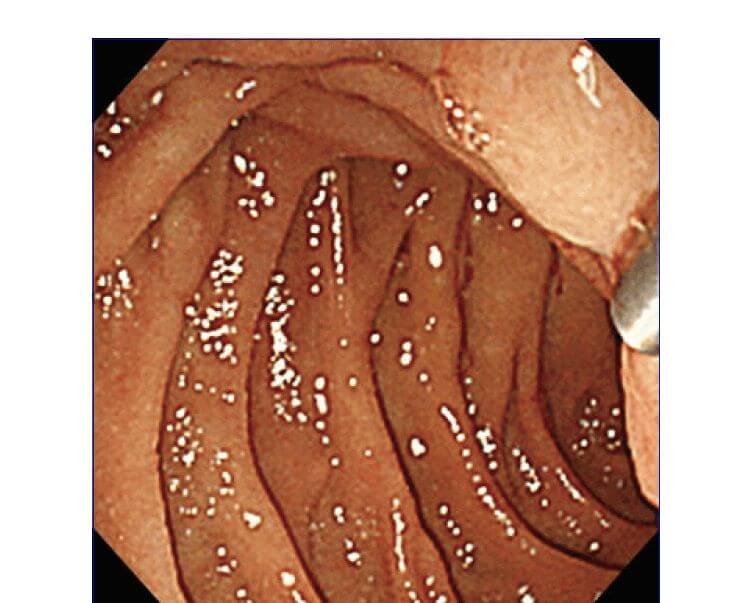
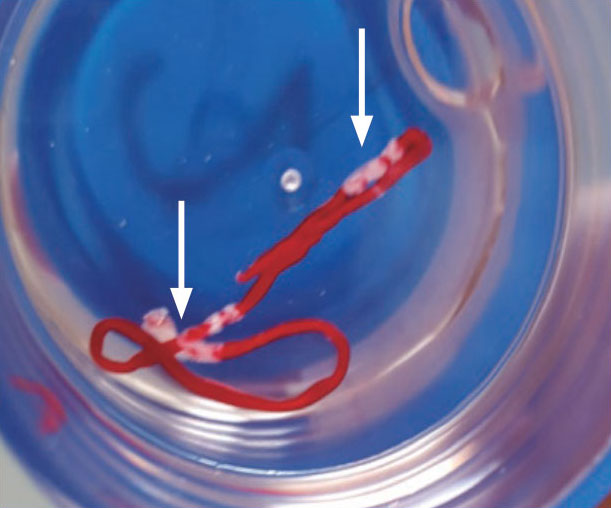
Also useful for determining whether or not a useful tissue specimen has been collected is macroscopic on-site quality evaluation (MOSE), in which white tissue (Fig., arrows) is macroscopically confirmed. Several reports show that this technique can help improve diagnostic rates. If a pathologist or cytology technician is not available, we recommend that endoscopists perform ROSE or MOSE themselves.
- Content Type